Connect to NemLog-in with SAML 2.0 (Template)
Use the NemLog-in template to configure a SAML 2.0 authentication method with OIOSAML 3.0.3 defaults. The template guides you through the public or private sector setup and generates the metadata you upload to NemLog-in.
This guide covers OIOSAML 3.0.3 only. OIOSAML 4.0.0 is not covered at this time.
Pricing
NemLog-in for the private sector is the cheapest way to offer MitID login. NemLog-in adds 0.02 DKK on top of the MitID base price (which applies to all brokers) and NemLog-in has no monthly fee. The tradeoff is that NemLog-in uses SAML 2.0 (OIOSAML) and has additional requirements. FoxIDs handles this and lets you connect your application with OpenID Connect.
| Item | Price |
|---|---|
| One-time NemLog-in onboarding fee | 4,500 DKK |
| NemLog-in price per login | 0.02 DKK |
| MitID base price per login (applies to all MitID brokers) | 0.175 DKK |
| Total price per login | 0.195 DKK |
| FoxIDs Pro plan per month (includes 2,000 logins per month) | 223.80 DKK |
| FoxIDs price per login | 0.038 DKK |
The same price applies for both MitID private users and MitID employee users.
NemLog-in is free to use for the public sector.
OpenID Connect bridge
By configuring a SAML 2.0 authentication method and an OpenID Connect application registration FoxIDs becomes a bridge between SAML 2.0 and OpenID Connect. FoxIDs then handles the SAML 2.0 connection as a Relying Party (RP) / Service Provider (SP) and you only need to care about OpenID Connect in your application.
Get started with NemLog-in
Before you can create IT systems for NemLog-in, your organisation must be connected. This is only necessary once per organisation.
- Follow the NemLog-in onboarding steps at https://tu.nemlog-in.dk/tilslutning/ (one-time per organisation)
- Create a test organisation for the integration test environment in NemLog-in organisation integration test. In the test organisation you can create MitID Business test users.
- Once the organisation is connected, create IT systems in the NemLog-in administration portal. Each IT system integration test or production tab corresponds to a FoxIDs authentication method.
Other useful resources:
- See Test users in integration test environment for MitID private and MitID Business test users
- The NemLog-in development portal with documentation for test and production environments
- Integration with NemLog-in (PDF) with a detailed description of the integration flow (secondary reading)
Consider a separate environment
NemLog-in requires an OCES3 certificate and extended logging. The template updates the environment configuration accordingly, so consider creating a separate environment dedicated to NemLog-in.

You can connect two environments in the same tenant with an Environment Link.
Create the NemLog-in authentication method (template)
Start by configuring a NemLog-in integration test connection and then the production connection.
1) Start in FoxIDs Control Client
- Go to the Authentication tab
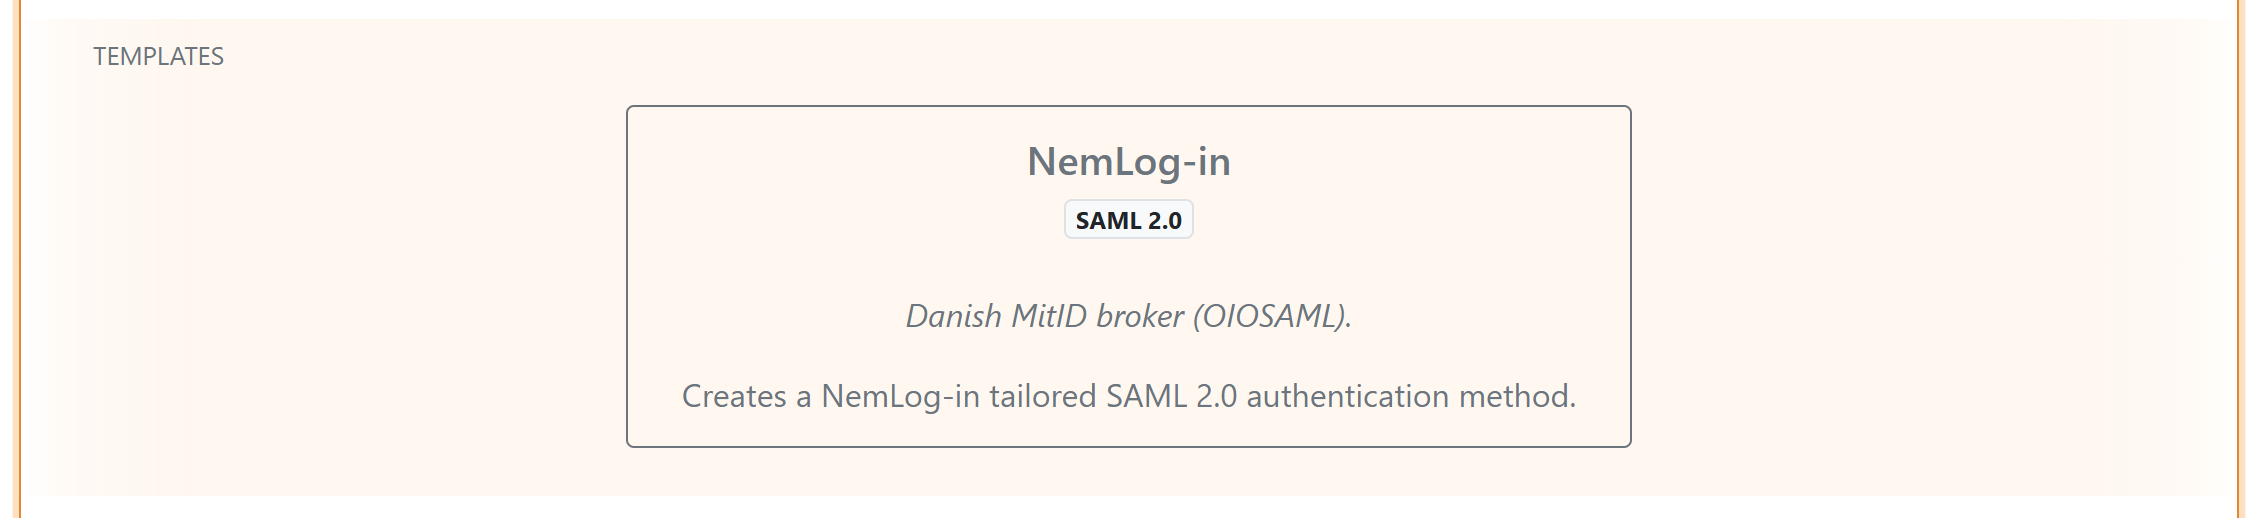
- Click New authentication
- Select NemLog-in - SAML 2.0
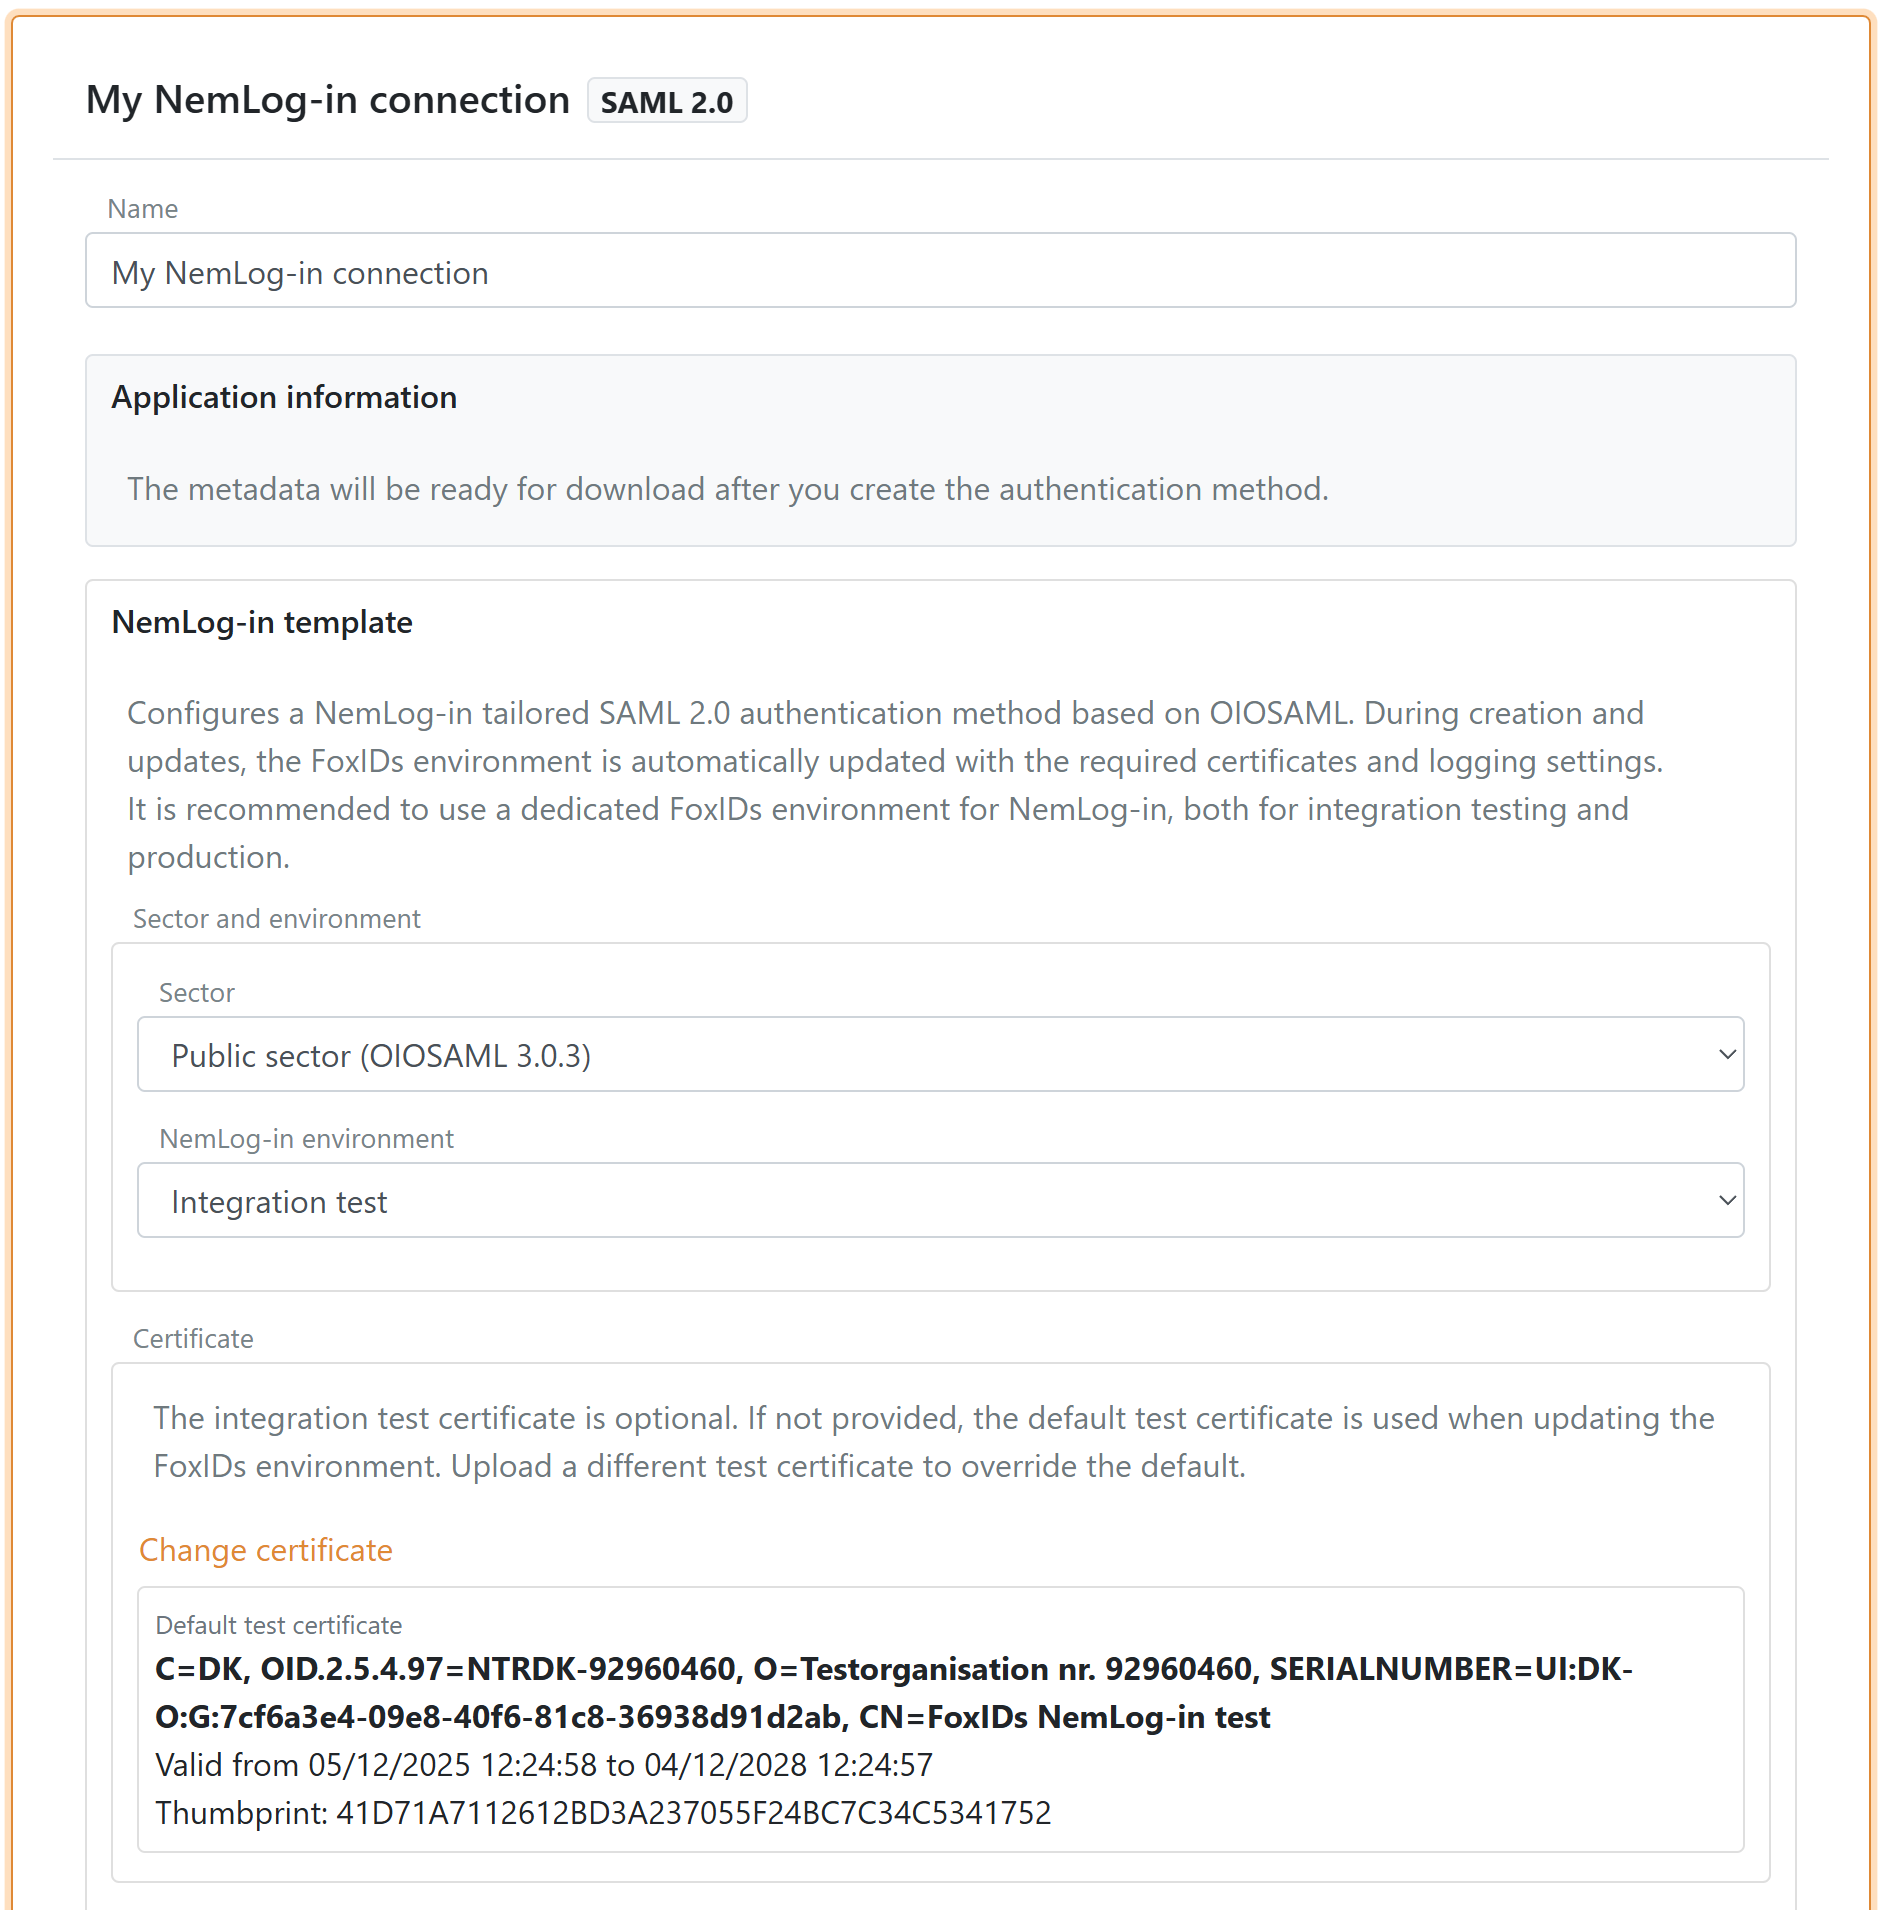
2) Configure the template
- Enter a name for the authentication method
- Select Sector:
- Public sector (OIOSAML 3.0.3)
- Private sector (OIOSAML 3.0.3)
- Select NemLog-in environment:
- Integration test
- Production
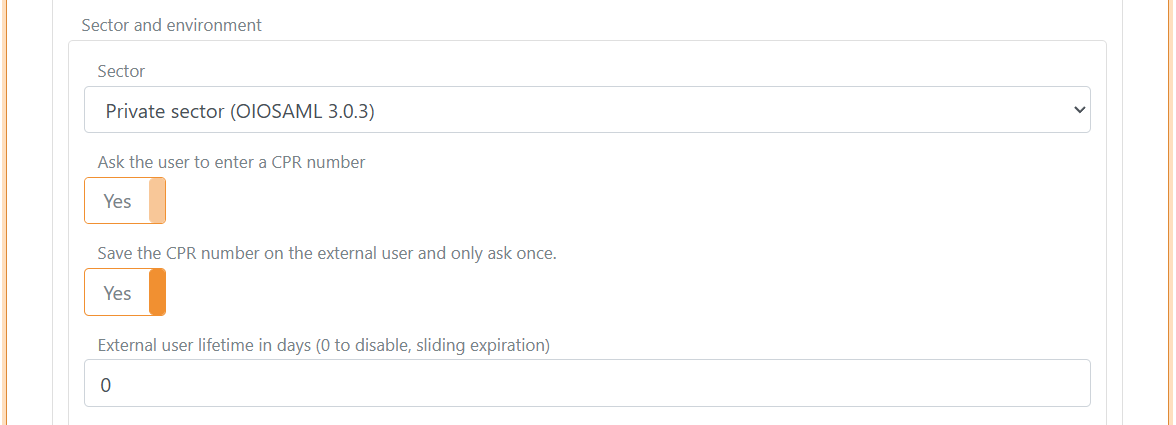
3) Private sector CPR flow
If you select the private sector, you can enable (default enabled):
- Request CPR to ask the user for a CPR number during login
- Save CPR on external users to store CPR on the external user so the user only needs to enter CPR once or you can set a lifetime for the saved CPR on the external user
The template configures the CPR match UI flow automatically.
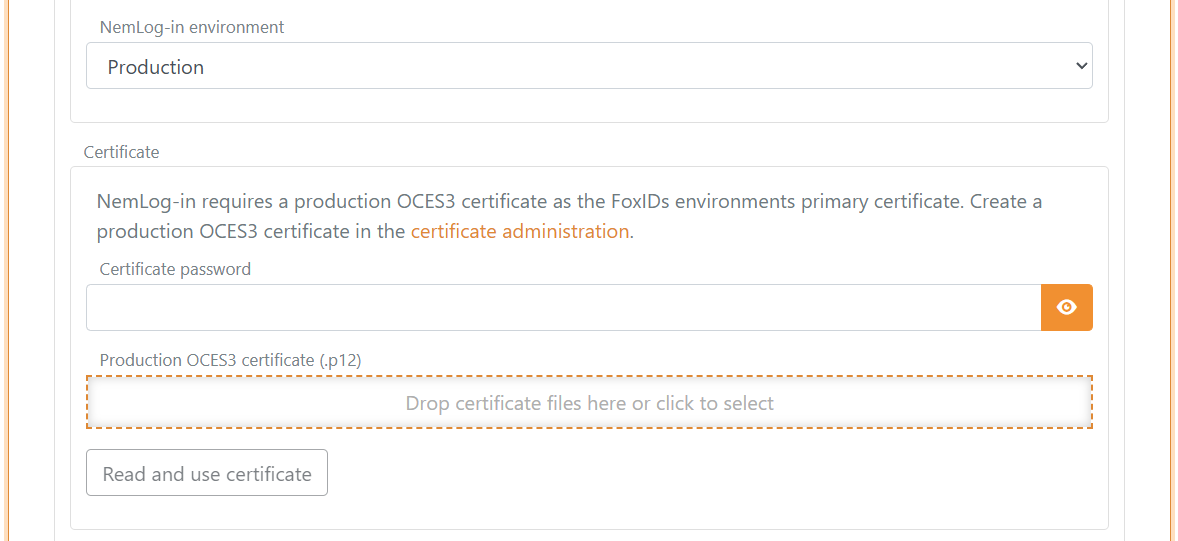
4) Configure certificate
NemLog-in requires an OCES3 certificate.
- Integration test: the template can use a default test certificate, which you can replace if needed
- Production: upload your own OCES3 certificate. You can create a production OCES3 certificate in the certificate administration
An OCES3 certificate is valid for 3 years. Update the NemLog-in template before the certificate expires and update the certificate in NemLog-in.
5) Metadata URL and IdP metadata
The template pre-fills the NemLog-in IdP metadata URL for the selected environment.
When NemLog-in changes certificate, the change is provisioned automatically. The NemLog-in template uses NemLog-in metadata exposed via the FoxIDs website, which we keep updated, and the template automatically loads the new metadata.
6) Level of assurance (optional)
You can optionally set a minimum level of assurance (LoA) (OIOSAML 3.0.3):
- Low
https://data.gov.dk/concept/core/nsis/loa/Low - Substantial
https://data.gov.dk/concept/core/nsis/loa/Substantial - High
https://data.gov.dk/concept/core/nsis/loa/High
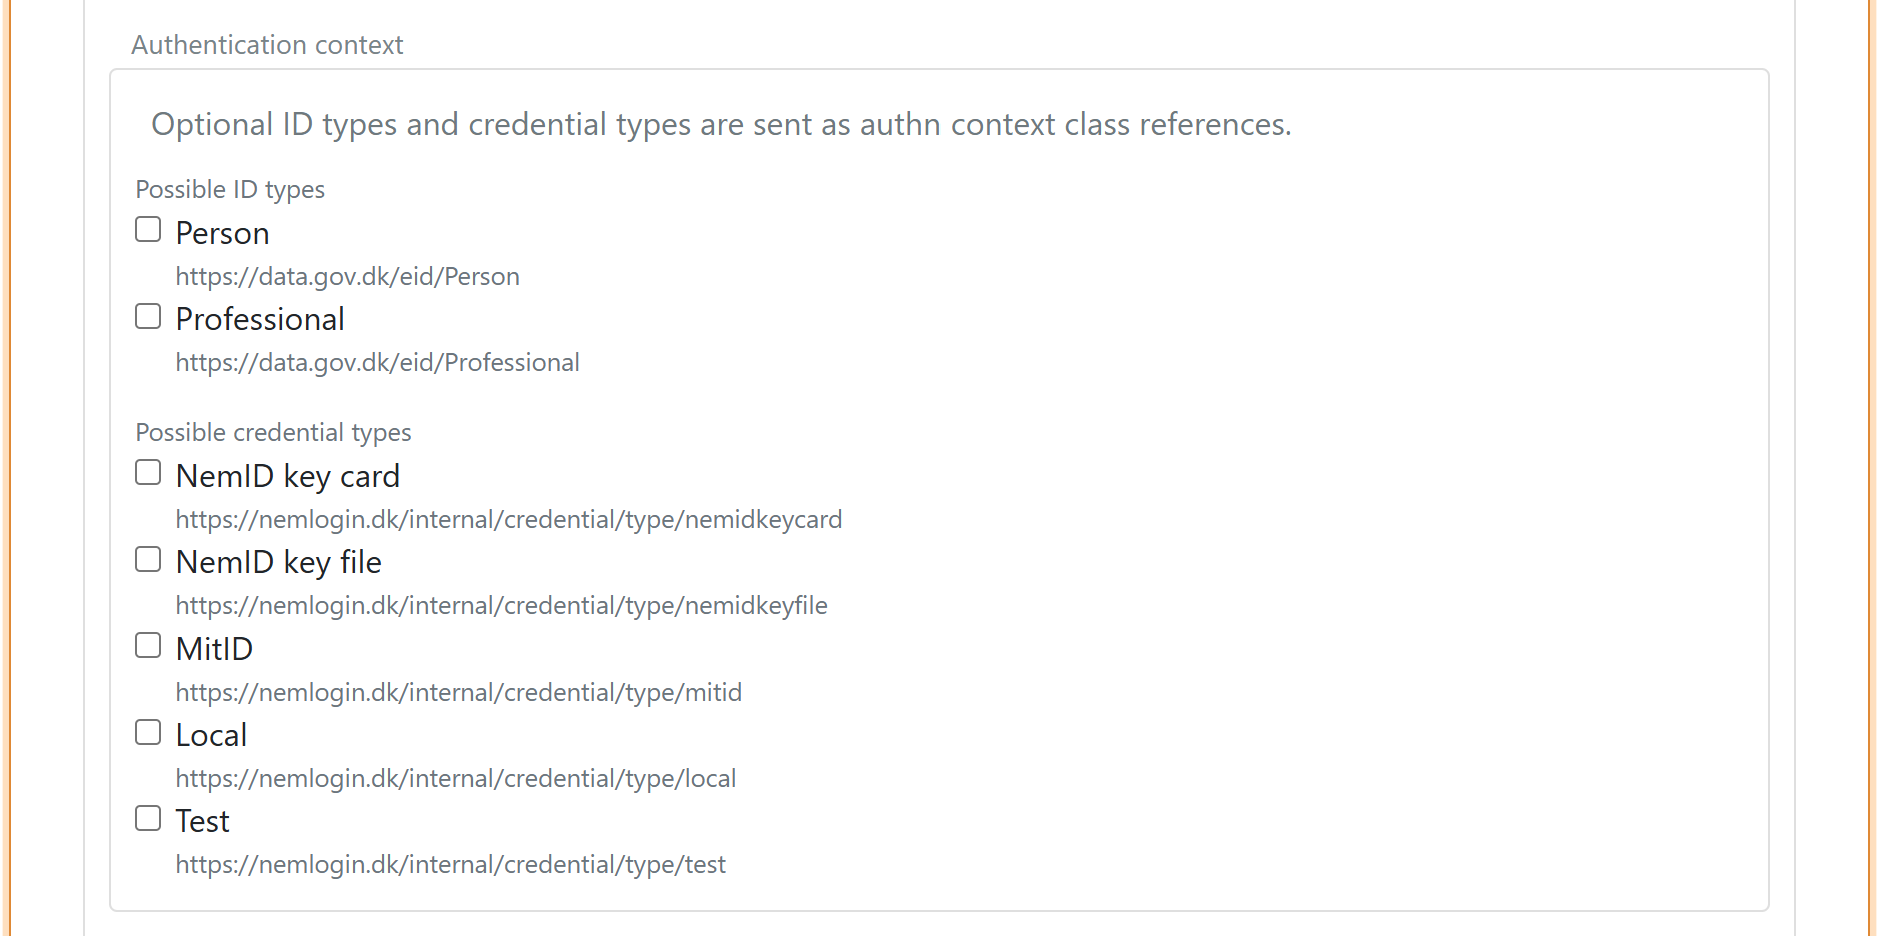
7) Authentication context (optional)
You can optionally set authentication context requirements.
You can specify ID type:
https://data.gov.dk/eid/Personhttps://data.gov.dk/eid/Professional
And possible credential types:
https://nemlogin.dk/internal/credential/type/nemidkeycardhttps://nemlogin.dk/internal/credential/type/nemidkeyfilehttps://nemlogin.dk/internal/credential/type/mitidhttps://nemlogin.dk/internal/credential/type/localhttps://nemlogin.dk/internal/credential/type/test
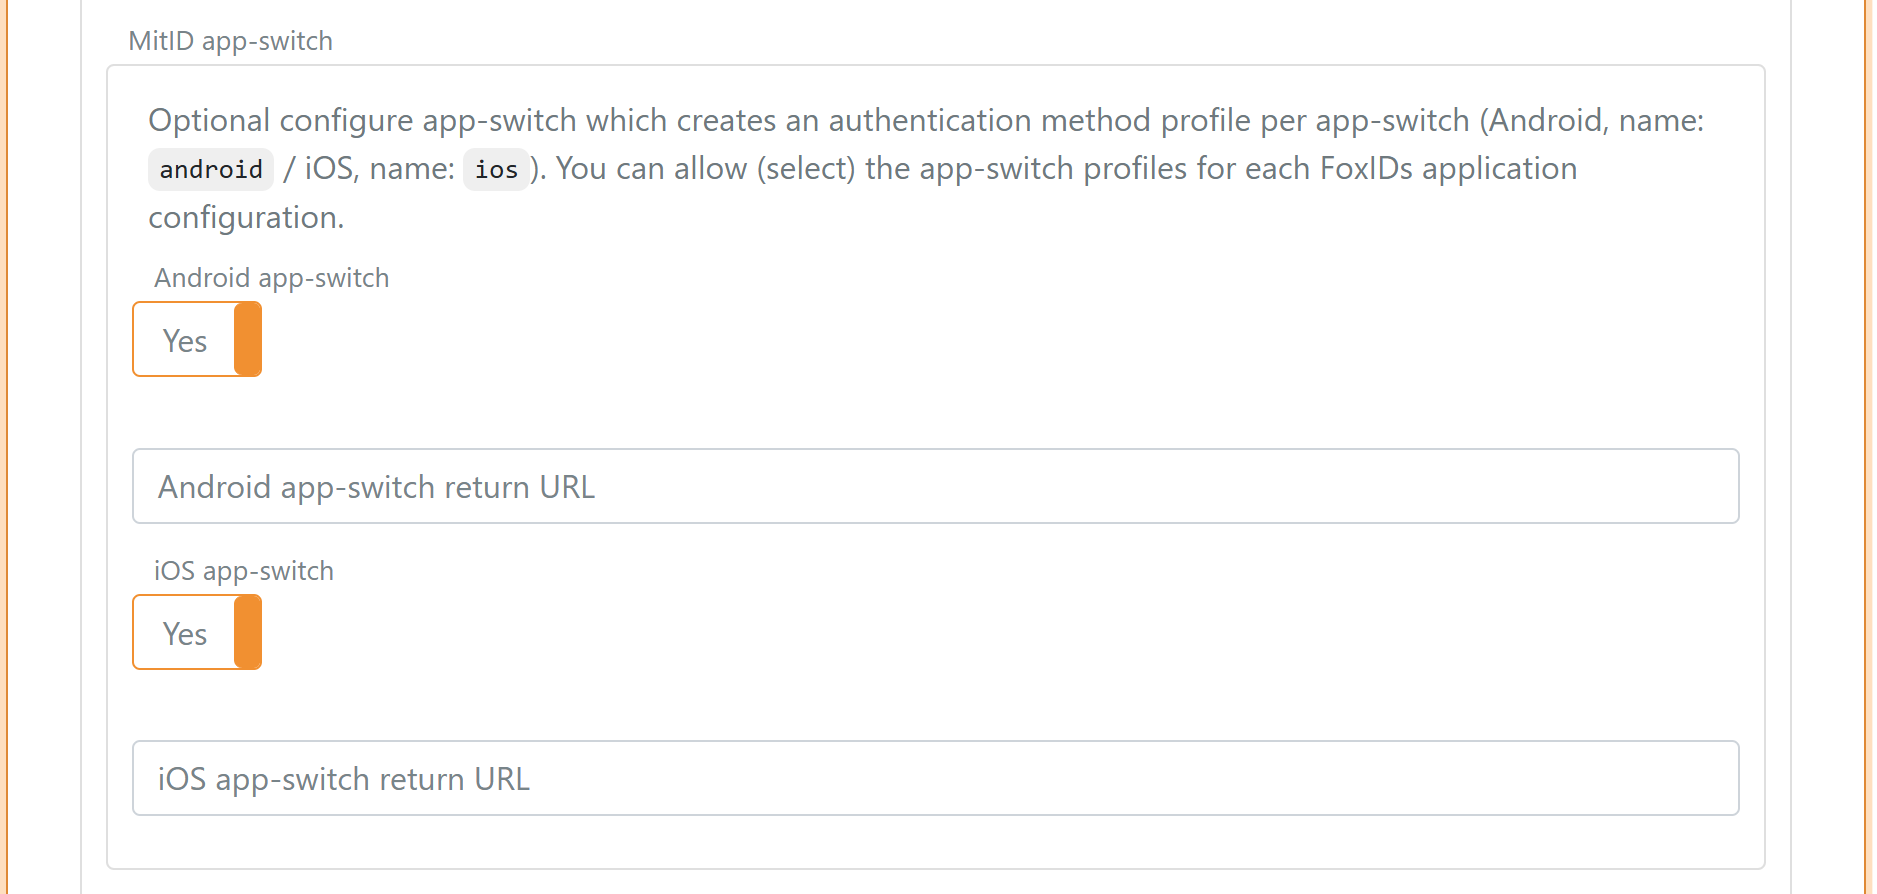
8) App-switch
Optionally configure app-switch to create one authentication method profile per mobile platform. You can then allow (select) the profiles per FoxIDs application configuration.
- Android profile name:
android - iOS profile name:
ios
Further reading:
- Integration of mobile applications with NemLog-in
- Integration with NemLog-in (PDF) (see chapter "12.8 Mobile app-switch")
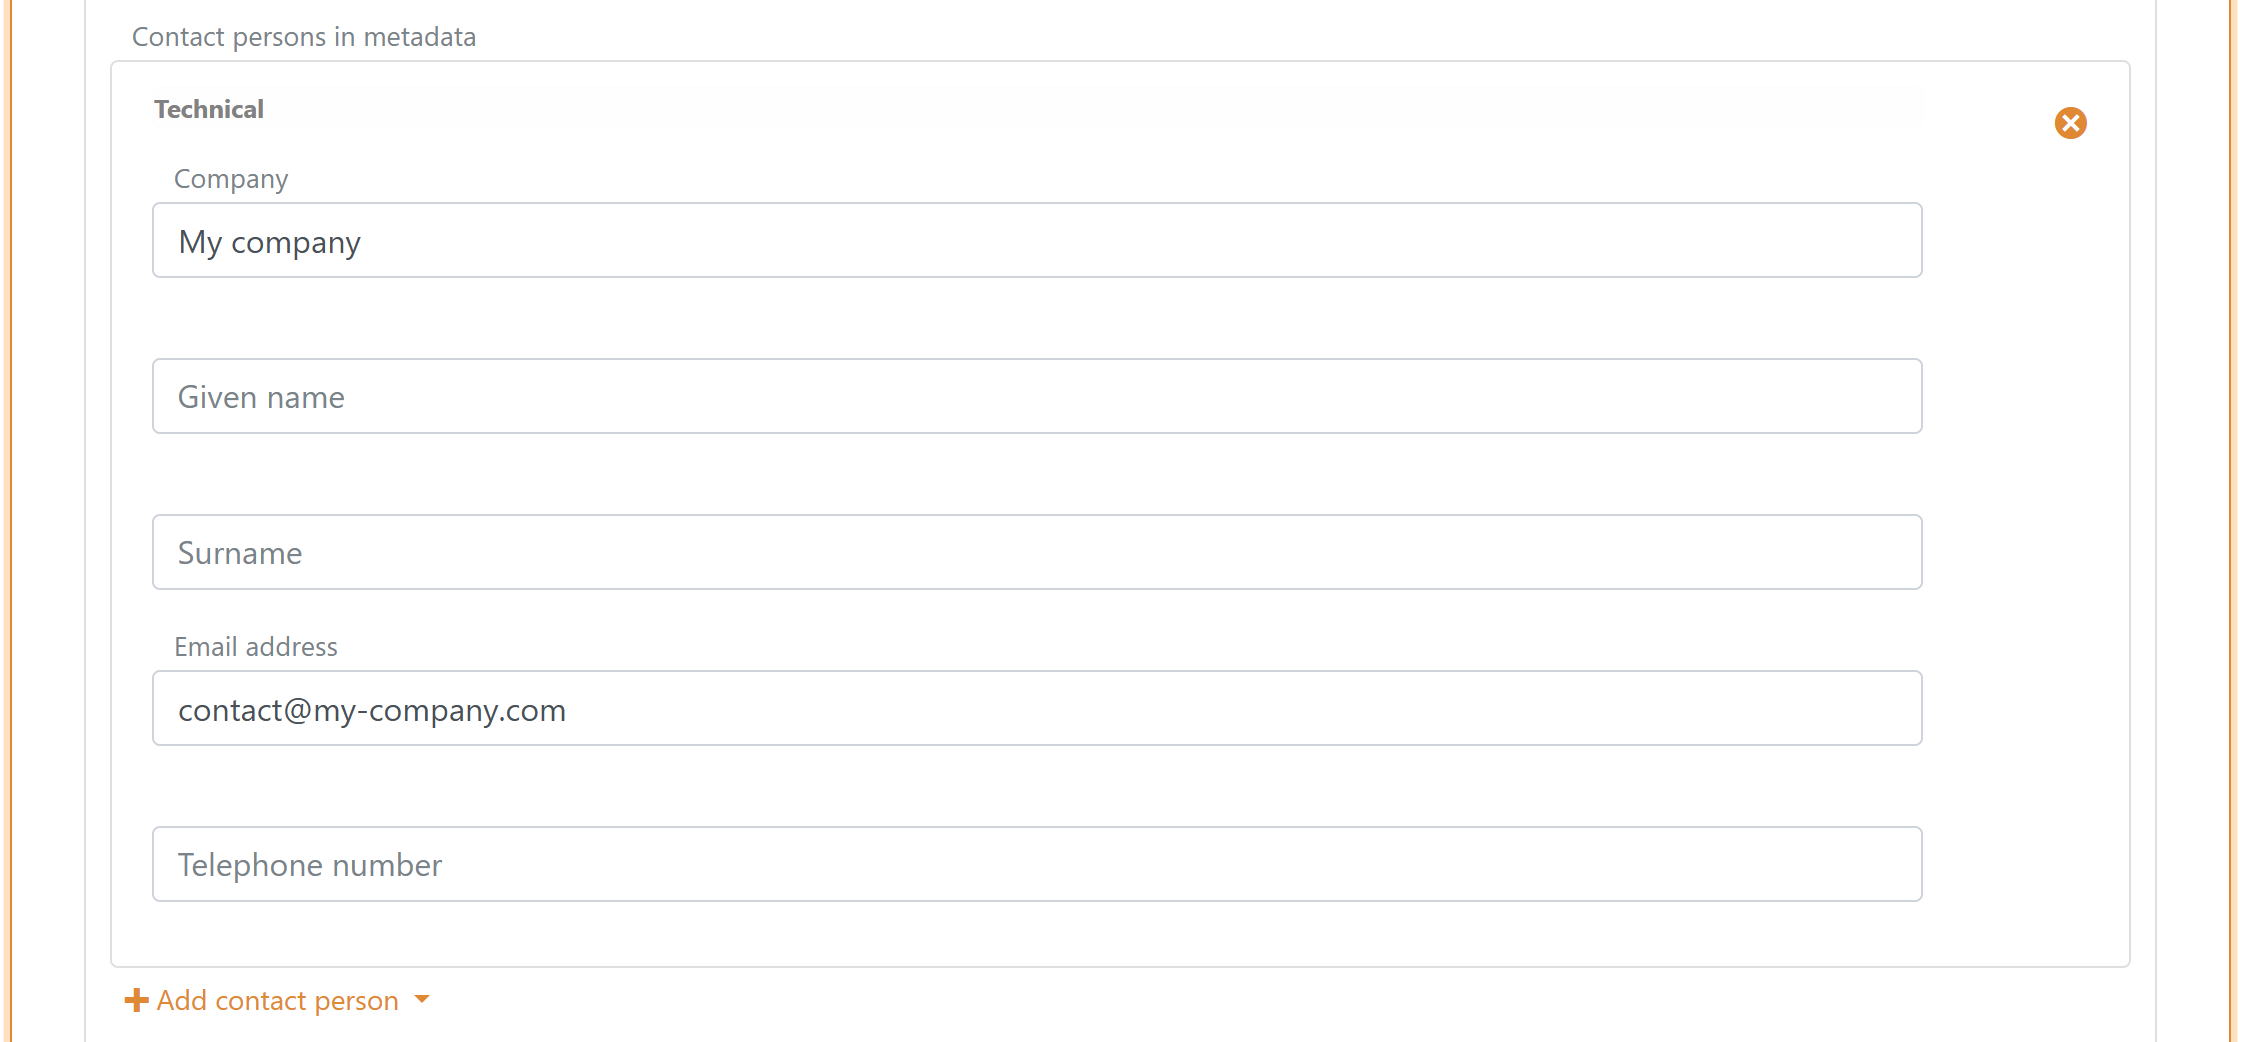
9) Add contact person
Add at least one technical or administrative contact person in metadata.
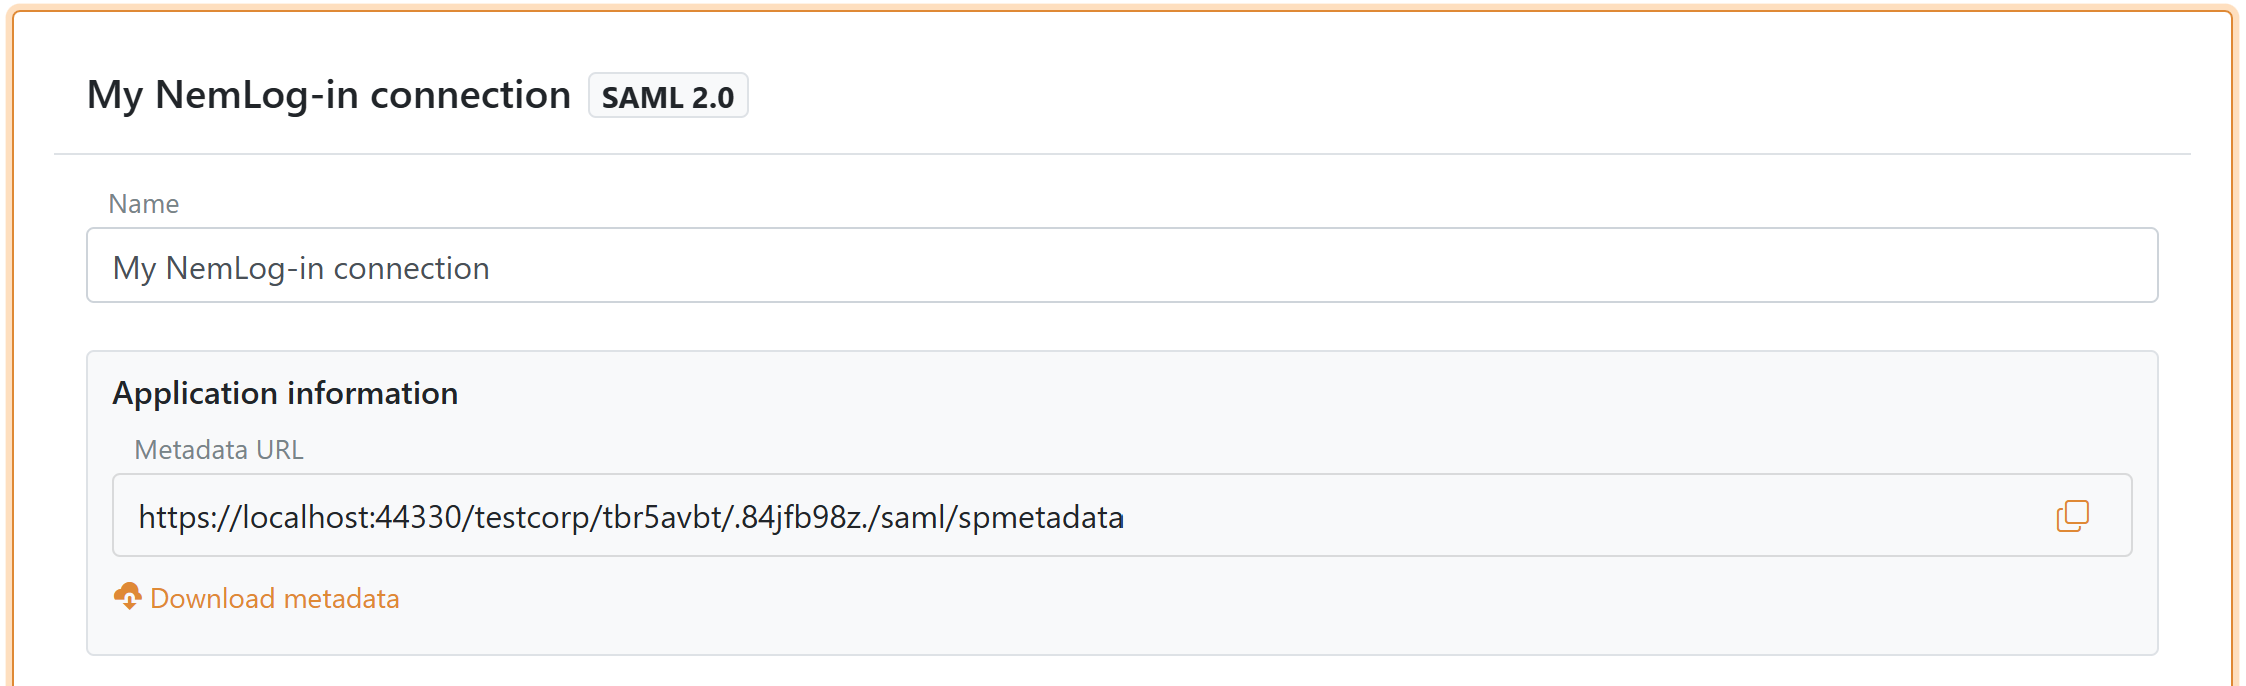
10) Create and download SP metadata
Click Create or Update. After the authentication method is created, the Application information section shows the metadata URL and a download button (in the top of the NemLog-in template).
If you change attributes or authentication context later, you must upload the metadata again in NemLog-in.
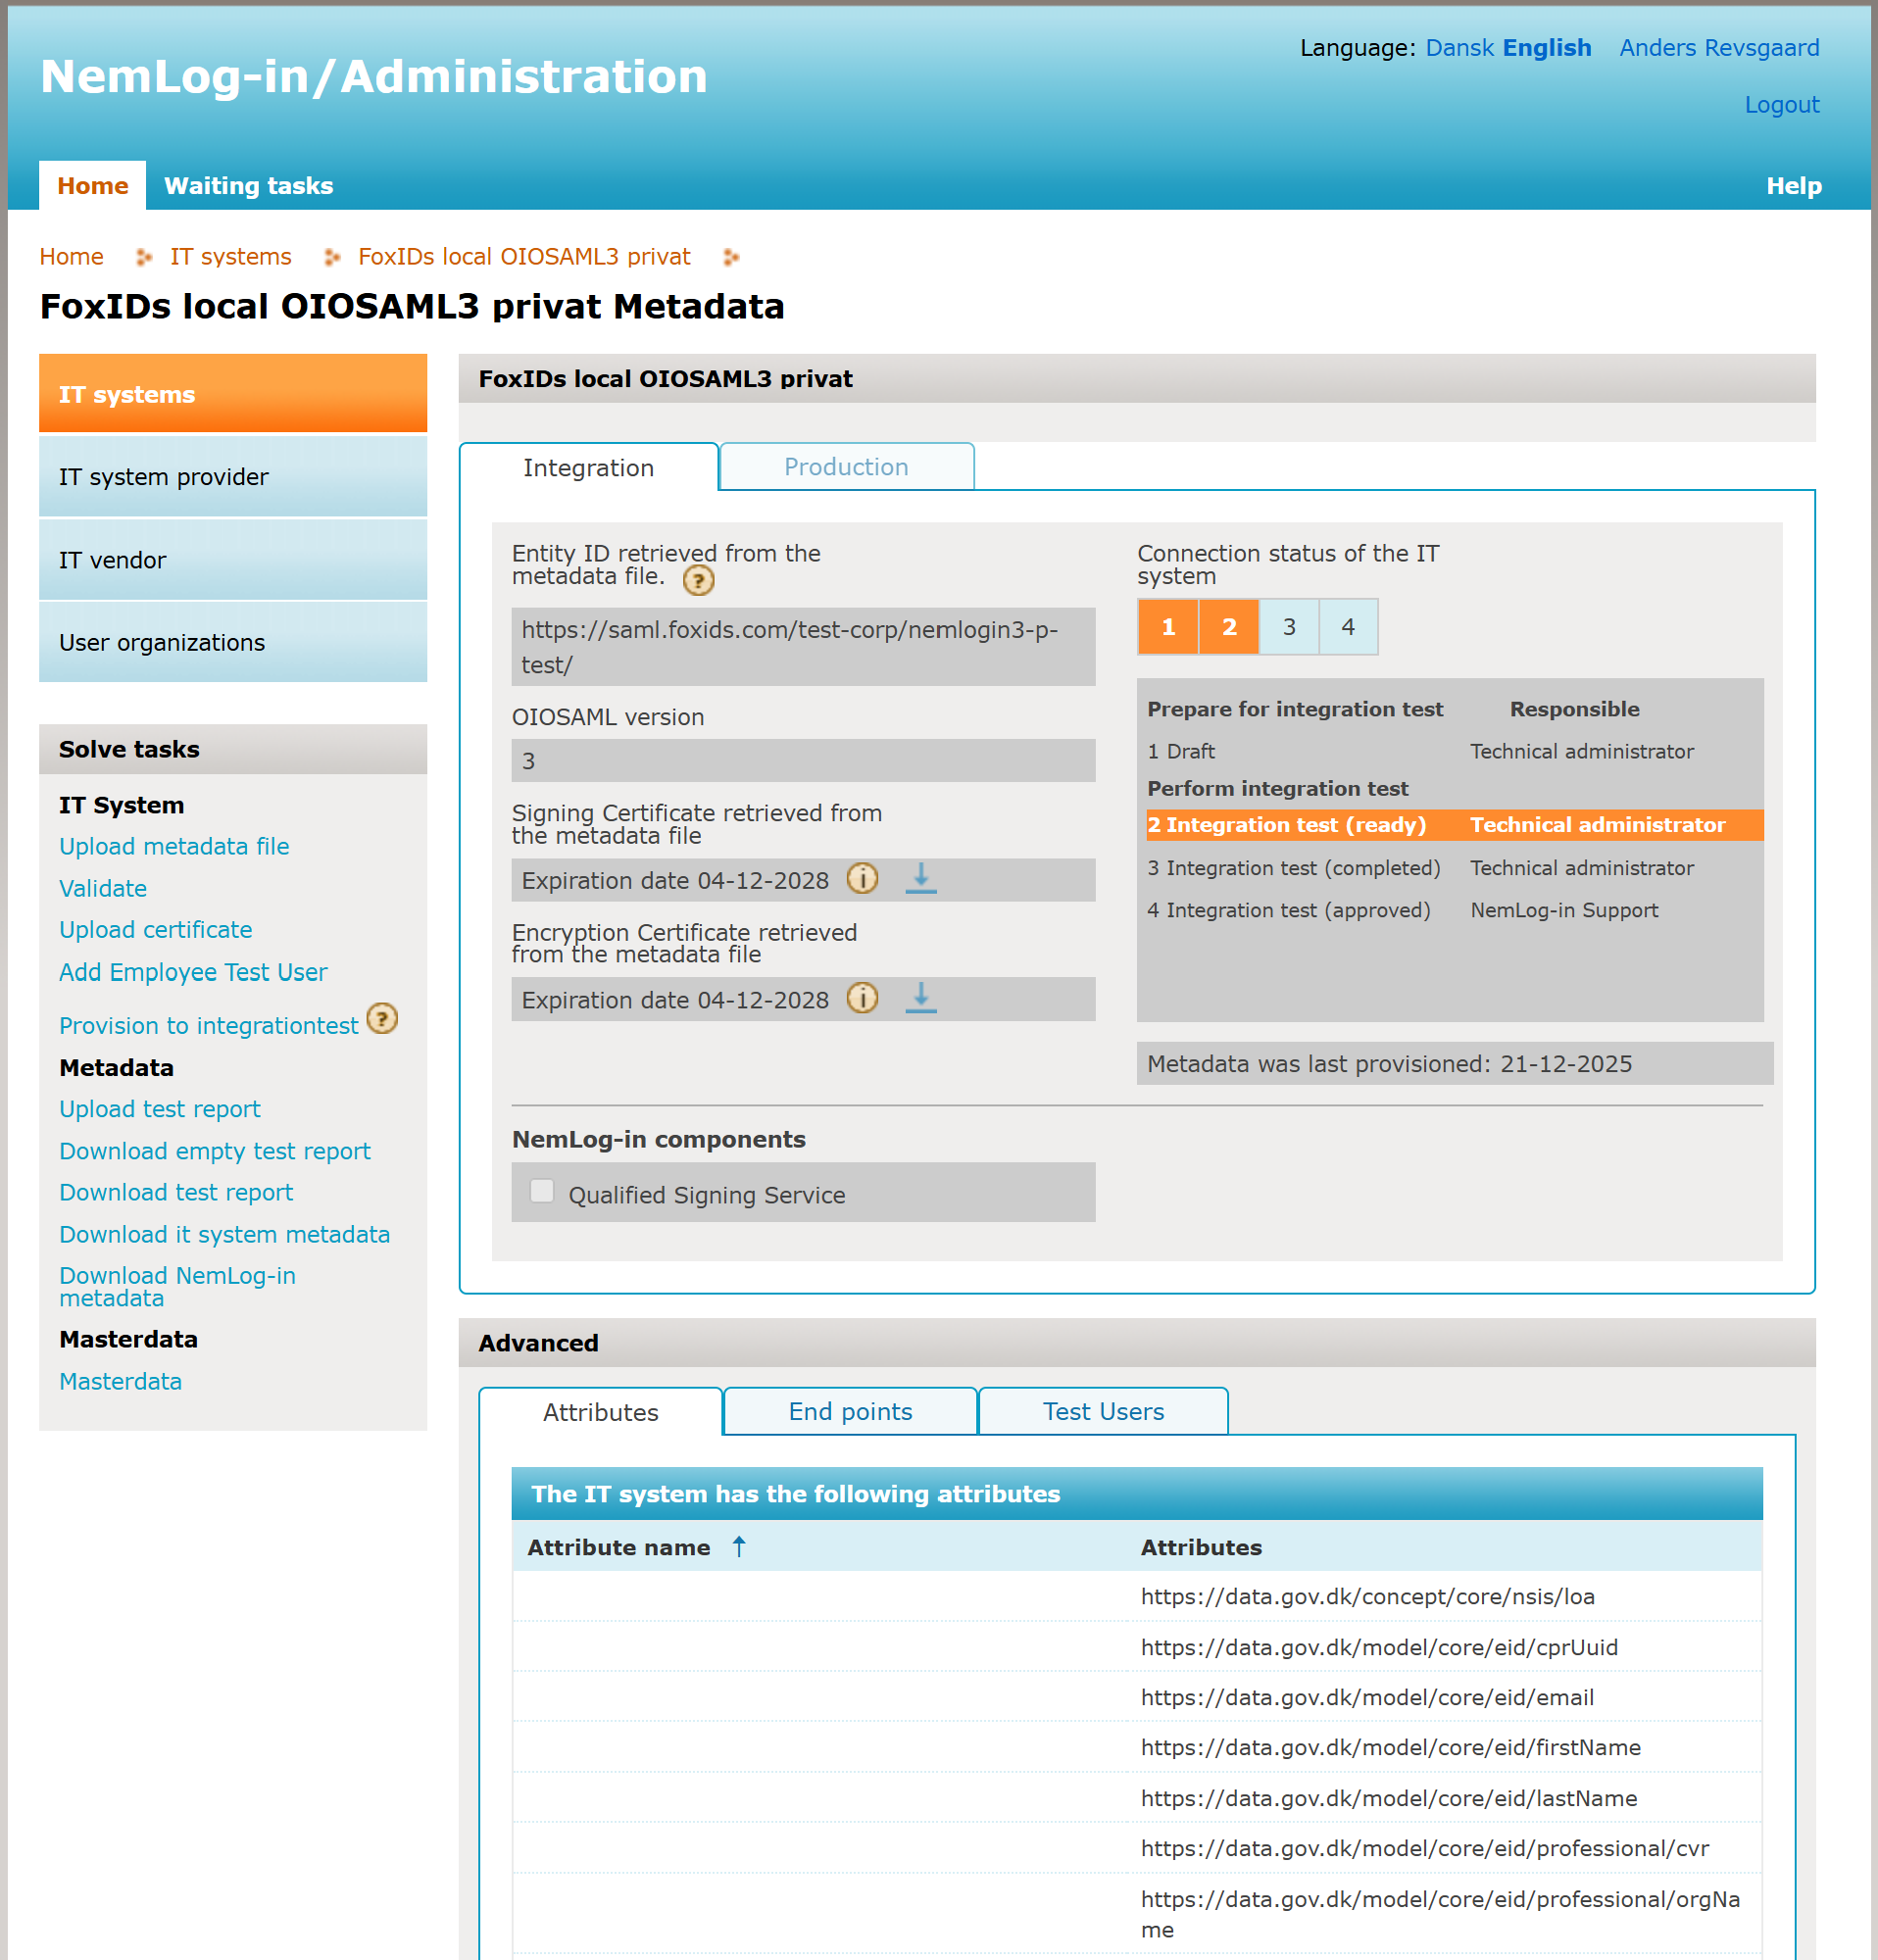
Configure the NemLog-in IT system
When you create an IT system in NemLog-in it has two tabs: integration test and production.
- Create a FoxIDs NemLog-in connection for integration test with the template
- In the NemLog-in administration portal, upload the SP metadata to the integration test tab and provision to integration test
- Upload the test report:
- After approval, the production tab opens
- Create a FoxIDs NemLog-in connection for production with the template
- Upload the SP metadata to the production tab and provision to production
- You are now in production with MitID
Test users in integration test environment
You can create both MitID private users and MitID Business (employee) users for the NemLog-in integration test environment.
MitID private test users
There are two ways to create a MitID private test user:
- Create a user that signs in with username (User ID) and password on the Test login tab on the NemLog-in page.
- Create a user that can both sign in with username (User ID) and password and simulate the MitID app on the MitID tab.
To create a MitID private test user with username and password:
- Go to the MitID simulator
- Optionally click Autofill
- Enter a fictitious CPR number. Each test CPR number can only be used once.
- Select Private MitID
- Enter your email address as the administrator email
- Click Create Identity
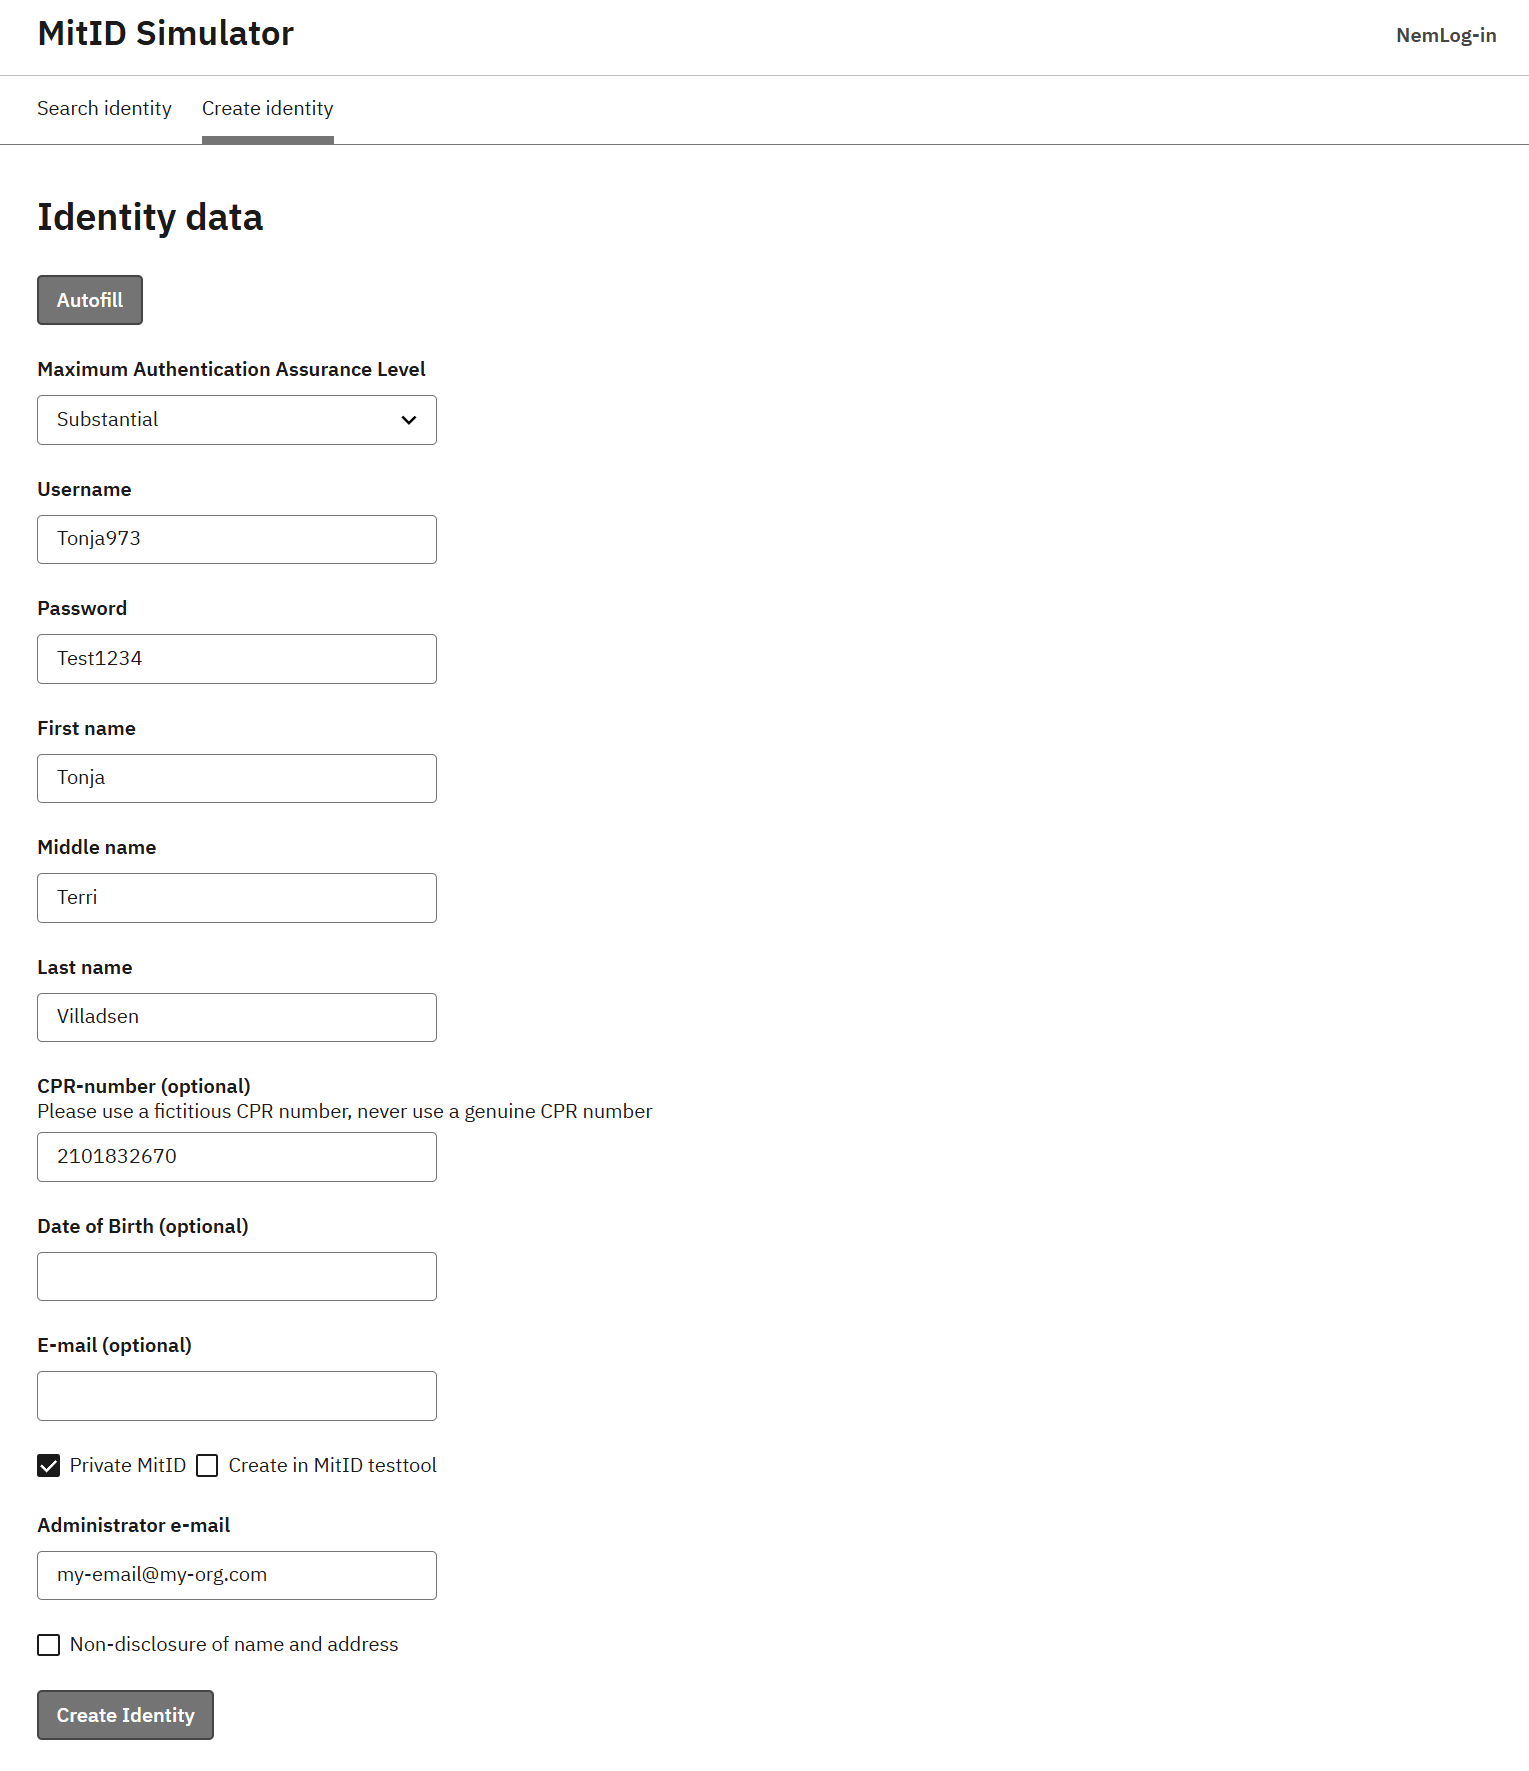
You receive an email with an access token you can use to edit the test user later. You can then sign in with the test user on the NemLog-in test login page.
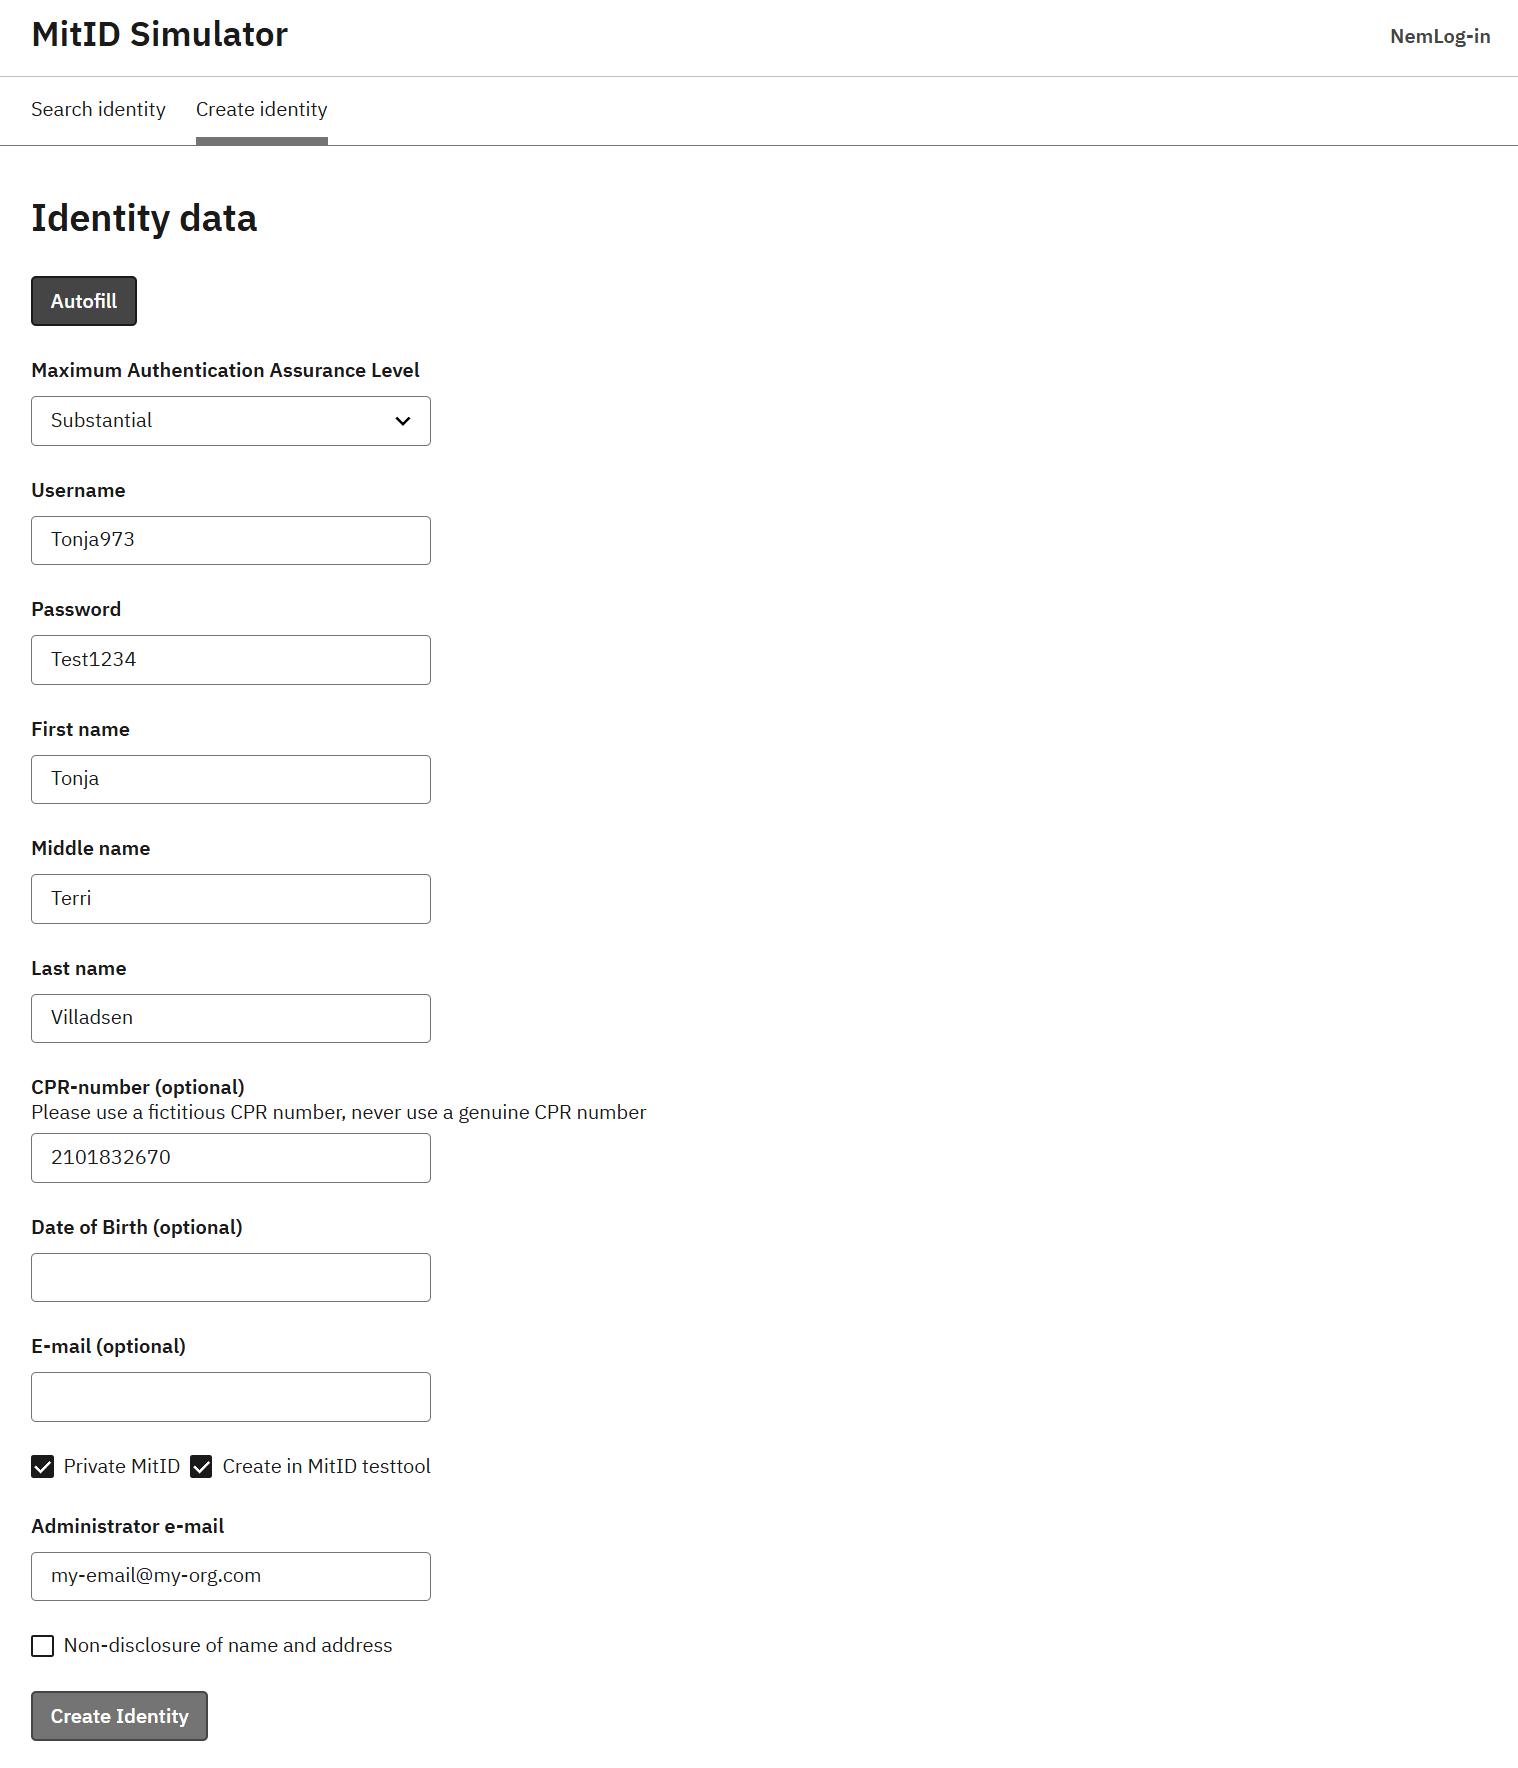
To create a MitID private test user that also works with the MitID App simulator:
- Go to the MitID simulator
- Optionally click Autofill
- Enter a fictitious CPR number. Each test CPR number can only be used once.
- Select Private MitID
- Select Create in MitID testtool
- Enter your email address as the administrator email
- Click Create Identity
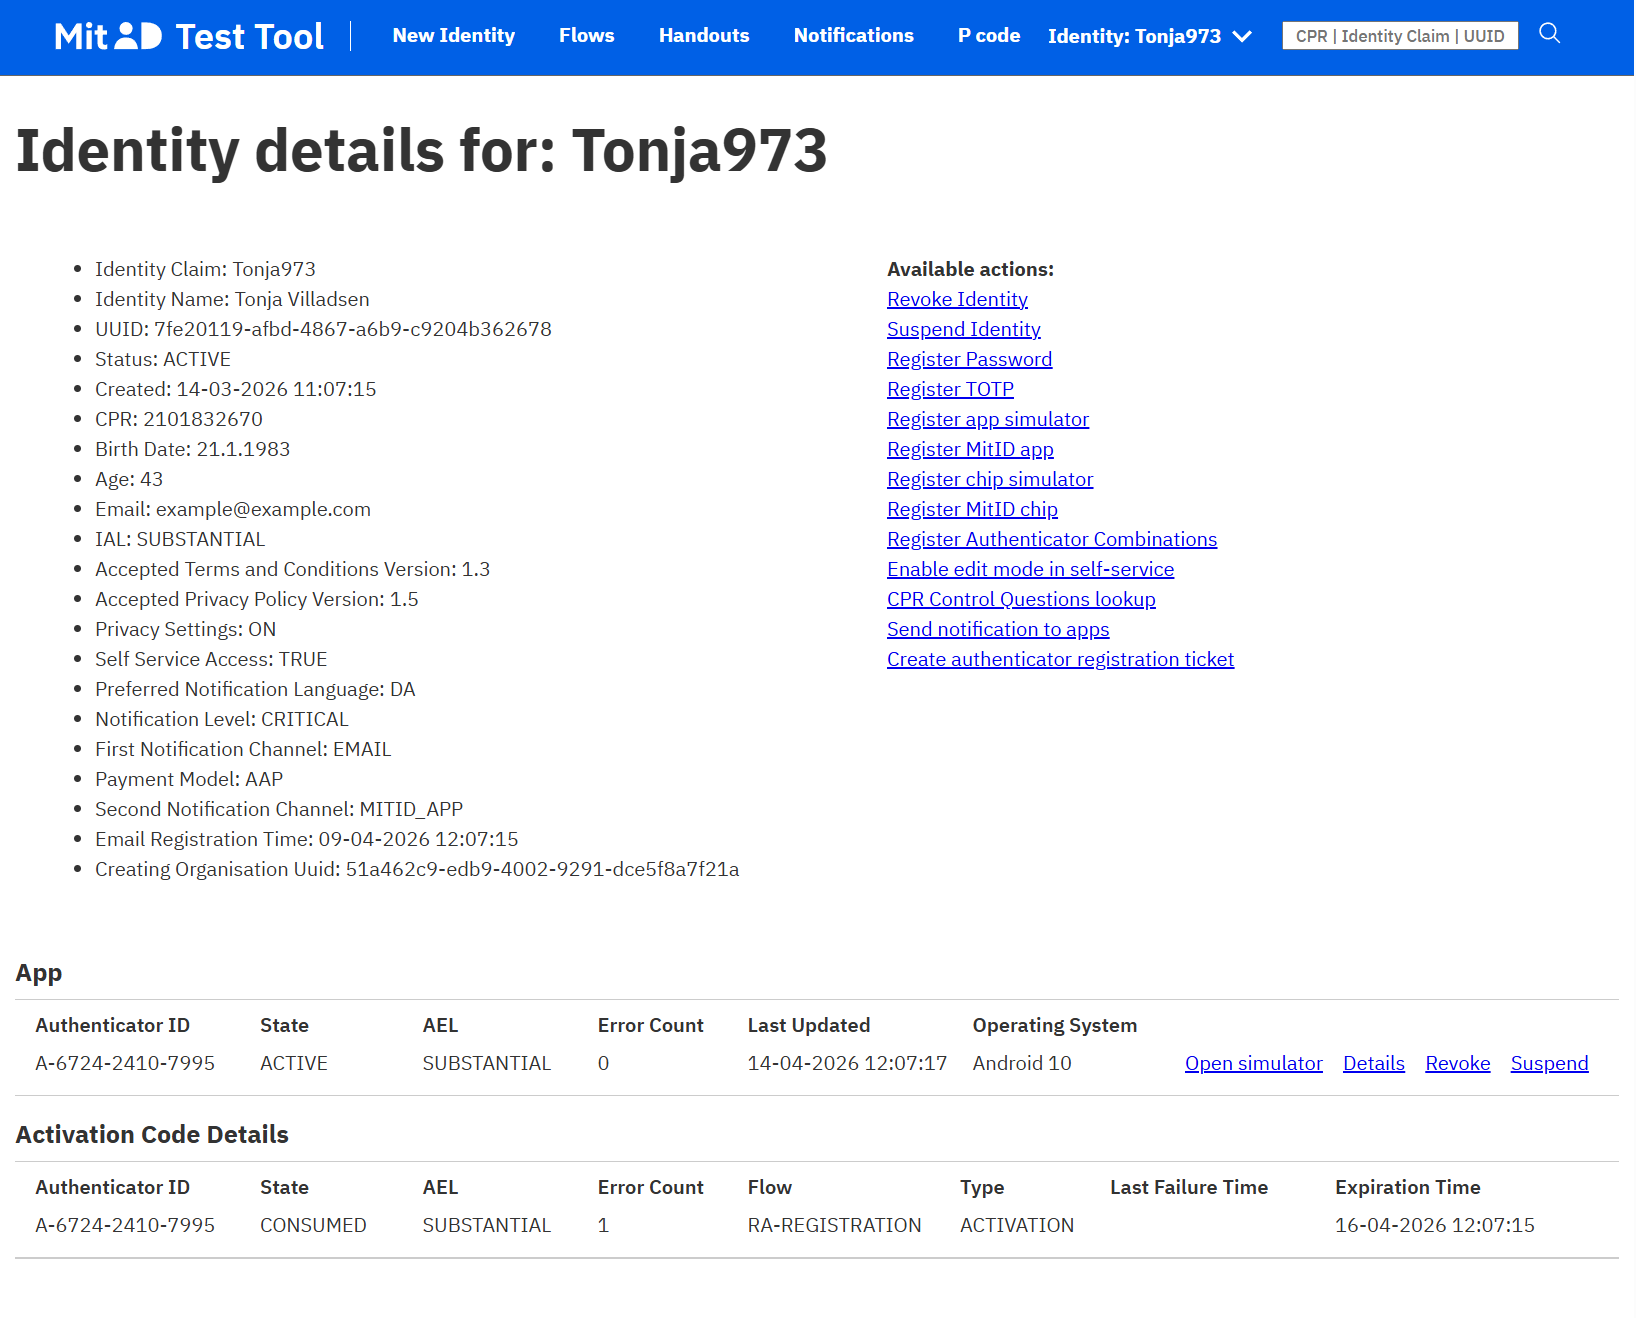
Find the test user in the MitID Test Tool by CPR number or username. In the App section, click Open simulator to open the MitID app simulator in a browser.
MitID Business test users
You need a test organisation in the integration test environment before you can create MitID Business test users. Create one test organisation per CVR number you want to use.
When you onboarded NemLog-in, you get a test organisation that you can manage in MitID Business integration test, where you can create MitID Business test users.
Alternatively, or in addition, you can create a test organisation on the Create test-user-organisation page. Fill in these fields and click Create (Opret):
- Administrator email address: used if you need to reset the password
- Password: used to sign in
- API access key: if you provide one, others cannot change the test organisation
- Approve qualified certificates: enable this if you need to test qualified certificates
- Organisation type: select
Privat virksomhedfor a private company orOffentlig virksomhedfor a public organisation - Assurance level for the identification process: set the NSIS assurance level for
Betydelig
After the organisation is created, sign in to MitID Business integration test and create MitID Business test users.
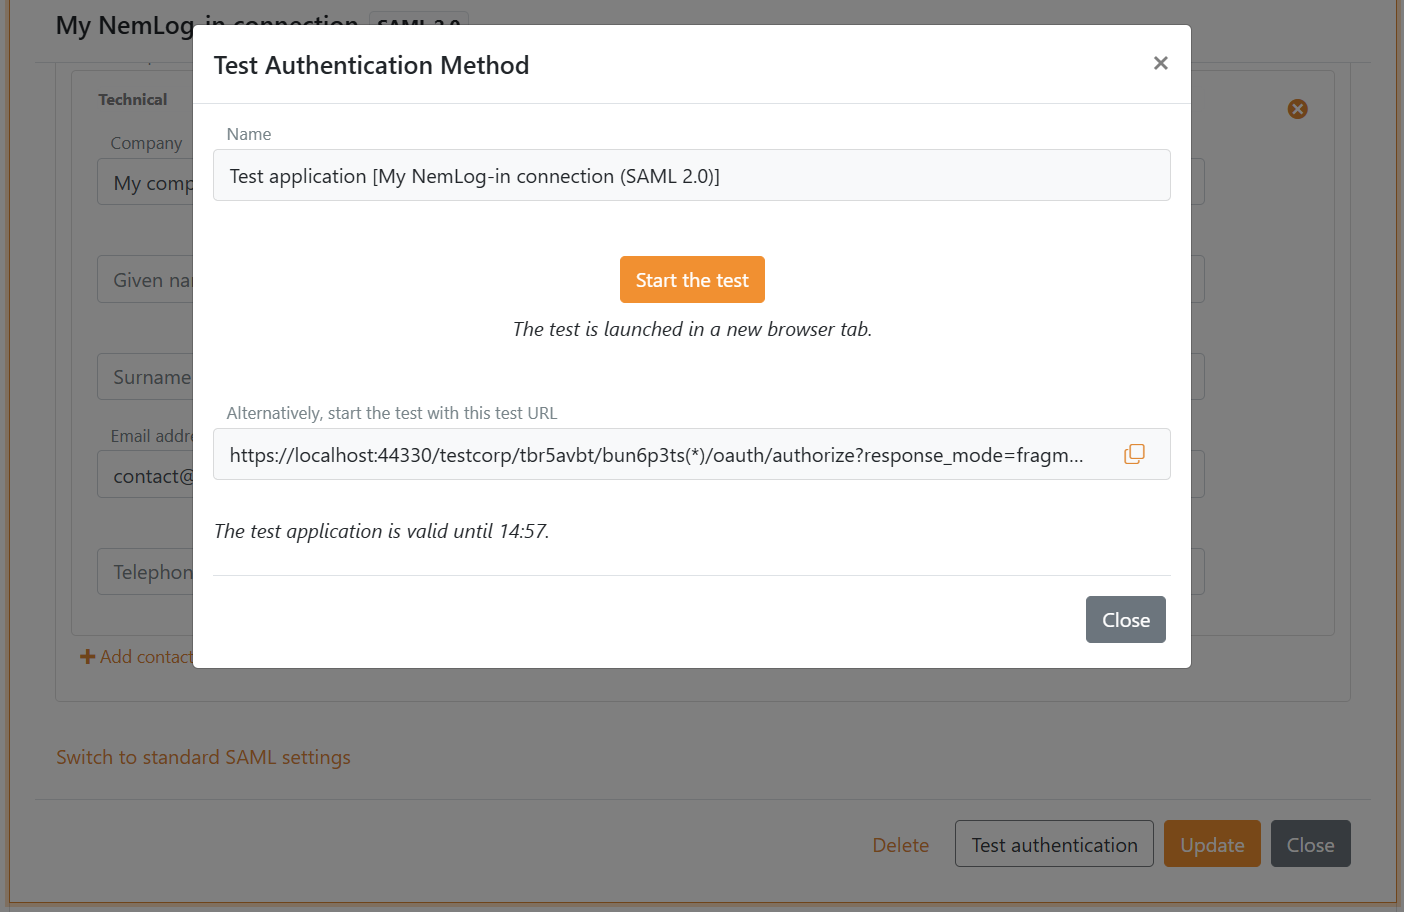
Test the authentication method
- Go back to FoxIDs Control Client and open the NemLog-in authentication method
- Click Test authentication to create a test application
- Click Start the test to start the test
Legacy
If you need the legacy guide for configuring NemLog-in with the standard SAML 2.0 settings, see Connect to NemLog-in with SAML 2.0 (Legacy standard configuration).