Brug FoxIDs til Google Workspace SAML SSO
Forbind FoxIDs som en ekstern identity provider for Google Workspace med SAML 2.0.
Ved at konfigurere en OpenID Connect autentifikationsmetode og Google Workspace som en SAML 2.0 applikation bliver FoxIDs en bridge mellem OpenID Connect og SAML 2.0 og konverterer automatisk JWT (OAuth 2.0) claims til SAML 2.0 claims.
Konfigurer Google Workspace
Denne guide beskriver hvordan du opsætter FoxIDs som en ekstern identity provider for Google Workspace. Brugere forbindes med deres e-mailadresse og skal allerede eksistere i Google Workspace.
1 - Start med at konfigurere et certifikat i FoxIDs Control Client
Du skal uploade SAML 2.0 metadata fra FoxIDs til Google Workspace. Derfor er det nødvendigt at bruge et langsigtet certifikat i FoxIDs, fx gyldigt i 3 år.
- Vælg fanen Certificates
- Klik Change Container type
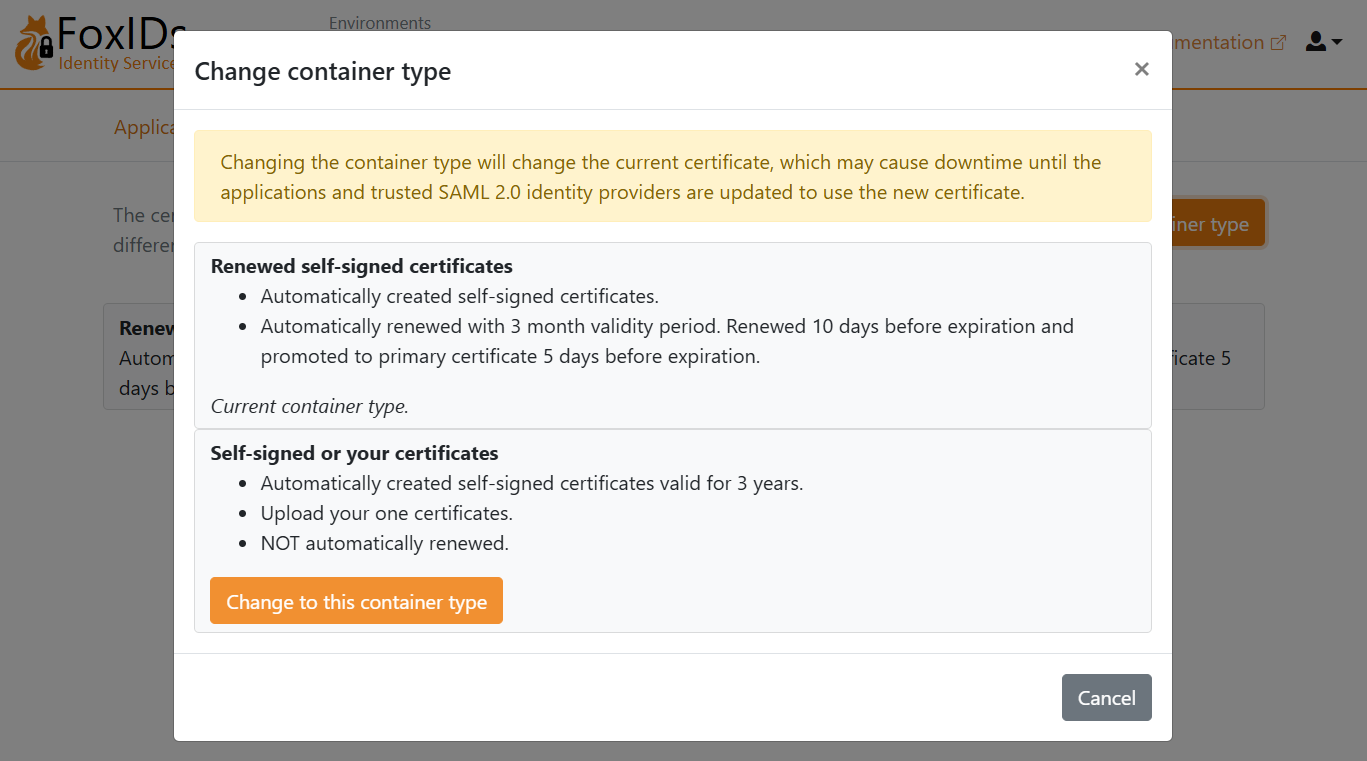
- Find Self-signed or your certificate og klik Change to this container type
- Det self-signed certifikat er gyldigt i 3 år, og du kan valgfrit uploade dit eget certifikat
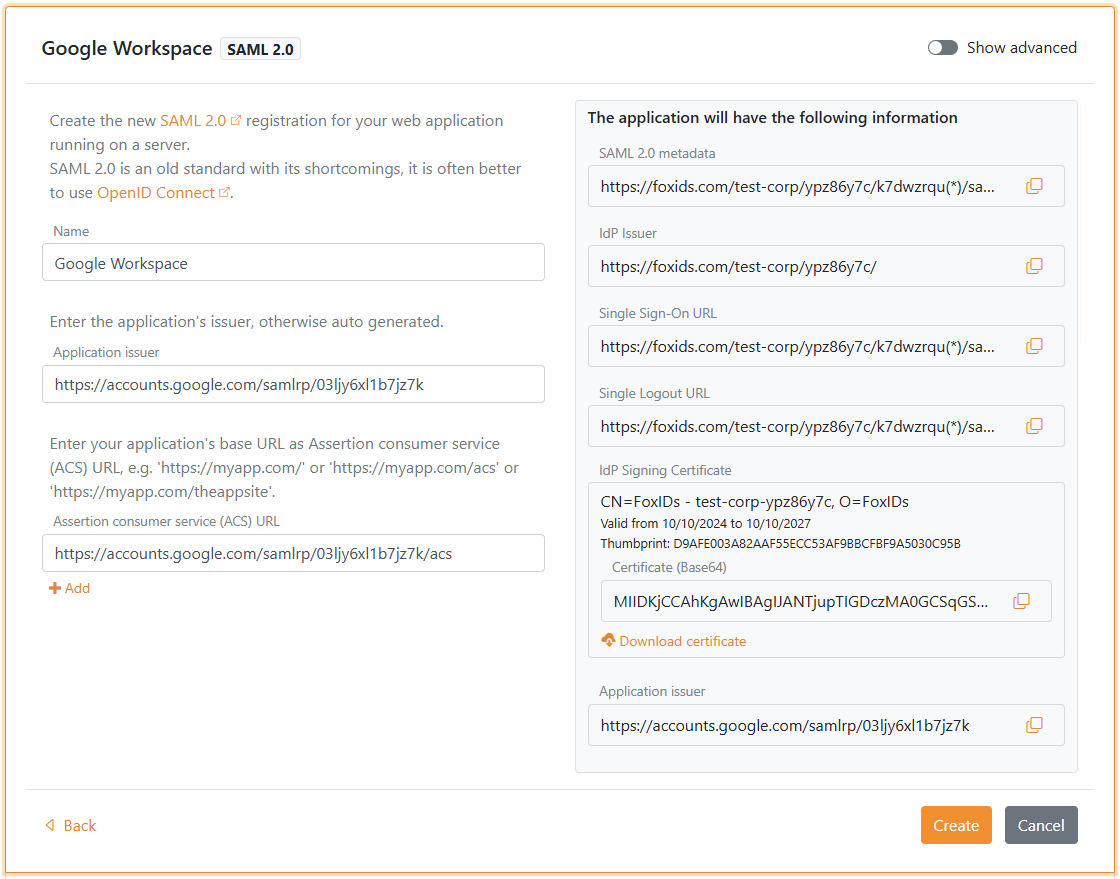
2 - Start derefter med at oprette en SAML 2.0 applikation i FoxIDs Control Client
- Vælg fanen Applications
- Klik New application
- Klik Web application (SAML 2.0)
- Indtast Name, fx
Google Workspace - I panelet til højre, klik Show more i sektionen The application will have the following information
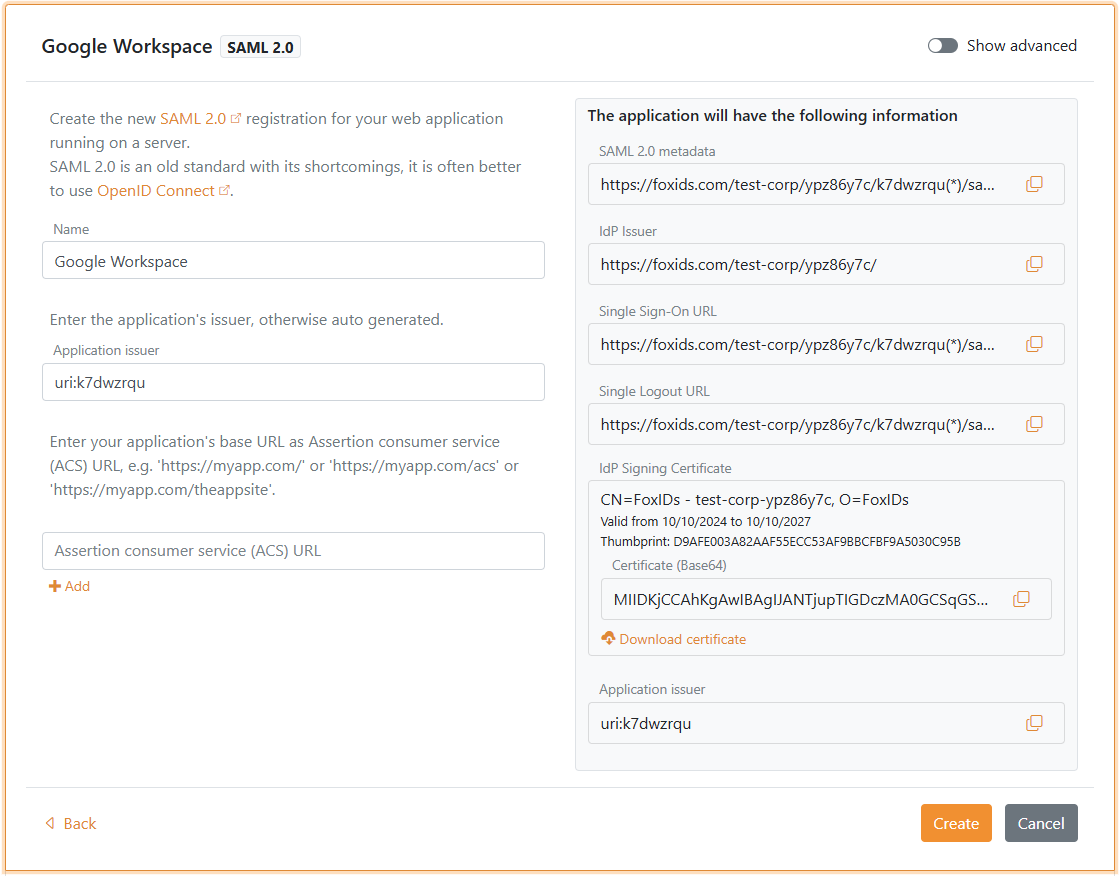
- Gem applikationsinformationen til senere brug i Google Workspace:
- Kopiér IdP Issuer
- Kopiér Single Sign-On URL
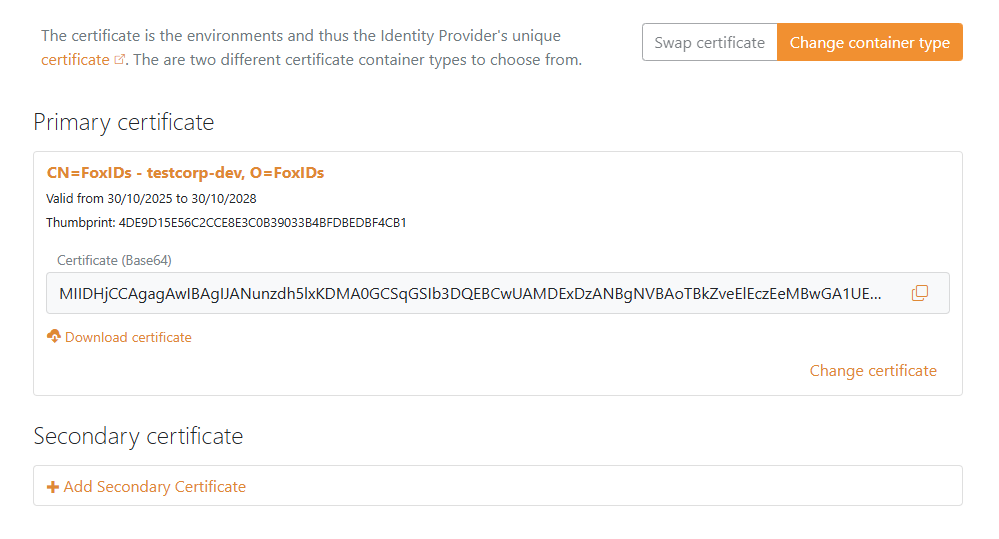
- Under IdP Signing Certificate, klik Download certificate
- Hold FoxIDs applikations-UI åben til senere brug
3 - Gå derefter til Google Workspace portalen
- Åbn Admin console og log ind hvis nødvendigt
- Navigér til Security > Authentication > SSO with third party IdP
- I sektionen Third-party SSO profiles, klik ADD SAML PROFILE
- Indtast et SSO profile name
- Under Autofill email, vælg Send email address in the URL as the login_hint parameter
- Find sektionen IDP details
- Sæt IDP entity ID til FoxIDs applikationens IdP Issuer værdi som du kopierede
- Sæt Sign-in page URL til FoxIDs applikationens Single Sign-On URL værdi som du kopierede
- (Valgfrit) Sæt Sign-out page URL til siden brugere skal lande på efter sign-out. Google Workspace understøtter ikke single logout, så FoxIDs bliver ikke kaldt ved sign-out.
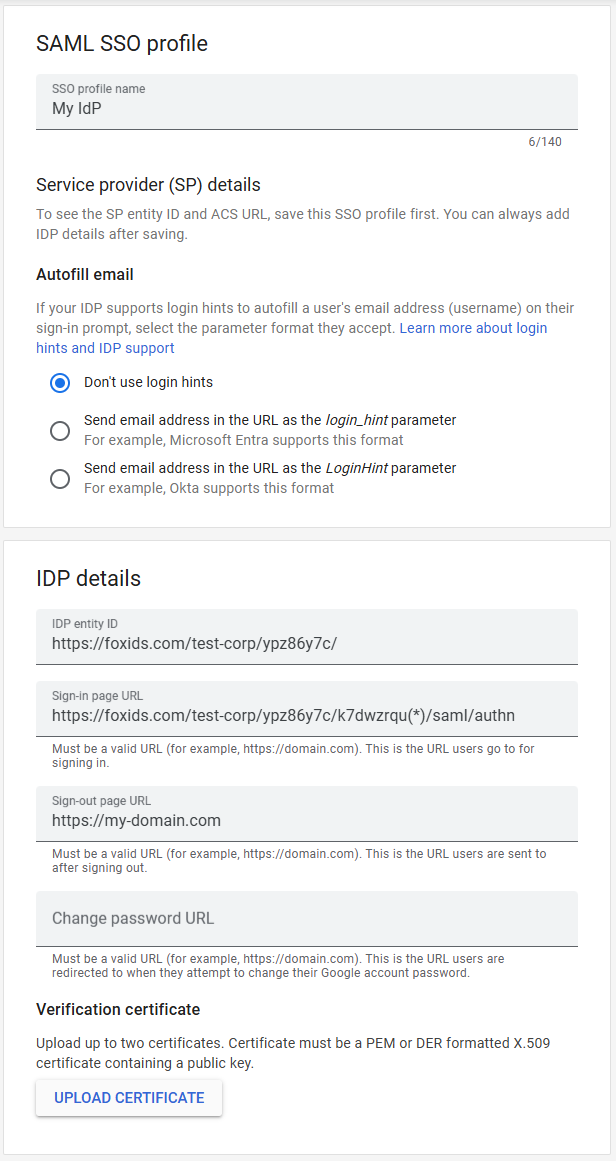
- Klik UPLOAD CERTIFICATE og upload IdP Signing Certificate som du downloadede fra FoxIDs
- Klik Save
- I sektionen SP details, gem informationen til senere brug i FoxIDs:
- Kopiér EntityID Issuer
- Kopiér ACS URL
4 - Fortsæt derefter oprettelsen af SAML 2.0 applikationen i FoxIDs Control Client
- Gå tilbage til FoxIDs applikations-UI som du holdt åben
- Sæt Application issuer til Google Workspace EntityID Issuer som du kopierede
- Sæt Assertion consumer service (ACS) URL til Google Workspace ACS URL som du kopierede
- Klik Create
- Klik Change application for at åbne applikationen i redigeringstilstand
- Vælg fanen Claims Transform
- Klik Add claim transform, vælg Map, og tilføj en NameID claim med brugerens e-mailadresse der matcher Google Workspace brugerens e-mailadresse.
- Sæt New claim til
http://schemas.xmlsoap.org/ws/2005/05/identity/claims/nameidentifier- som er NameID claim URI - Sæt Select claim til
http://schemas.xmlsoap.org/ws/2005/05/identity/claims/emailaddress - Klik Update
Du skal aktivere single sign-on for brugere i Google Workspace. Se Google Workspace dokumentation for mere information.