Gebruik FoxIDs voor Google Workspace, SAML, SSO en
Verbind FoxIDs als een externe identity provider voor Google Workspace met SAML 2.0.
Door een OpenID Connect authenticatiemethode en Google Workspace als een SAML 2.0 applicatie te configureren wordt FoxIDs een bridge tussen OpenID Connect en SAML 2.0 en zet automatisch JWT (OAuth 2.0) claims om naar SAML 2.0 claims.
Google Workspace configureren
Deze gids beschrijft hoe je FoxIDs instelt als externe identity provider voor Google Workspace. Gebruikers worden gekoppeld op hun e-mailadres en moeten al bestaan in Google Workspace.
1 - Begin met het configureren van een certificaat in FoxIDs Control Client
Je moet de SAML 2.0 metadata van FoxIDs uploaden naar Google Workspace. Daarom is het nodig om een langdurig certificaat in FoxIDs te gebruiken, bijv. geldig voor 3 jaar.
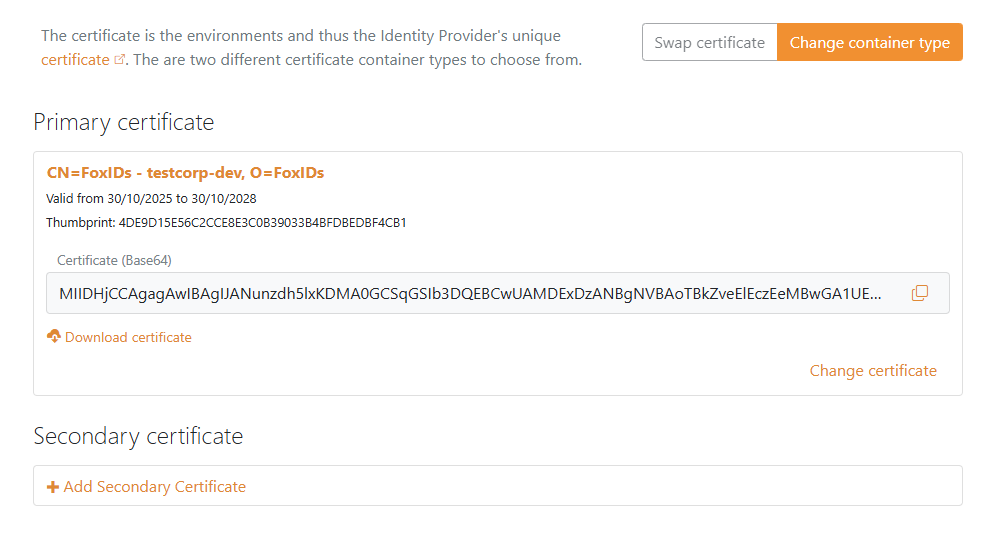
- Selecteer het tabblad Certificates
- Klik Change Container type
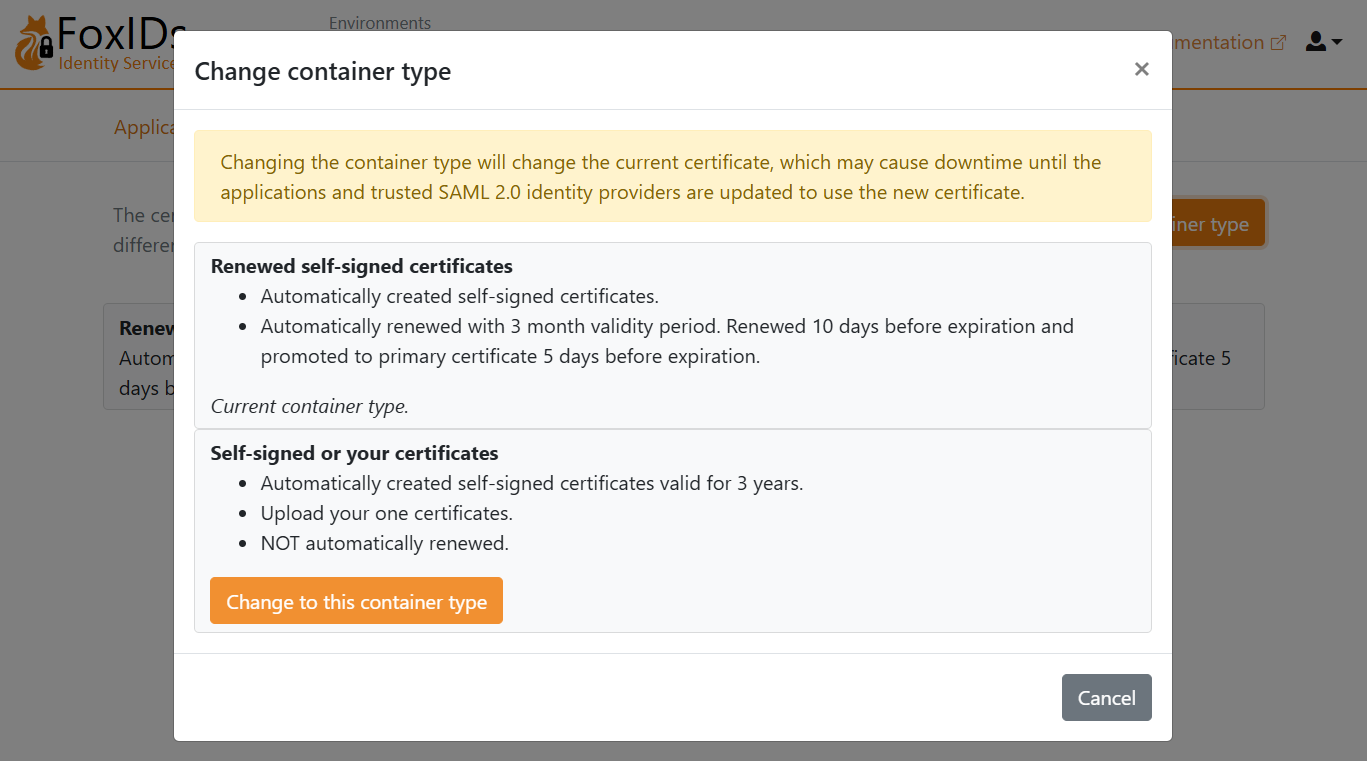
- Zoek Self-signed or your certificate en klik Change to this container type
- Het self-signed certificaat is 3 jaar geldig, en je kunt optioneel je eigen certificaat uploaden
2 - Begin daarna met het maken van een SAML 2.0 applicatie in FoxIDs Control Client
- Selecteer het tabblad Applications
- Klik New application
- Klik Web application (SAML 2.0)
- Voer de Name in, bijv.
Google Workspace - Klik in het paneel rechts op Show more in de sectie The application will have the following information
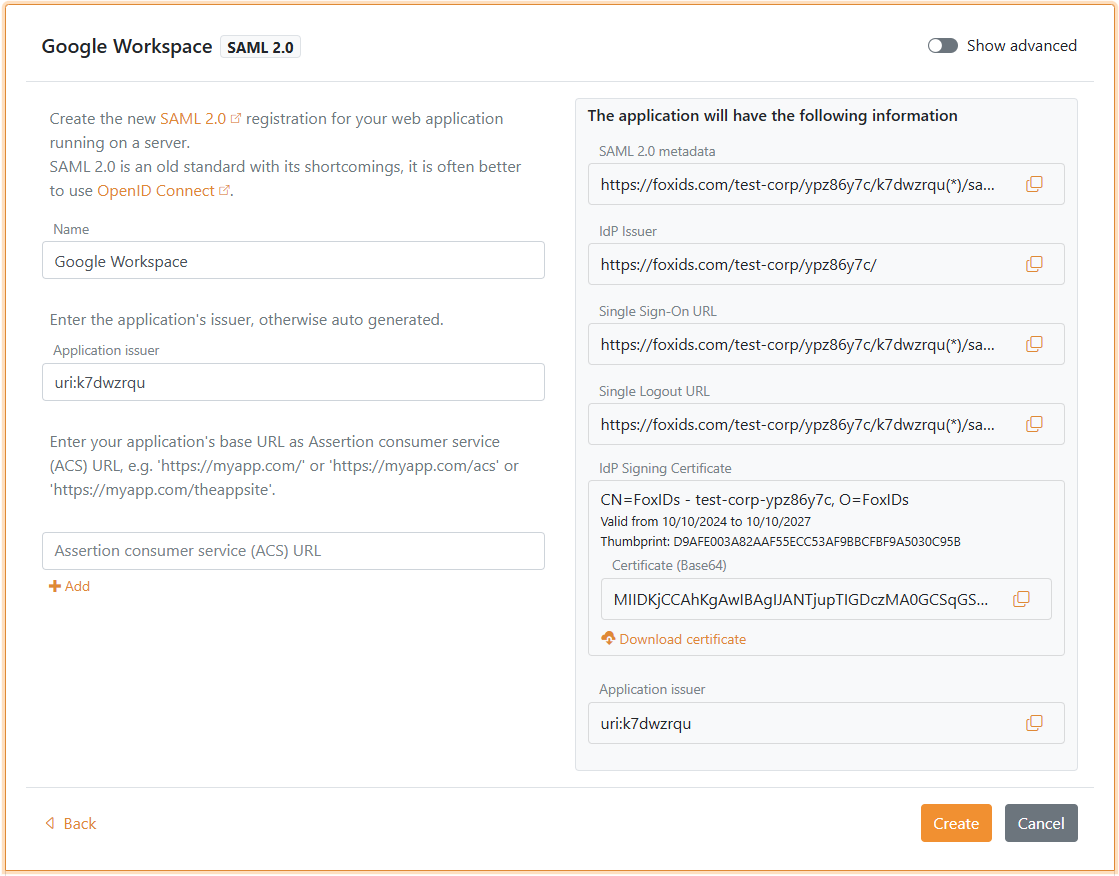
- Bewaar de applicatie-informatie voor later gebruik in Google Workspace:
- Kopieer de IdP Issuer
- Kopieer de Single Sign-On URL
- Onder IdP Signing Certificate, klik Download certificate
- Houd de FoxIDs applicatie-UI open voor later gebruik
3 - Ga daarna naar de Google Workspace portal
- Open de Admin console en log in indien gevraagd
- Navigeer naar Security > Authentication > SSO with third party IdP
- Klik in de sectie Third-party SSO profiles op ADD SAML PROFILE
- Voer een SSO profile name in
- Kies onder Autofill email voor Send email address in the URL as the login_hint parameter
- Zoek de sectie IDP details
- Zet IDP entity ID op de IdP Issuer waarde uit FoxIDs
- Zet Sign-in page URL op de Single Sign-On URL waarde uit FoxIDs
- (Optioneel) Zet Sign-out page URL op de pagina waar gebruikers na sign-out landen. Google Workspace ondersteunt geen single logout, dus FoxIDs wordt niet aangeroepen tijdens sign-out.
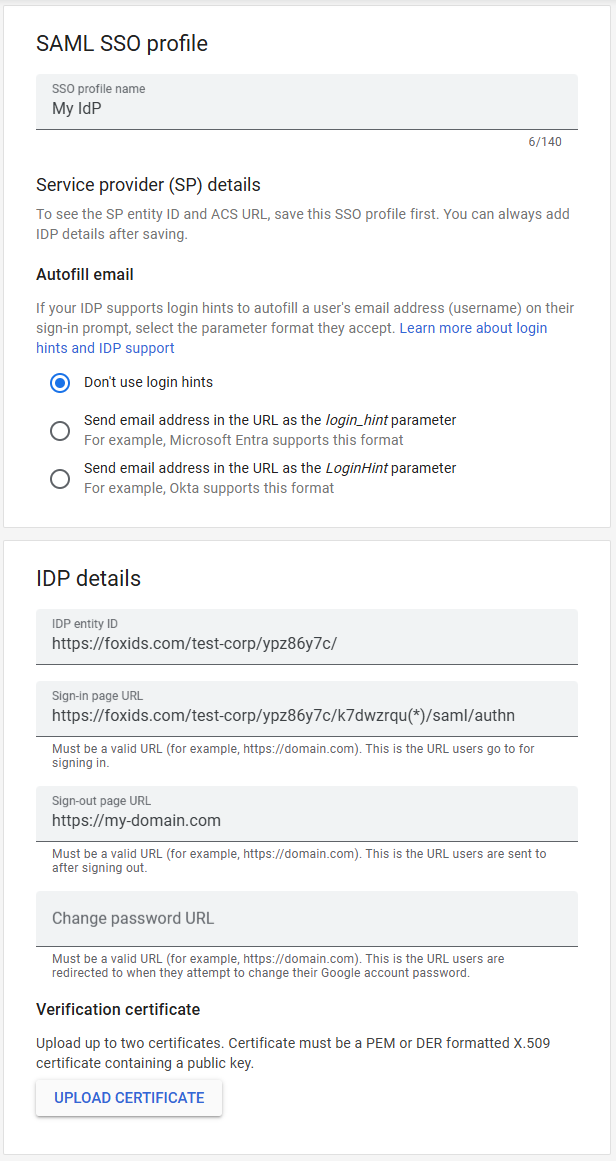
- Klik UPLOAD CERTIFICATE en upload het IdP Signing Certificate dat je uit FoxIDs hebt gedownload
- Klik Save
- Bewaar in de sectie SP details de informatie voor later gebruik in FoxIDs:
- Kopieer de EntityID Issuer
- Kopieer de ACS URL
4 - Ga verder met het maken van de SAML 2.0 applicatie in FoxIDs Control Client
- Ga terug naar de FoxIDs applicatie-UI die je open hield
- Zet Application issuer op de EntityID Issuer van Google Workspace
- Zet Assertion consumer service (ACS) URL op de ACS URL van Google Workspace
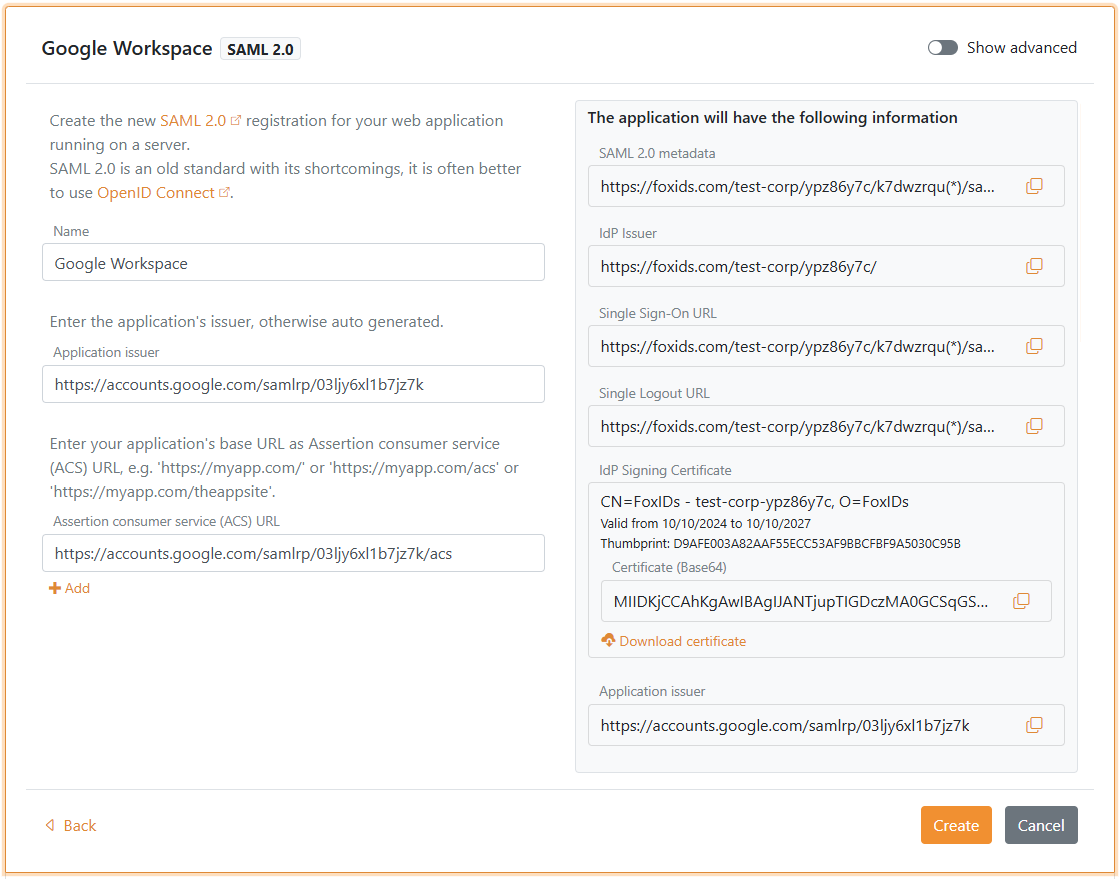
- Klik Create
- Klik Change application om de applicatie in bewerkmodus te openen
- Selecteer het tabblad Claims Transform
- Klik Add claim transform, kies Map, en voeg een NameID claim toe met het e-mailadres van de gebruiker dat overeenkomt met het Google Workspace e-mailadres.
- Zet New claim op
http://schemas.xmlsoap.org/ws/2005/05/identity/claims/nameidentifier- dit is de NameID claim URI - Zet Select claim op
http://schemas.xmlsoap.org/ws/2005/05/identity/claims/emailaddress - Klik Update
Je moet single sign-on voor gebruikers in Google Workspace activeren. Zie de Google Workspace documentatie voor meer informatie.