Använd FoxIDs för Google Workspace, SAML, SSO och
Anslut FoxIDs som en extern identity provider för Google Workspace med SAML 2.0.
Genom att konfigurera en OpenID Connect autentiseringsmetod och Google Workspace som en SAML 2.0 applikation blir FoxIDs en bridge mellan OpenID Connect och SAML 2.0 och konverterar automatiskt JWT (OAuth 2.0) claims till SAML 2.0 claims.
Konfigurera Google Workspace
Den här guiden beskriver hur du sätter upp FoxIDs som en extern identity provider för Google Workspace. Användare kopplas med sin e-postadress och måste redan finnas i Google Workspace.
1 - Börja med att konfigurera ett certifikat i FoxIDs Control Client
Du behöver ladda upp SAML 2.0 metadata från FoxIDs till Google Workspace. Därför är det nödvändigt att använda ett långlivat certifikat i FoxIDs, t.ex. giltigt i 3 år.
- Välj fliken Certificates
- Klicka Change Container type
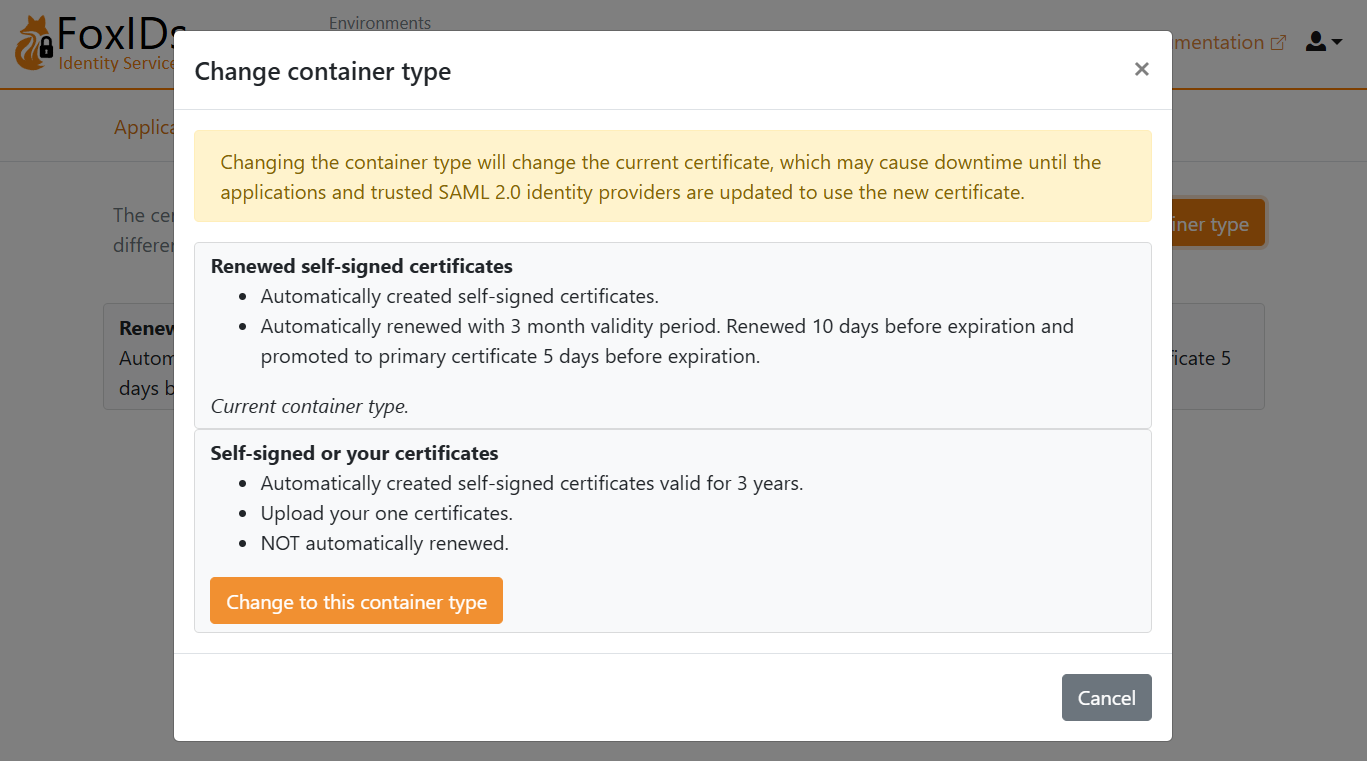
- Hitta Self-signed or your certificate och klicka Change to this container type
- Det self-signed certifikatet är giltigt i 3 år, och du kan valfritt ladda upp ditt eget certifikat
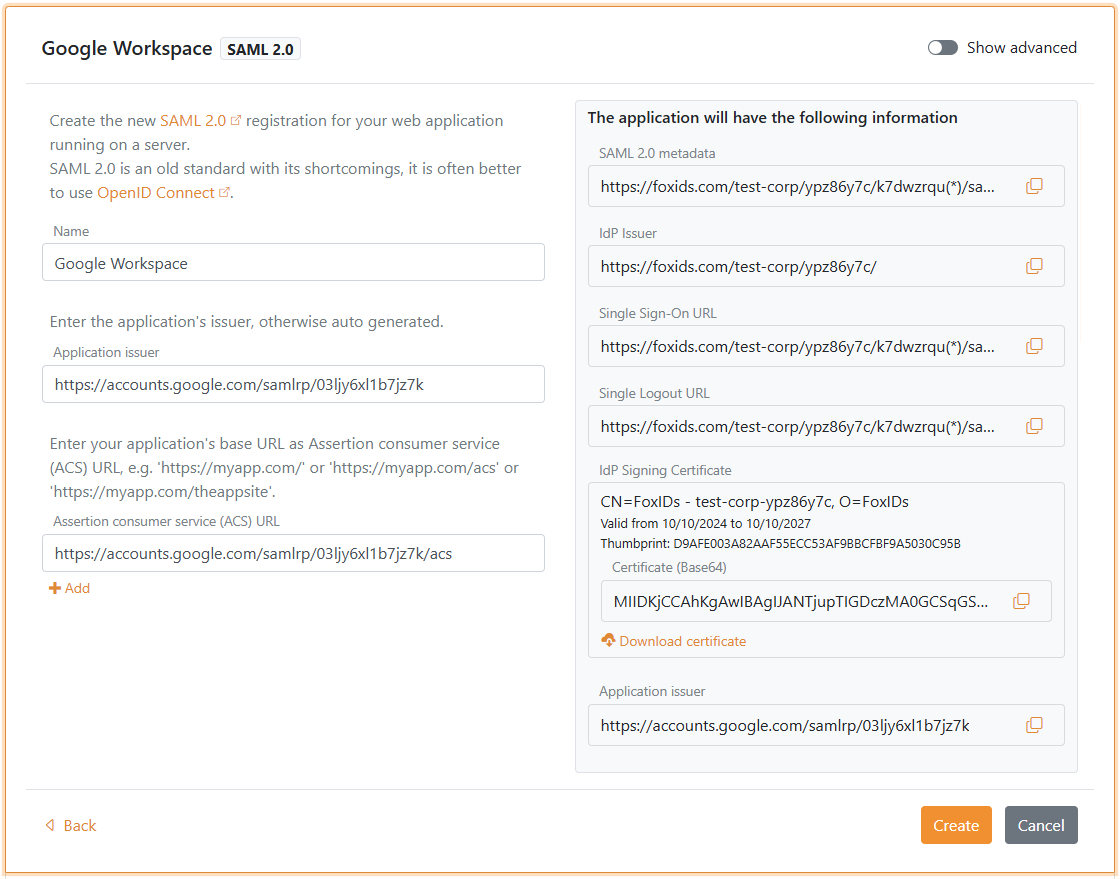
2 - Börja sedan skapa en SAML 2.0 applikation i FoxIDs Control Client
- Välj fliken Applications
- Klicka New application
- Klicka Web application (SAML 2.0)
- Ange Name, t.ex.
Google Workspace - I panelen till höger, klicka Show more i sektionen The application will have the following information
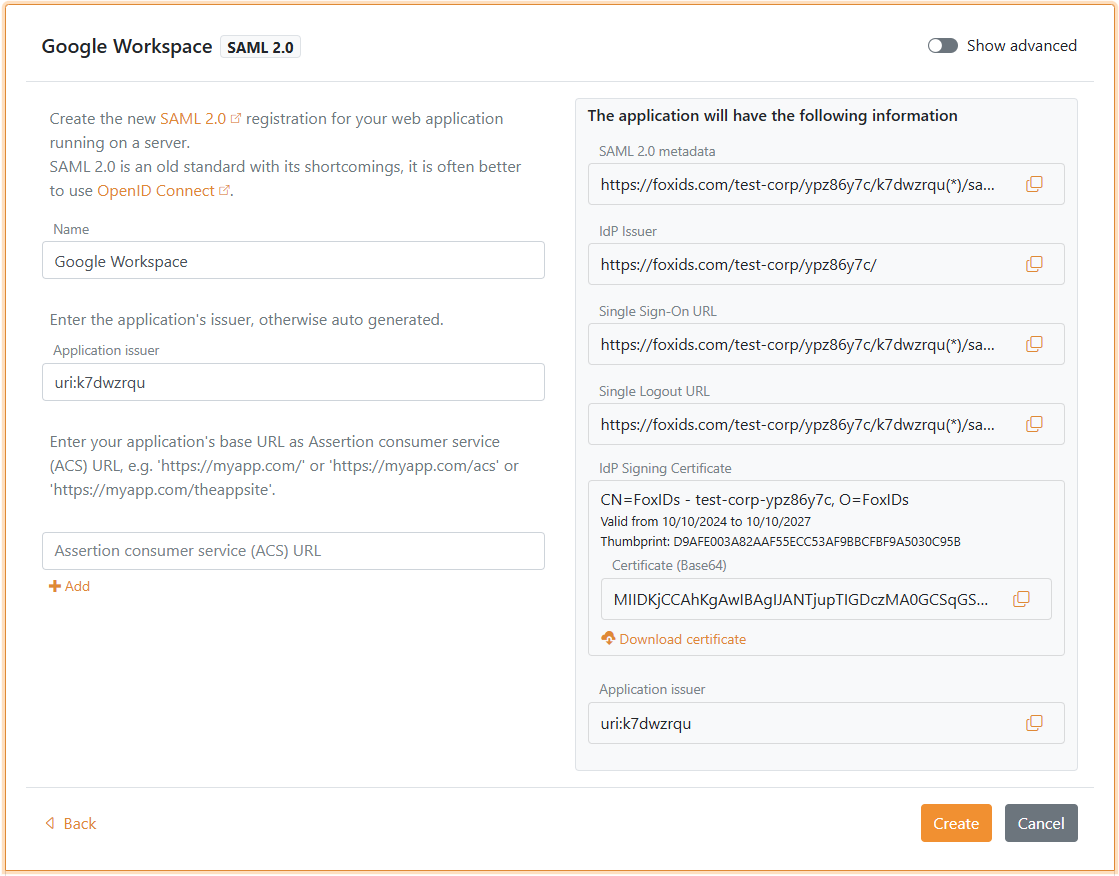
- Spara applikationsinformationen för senare användning i Google Workspace:
- Kopiera IdP Issuer
- Kopiera Single Sign-On URL
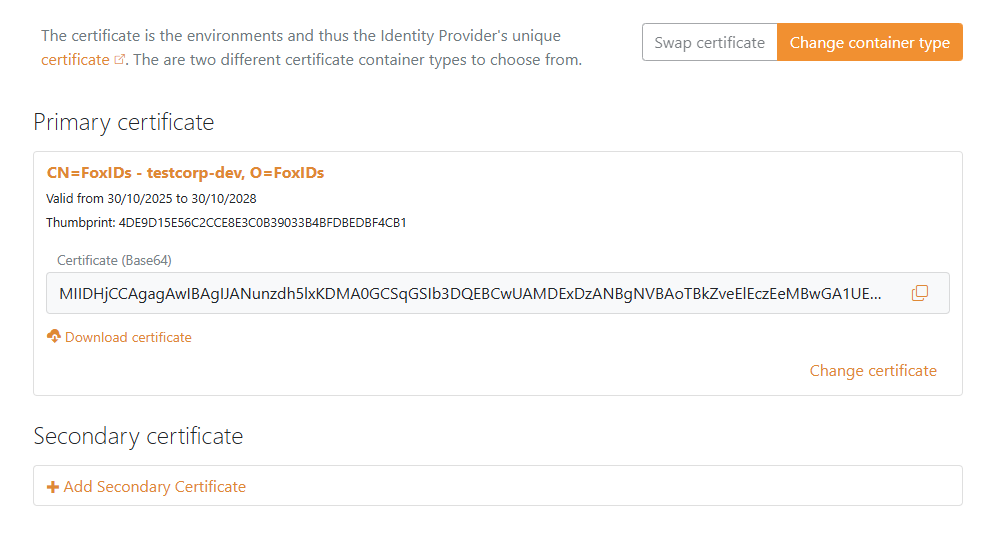
- Under IdP Signing Certificate, klicka Download certificate
- Håll FoxIDs applikations-UI öppet för senare användning
3 - Gå sedan till Google Workspace portalen
- Öppna Admin console och logga in om det behövs
- Navigera till Security > Authentication > SSO with third party IdP
- I sektionen Third-party SSO profiles, klicka ADD SAML PROFILE
- Ange ett SSO profile name
- Under Autofill email, välj Send email address in the URL as the login_hint parameter
- Hitta sektionen IDP details
- Sätt IDP entity ID till FoxIDs applikationens IdP Issuer värde som du kopierade
- Sätt Sign-in page URL till FoxIDs applikationens Single Sign-On URL värde som du kopierade
- (Valfritt) Sätt Sign-out page URL till sidan användare ska landa på efter sign-out. Google Workspace stödjer inte single logout, så FoxIDs anropas inte vid sign-out.
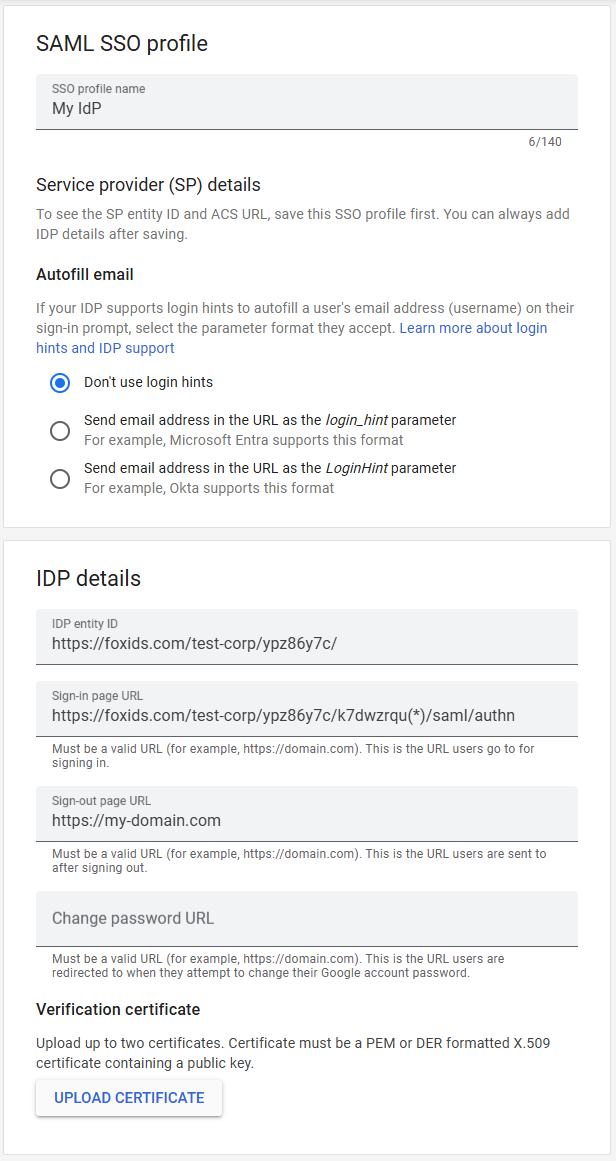
- Klicka UPLOAD CERTIFICATE och ladda upp IdP Signing Certificate som du laddade ner från FoxIDs
- Klicka Save
- I sektionen SP details, spara informationen för senare användning i FoxIDs:
- Kopiera EntityID Issuer
- Kopiera ACS URL
4 - Fortsätt sedan skapa SAML 2.0 applikationen i FoxIDs Control Client
- Gå tillbaka till FoxIDs applikations-UI som du höll öppet
- Sätt Application issuer till Google Workspace EntityID Issuer som du kopierade
- Sätt Assertion consumer service (ACS) URL till Google Workspace ACS URL som du kopierade
- Klicka Create
- Klicka Change application för att öppna applikationen i redigeringsläge
- Välj fliken Claims Transform
- Klicka Add claim transform, välj Map, och lägg till en NameID claim med användarens e-postadress som matchar Google Workspace användarens e-postadress.
- Sätt New claim till
http://schemas.xmlsoap.org/ws/2005/05/identity/claims/nameidentifier- vilket är NameID claim URI - Sätt Select claim till
http://schemas.xmlsoap.org/ws/2005/05/identity/claims/emailaddress - Klicka Update
Du behöver aktivera single sign-on för användare i Google Workspace. Se Google Workspace dokumentation för mer information.