Connect to Amazon IAM Identity Center with SAML 2.0
Connect FoxIDs as an external identity provider for Amazon IAM Identity Center with SAML 2.0.
By configuring an OpenID Connect authentication method and Amazon IAM Identity Center as a SAML 2.0 application FoxIDs become a bridge between OpenID Connect and SAML 2.0 and automatically convert JWT (OAuth 2.0) claims to SAML 2.0 claims.
Configure Amazon IAM Identity Center
This guide describes how to set up FoxIDs as an external identity provider for Amazon IAM Identity Center. Users are connected with their email address and must already exist in Amazon IAM Identity Center.
1 - Start by configuring a certificate in FoxIDs Control Client
You are required to upload the SAML 2.0 metadata from FoxIDs to Amazon IAM Identity Center. It is therefore necessary to use a long-lived certificate in FoxIDs, e.g. valid for 3 years.
- Select the Certificates tab
- Click Change Container type
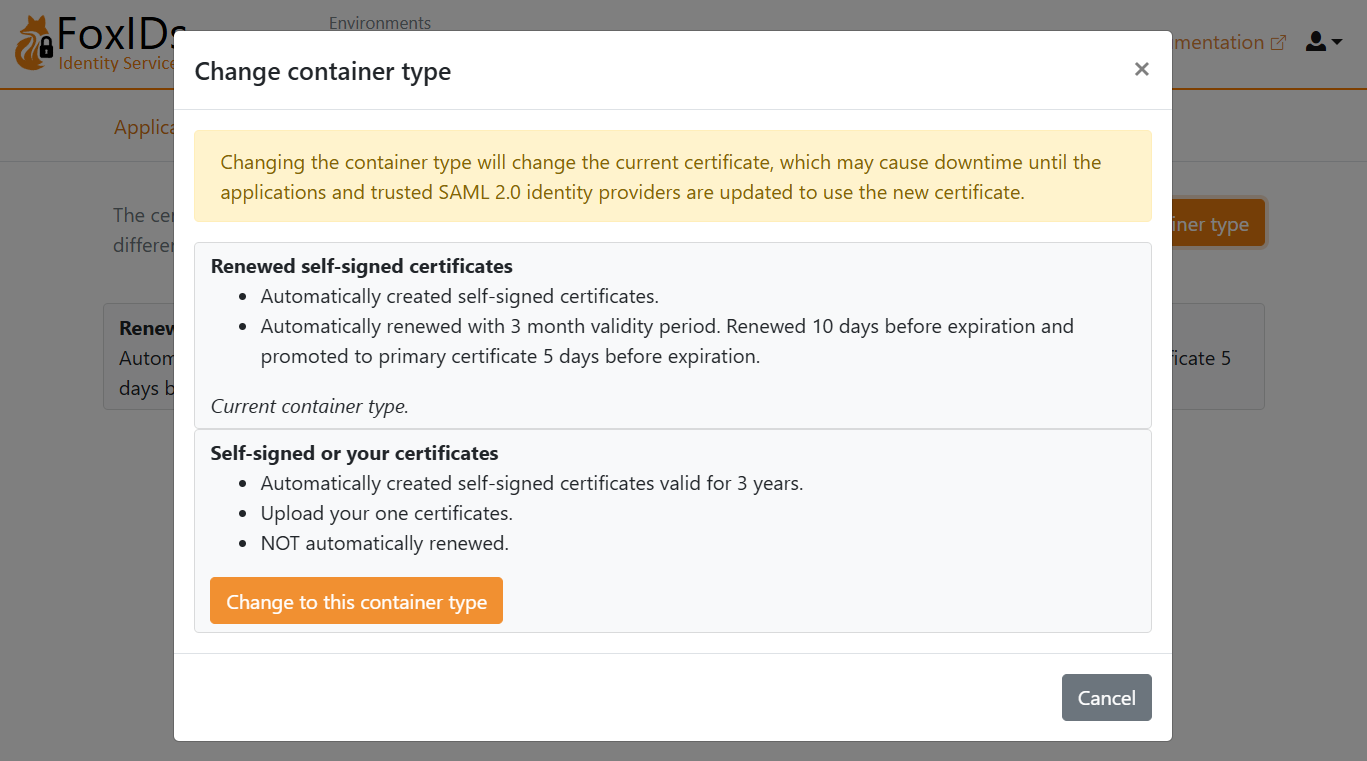
- Find Self-signed or your certificate and click Change to this container type
- The self-signed certificate is valid for 3 years, and you can optionally upload your own certificate
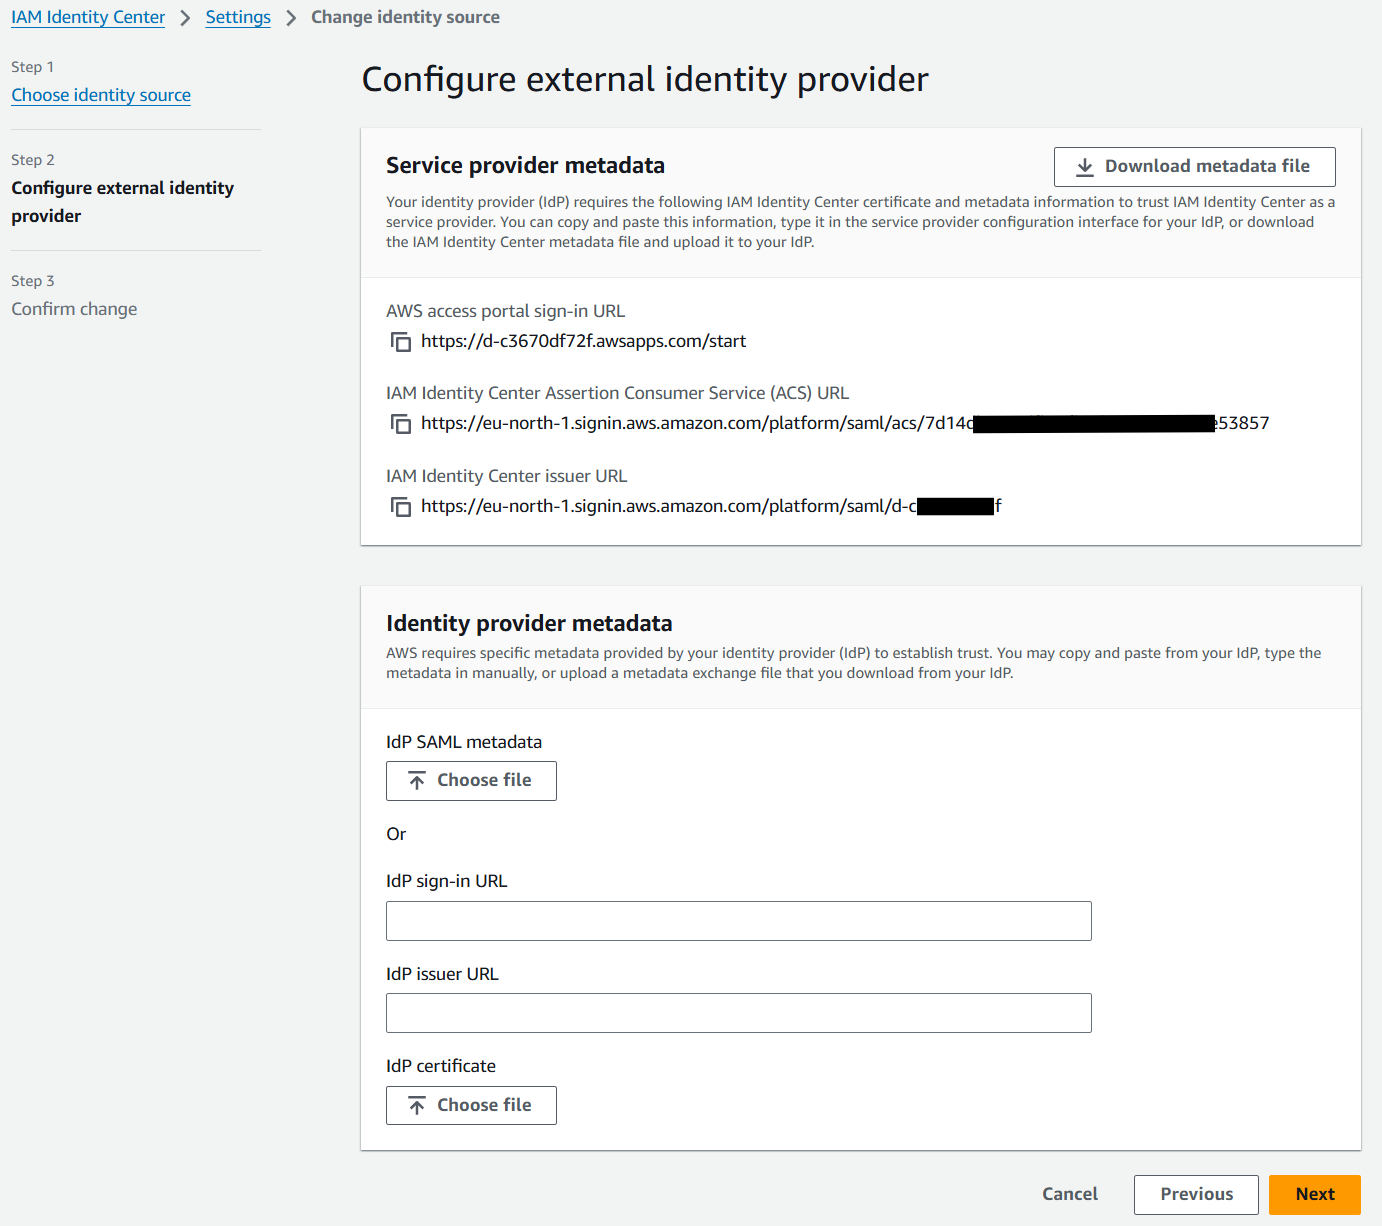
2 - Then go to the Amazon IAM Identity Center page in the AWS portal
- Navigate to Amazon IAM Identity Center
- Click Settings
- Click Choose identity source (under the Identity source section in the Actions menu)
- Select External identity provider
- Click Next
- Copy the IAM Identity Center Assertion Consumer Service (ACS) URL and save it for later
- Copy the IAM Identity Center issuer URL and save it for later
3 - Then create a SAML 2.0 application in FoxIDs Control Client
- Select the Applications tab
- Click New application
- Click Web application (SAML 2.0)
- Add the Name e.g.
Amazon IAM Identity Center - Set the Application issuer to the IAM Identity Center issuer URL you copied
- Set the Assertion consumer service (ACS) URL to the IAM Identity Center Assertion Consumer Service (ACS) URL you copied
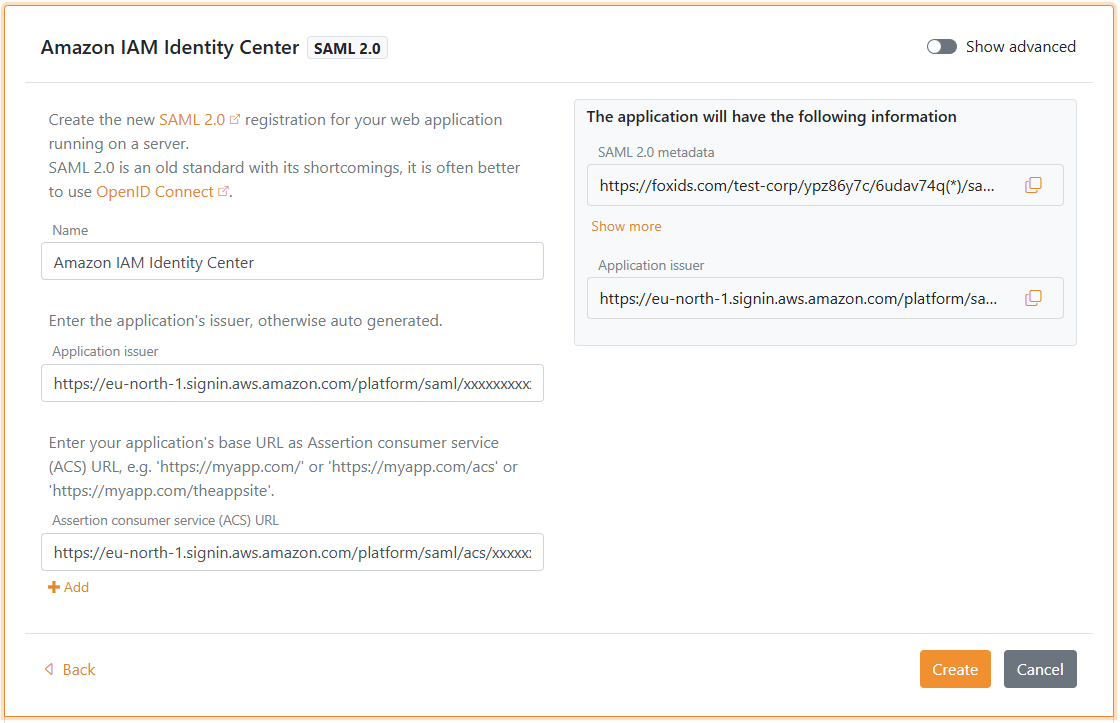
- Click Create
- Click Change application to open the application in edit mode
- Click Show advanced
- Set the Authn request binding to Post
- Set the NameID format to
urn:oasis:names:tc:SAML:1.1:nameid-format:emailAddress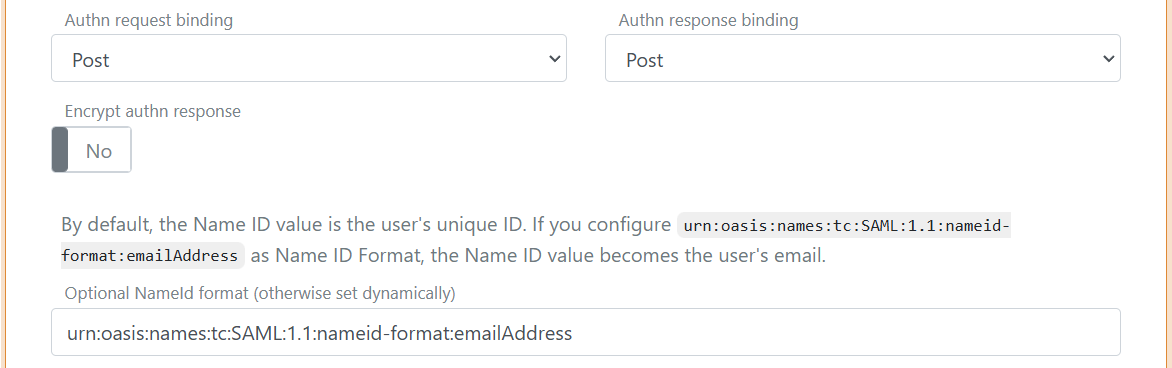
- At the bottom of the application, set the NameID format in metadata to
urn:oasis:names:tc:SAML:1.1:nameid-format:emailAddress - Click Update
- Go to the top of the application and find the SAML 2.0 Metadata URL link, open it in a browser, and save the page as an XML file
4 - Go back to the Amazon IAM Identity Center in AWS portal
- Find the IdP SAML metadata and click Choose file
- Select the metadata file from FoxIDs
- Click Next
- Enter
ACCEPT - Click Change identity source
- In the Identity source section, select the AWS access portal URL link to test the sign-in flow (you may need to create a user in FoxIDs first)
Amazon IAM Identity Center does not support single sign-out.