Connect to Microsoft Entra ID with SAML 2.0
Connect FoxIDs as an external identity provider for Microsoft Entra ID with SAML 2.0.
By configuring an OpenID Connect authentication method and Microsoft Entra ID as a SAML 2.0 application FoxIDs become a bridge between OpenID Connect and SAML 2.0 and automatically convert JWT (OAuth 2.0) claims to SAML 2.0 claims.
Configure Microsoft Entra ID
This guide describes how to set up FoxIDs as an external identity provider for Microsoft Entra ID. Users are connected to Microsoft Entra ID users with their Immutable ID.
1 - Start by configuring a certificate in FoxIDs Control Client
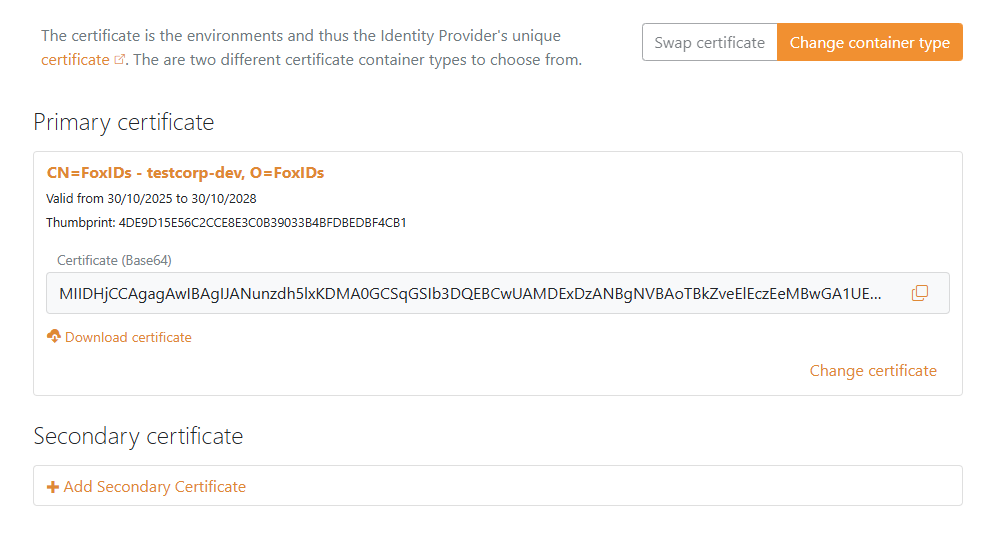
You are required to upload the SAML 2.0 signing certificate used in FoxIDs to Microsoft Entra ID. It is therefore necessary to use a long-lived certificate in FoxIDs, e.g. valid for 3 years.
- Select the Certificates tab
- Click Change Container type
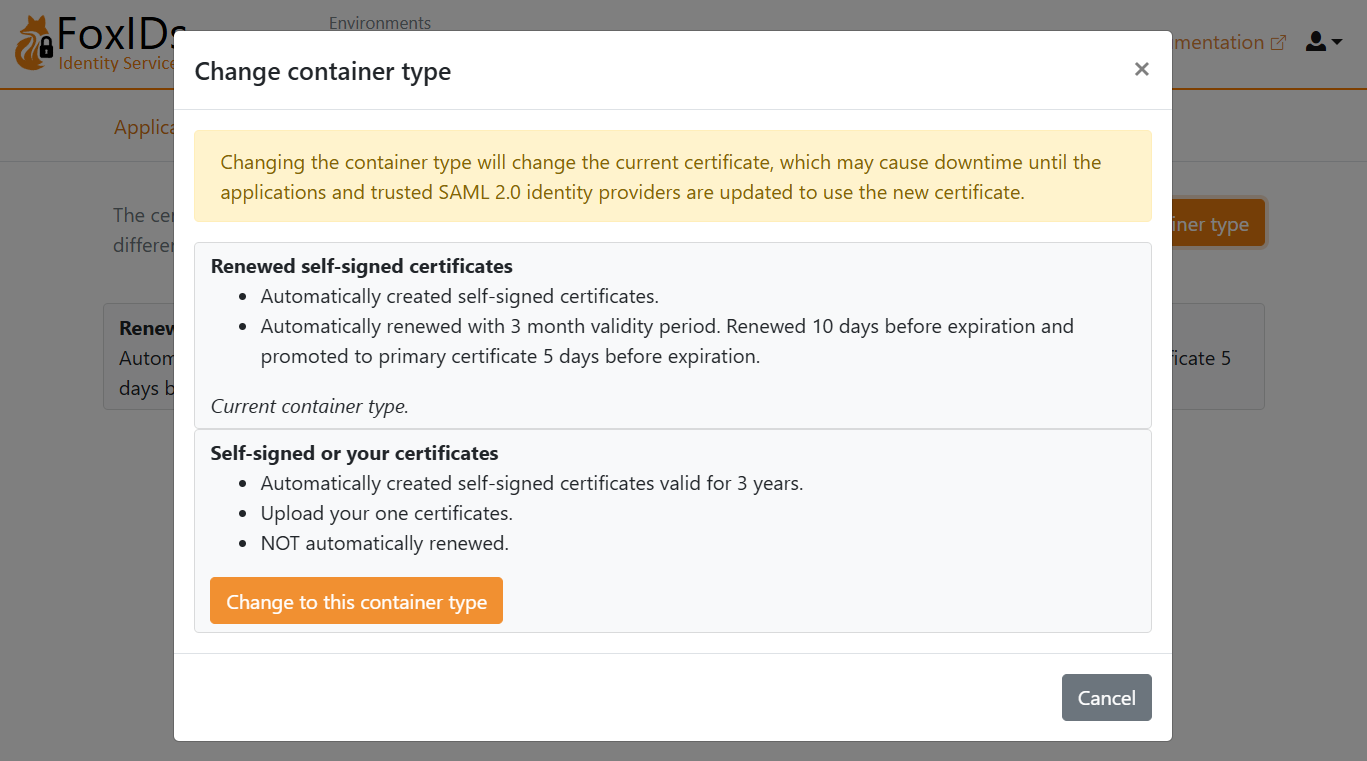
- Find Self-signed or your certificate and click Change to this container type
- The self-signed certificate is valid for 3 years, and you can optionally upload your own certificate
2 - Then create a SAML 2.0 application in FoxIDs Control Client
- Select the Applications tab
- Click New application
- Click Web application (SAML 2.0)
- Add the Name e.g.
Microsoft Entra ID - Set the Application issuer to
urn:federation:MicrosoftOnline - Set the Assertion consumer service (ACS) URL to
https://login.microsoftonline.com/login.srf
- Click Create
- Click Change application to open the application in edit mode
- Click Show advanced
- Set the Authn request binding to Post
- Set the NameID format to
urn:oasis:names:tc:SAML:2.0:nameid-format:persistent - Set the Optional logged out URL and Optional single logout URL to
https://login.microsoftonline.com/login.srf
- Set the Authn response sign type to
Sign assertion
- Go to the top of the application, find the Application information section and click Show more
- Copy the IdP Issuer
- Copy the Single Sign-On URL
- Copy the Single Logout URL
- Copy the IdP Signing Certificate in Base64 format
- Select the Claims Transform tab
- Click Add claim transform and click Map to add a NameID claim with the user's Immutable ID matching the Microsoft Entra ID user's Immutable ID.
- Set New claim to
http://schemas.xmlsoap.org/ws/2005/05/identity/claims/nameidentifier- which is the NameID claim URI - Set Select claim to
http://schemas.foxids.com/ws/identity/claims/immutableid - Click Update
You need to set the user's Immutable ID as a claim in FoxIDs.
To set the Immutable ID on an internal user, select the Users tab and then Internal Users tab find the user and add a claim with the claim typeimmutable_idand the value of the Immutable ID in Microsoft Entra ID - it should be base64 encoded.
Theimmutable_idclaim type is mapped to the SAML 2.0 claim URIhttp://schemas.foxids.com/ws/identity/claims/immutableidin FoxIDs.
3 - Then configure domain federation in Microsoft Entra ID with PowerShell
It is not possible to configure an external SAML 2.0 identity provider in the Microsoft Entra ID Portal. You need to use PowerShell.
- Open PowerShell as administrator
- Install the Microsoft Graph PowerShell module if not already installed:
Install-Module -Name Microsoft.Graphand selectA- Optionally, install for current user:
Install-Module Microsoft.Graph -Scope CurrentUser -Force - Or update the module:
Update-Module -Name Microsoft.Graphand selectA
- Optionally, install for current user:
- Connect to Microsoft Graph:
Connect-MgGraph -Scopes "Domain.ReadWrite.All,Directory.AccessAsUser.All" - Set up the configuration variables:
$domainName = "your-domain.com" # The domain name to configure federation for $idpIssuer = "copied IdP Issuer from FoxIDs" $ssoUrl = "copied Single Sign-On URL from FoxIDs" $sloUrl = "copied Single Logout URL from FoxIDs" $signingCertBase64 = @" -----BEGIN CERTIFICATE----- copied IdP Signing Certificate from FoxIDs -----END CERTIFICATE----- "@ - configure the domain federation:
FederatedIdpMfaBehavior can be set to:New-MgDomainFederationConfiguration -DomainId $domainName ` -IssuerUri $idpIssuer ` -PassiveSignInUri $ssoUrl ` -SignOutUri $sloUrl ` -SigningCertificate $signingCertBase64 ` -PreferredAuthenticationProtocol "saml" ` -FederatedIdpMfaBehavior "acceptIfMfaDoneByFederatedIdp"acceptIfMfaDoneByFederatedIdp- Entra accepts MFA from FoxIDs; if FoxIDs didn't do MFA, Entra will do it.enforceMfaByFederatedIdp- If a policy needs MFA, Entra will send the user back to FoxIDs to complete MFA.rejectMfaByFederatedIdp- Entra always does MFA itself; MFA at FoxIDs is ignored.
- Validate the configuration:
Get-MgDomainFederationConfiguration -DomainId $domainName
# or
Get-MgDomain -DomainId $domainName | fl Id, AuthenticationType
4a - Then configure the user's Immutable ID in Microsoft Entra ID with PowerShell
- Open PowerShell as administrator
- Install the Microsoft Graph PowerShell module if not already installed:
Install-Module -Name Microsoft.Graphand selectA- Optionally, install for current user:
Install-Module Microsoft.Graph -Scope CurrentUser -Force - Or update the module:
Update-Module -Name Microsoft.Graphand selectA
- Optionally, install for current user:
- Connect to Microsoft Graph:
Connect-MgGraph -Scopes "Domain.ReadWrite.All" - Set up the configuration variables:
$userId = "user-id@my-domain.com" # The user's User Principal Name (UPN) or the Object ID $immutableId = "immutable-id" # The user's Immutable ID - base64 encoded. - Configure the user's Immutable ID:
Set-MgUser -UserId $userId -OnPremisesImmutableId $immutableId - Validate the configuration:
Get-MgUser -UserId $userId | fl Id, OnPremisesImmutableId
If the user already has an Immutable ID set, you need to move the user away from the federated domain, set the Immutable ID, and then move the user back to the federated domain.
- Move the user to a non-federated domain:
$userId = "user-id@my-domain.com" $userIdTemp = "user-id@yourtenant.onmicrosoft.com" Update-MgUser -UserId $userId -UserPrincipalName $userIdTemp - Set the user's new Immutable ID:
$immutableId = "immutable-id" # The user's Immutable ID - base64 encoded. Set-MgUser -UserId $userIdTemp -OnPremisesImmutableId $immutableId - Move the user back to the federated domain:
Update-MgUser -UserId $userIdTemp -UserPrincipalName $userId
4b - Or alternatively configure the user's Immutable ID in Microsoft Entra ID with Graph API
- Get an access token for Microsoft Graph API with the required scopes.
- Make a
PATCHrequest to the/users/{id | userPrincipalName}endpoint with the following JSON body:
Replace{ "onPremisesImmutableId": "immutable-id" }immutable-idwith the desired Immutable ID value that matches the NameID claim sent from FoxIDs. - Validate the configuration by making a
GETrequest to the/users/{id | userPrincipalName}endpoint and checking theonPremisesImmutableIdproperty in the response.
If the user already has an Immutable ID set, you need to move the user away from the federated domain, set the Immutable ID, and then move the user back to the federated domain.
- Make a
PATCHrequest to the/users/{id | userPrincipalName}endpoint to change theuserPrincipalNameto a non-federated domain. - Make a
PATCHrequest to set the new Immutable ID. - Make a
PATCHrequest to change theuserPrincipalNameback to the federated domain. - Validate the configuration by making a
GETrequest to the/users/{id | userPrincipalName}endpoint and checking theonPremisesImmutableIdproperty in the response.