Connect to Google Workspace with SAML 2.0
Connect FoxIDs as an external identity provider for Google Workspace with SAML 2.0.
By configuring an OpenID Connect authentication method and Google Workspace as a SAML 2.0 application FoxIDs become a bridge between OpenID Connect and SAML 2.0 and automatically convert JWT (OAuth 2.0) claims to SAML 2.0 claims.
Configure Google Workspace
This guide describes how to set up FoxIDs as an external identity provider for Google Workspace. Users are connected with their email address and must already exist in Google Workspace.
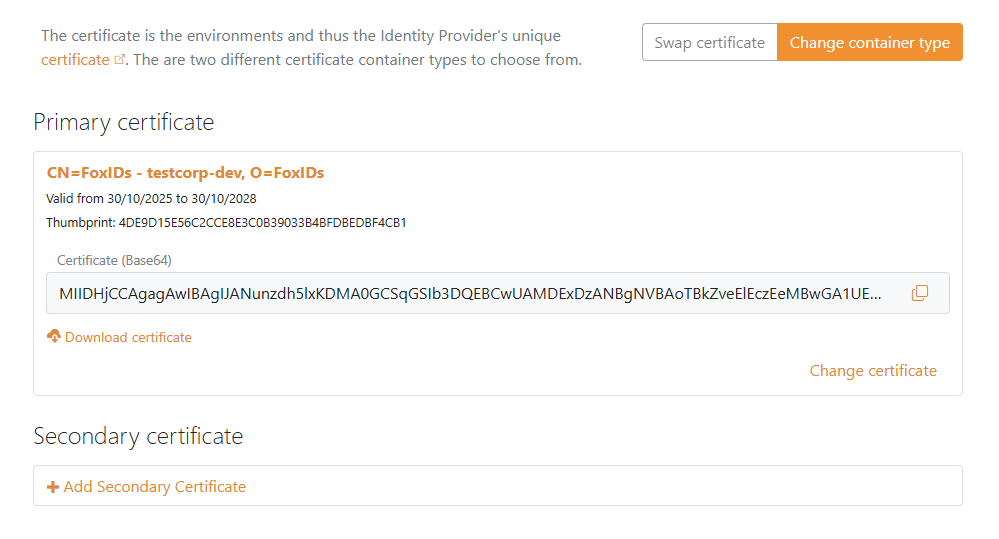
1 - Start by configuring a certificate in FoxIDs Control Client
You are required to upload the SAML 2.0 metadata from FoxIDs to Google Workspace. It is therefore necessary to use a long-lived certificate in FoxIDs, e.g. valid for 3 years.
- Select the Certificates tab
- Click Change Container type
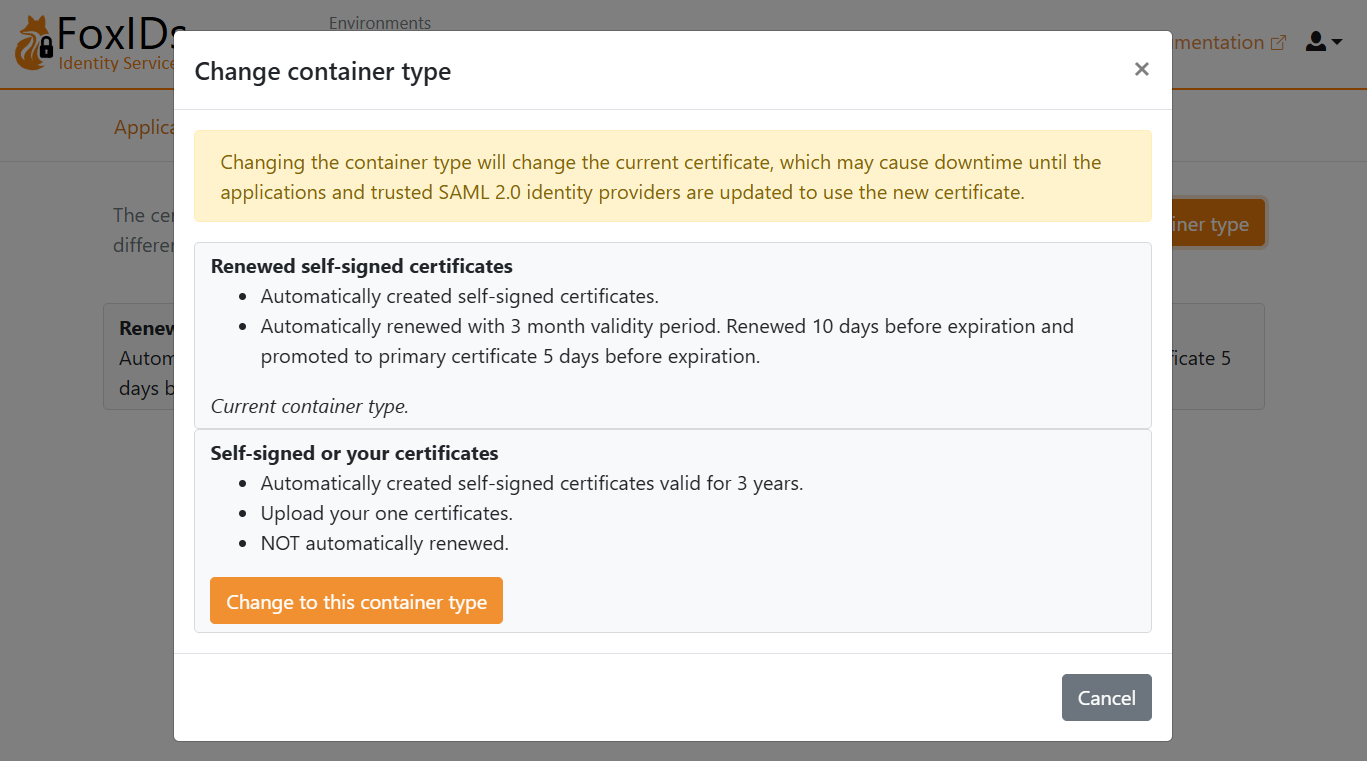
- Find Self-signed or your certificate and click Change to this container type
- The self-signed certificate is valid for 3 years, and you can optionally upload your own certificate
2 - Then start creating a SAML 2.0 application in FoxIDs Control Client
- Select the Applications tab
- Click New application
- Click Show advanced
- Click Web application (SAML 2.0)
- Enter the Name, e.g.
Google Workspace - In the panel on the right, click Show more in the section labeled The application will have the following information

- Save the application information for later use in Google Workspace:
- Copy the IdP Issuer
- Copy the Single Sign-On URL
- Under IdP Signing Certificate, click Download certificate
- Keep the FoxIDs application UI open for later use
3 - Then go to the Google Workspace portal
- Open the Admin console and sign in if prompted
- Navigate to Security > Authentication > SSO with third party IdP
- In the Third-party SSO profiles section, click ADD SAML PROFILE
- Enter an SSO profile name
- Under Autofill email, select Send email address in the URL as the login_hint parameter
- Find the IDP details section
- Set the IDP entity ID to the FoxIDs application's IdP Issuer value you copied
- Set the Sign-in page URL to the FoxIDs application's Single Sign-On URL value you copied
- (Optional) Set the Sign-out page URL to the page users should land on after sign-out. Google Workspace does not support single logout, so FoxIDs is not invoked during sign-out.
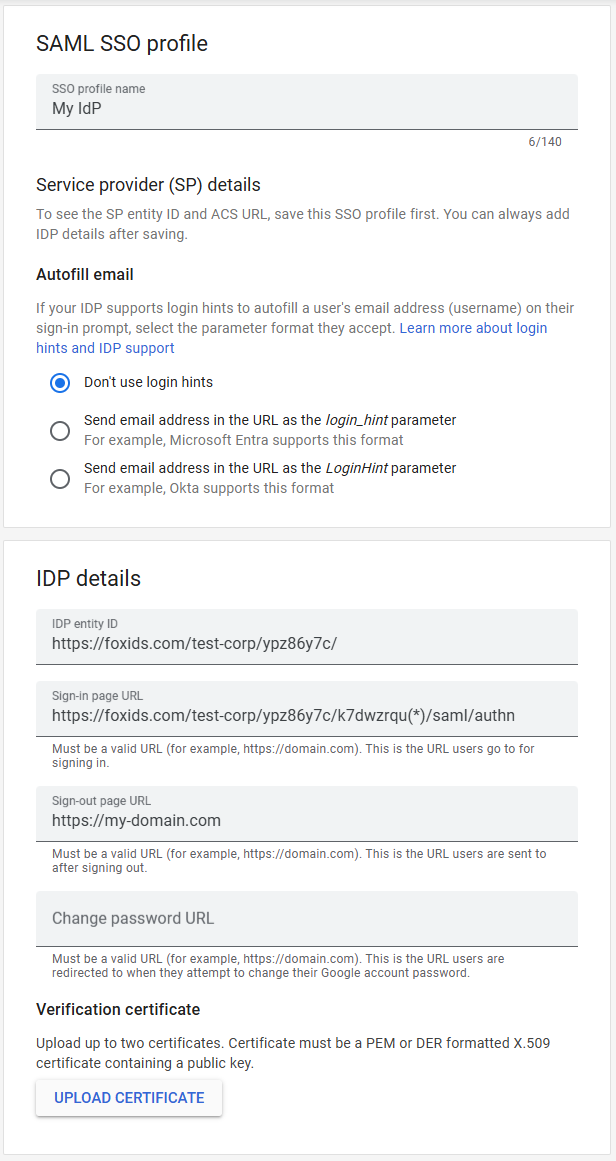
- Click UPLOAD CERTIFICATE and upload the IdP Signing Certificate you downloaded from FoxIDs
- Click Save
- In the SP details section, save the information for later use in FoxIDs:
- Copy the EntityID Issuer
- Copy the ACS URL
4 - Then continue creating the SAML 2.0 application in FoxIDs Control Client
- Go back to the FoxIDs application UI you kept open
- Set the Application issuer to the Google Workspace EntityID Issuer you copied
- Set the Assertion consumer service (ACS) URL to the Google Workspace ACS URL you copied

- Click Create
- Click Change application to open the application in edit mode
- Select the Claims Transform tab
- Click Add claim transform, choose Map, and add a NameID claim with the user's email address matching the Google Workspace user's email address.
- Set New claim to
http://schemas.xmlsoap.org/ws/2005/05/identity/claims/nameidentifier- which is the NameID claim URI - Set Select claim to
http://schemas.xmlsoap.org/ws/2005/05/identity/claims/emailaddress - Click Update
You need to activate the single sign-on for users in Google Workspace. See Google Workspace documentation for more information.