Interconnect FoxIDs environments with OpenID Connect
Use this integration when users in one FoxIDs environment should authenticate in another FoxIDs environment. The two environments can be in the same tenant, in different tenants, or in different FoxIDs deployments.
The trusting environment connects to the other environment with an OpenID Connect authentication method. The trusted environment exposes an OpenID Connect application registration. This makes it possible to centralize user authentication in one environment and reuse it from another environment.
You can easily connect two environments in the same tenant with an Environment Link.
Choose an Environment Link when both environments are in the same tenant and you want the simplest setup. Choose OpenID Connect when you need to connect across tenants or across separate FoxIDs deployments.
The integration supports OpenID Connect authentication (login), RP-initiated logout, and front-channel logout. A session is established when the user authenticates and is invalidated on logout.
You can test OpenID Connect environment connections with the online web app sample (sample docs) by clicking
Log inand thenParallel FoxIDs environment.
Take a look at the environment connection configuration in FoxIDs Control: https://control.foxids.com/test-corp
Get read access with the userreader@foxids.comand passwordgEh#V6kSwthen take a look at theparallelandProductionenvironments.
The following steps configure an OpenID Connect authentication method in one FoxIDs environment and an OpenID Connect application registration in the other environment. After that, the first environment can trust the second environment to authenticate users.
Configure integration
1 - Start in your FoxIDs environment by creating an OpenID Connect authentication method in FoxIDs Control Client
- Add the name
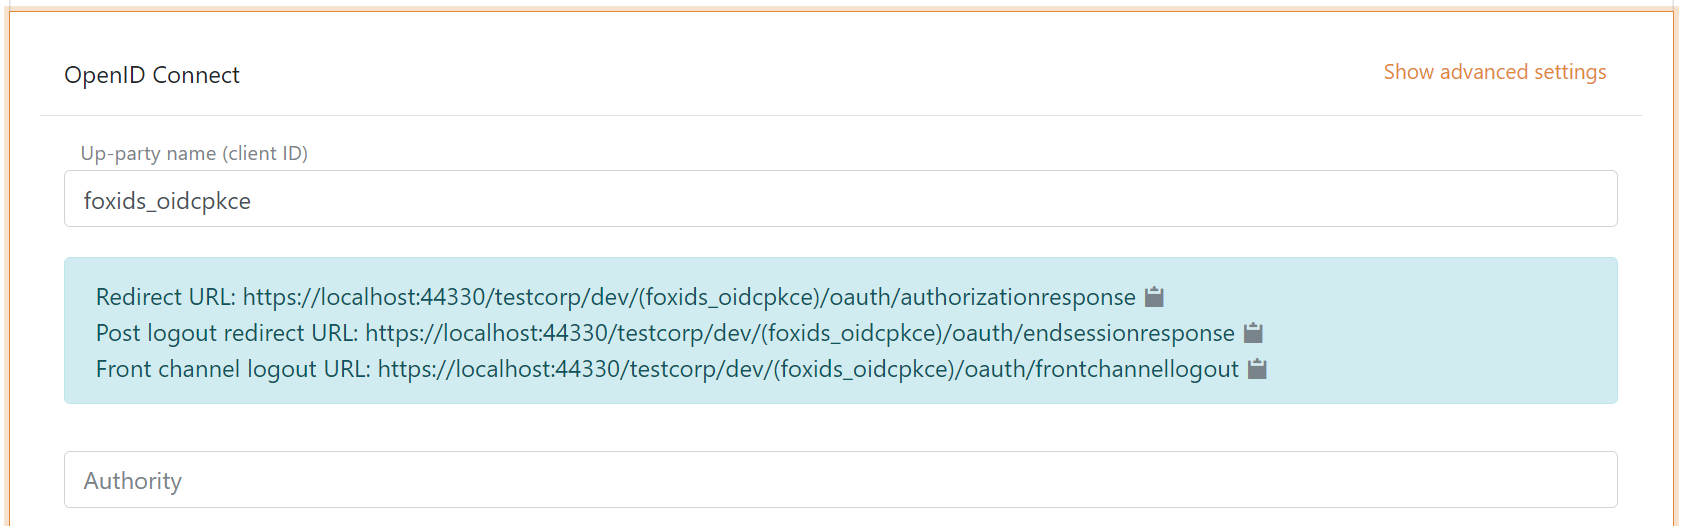
It is now possible to read the Redirect URL, Post logout redirect URL and Front channel logout URL.
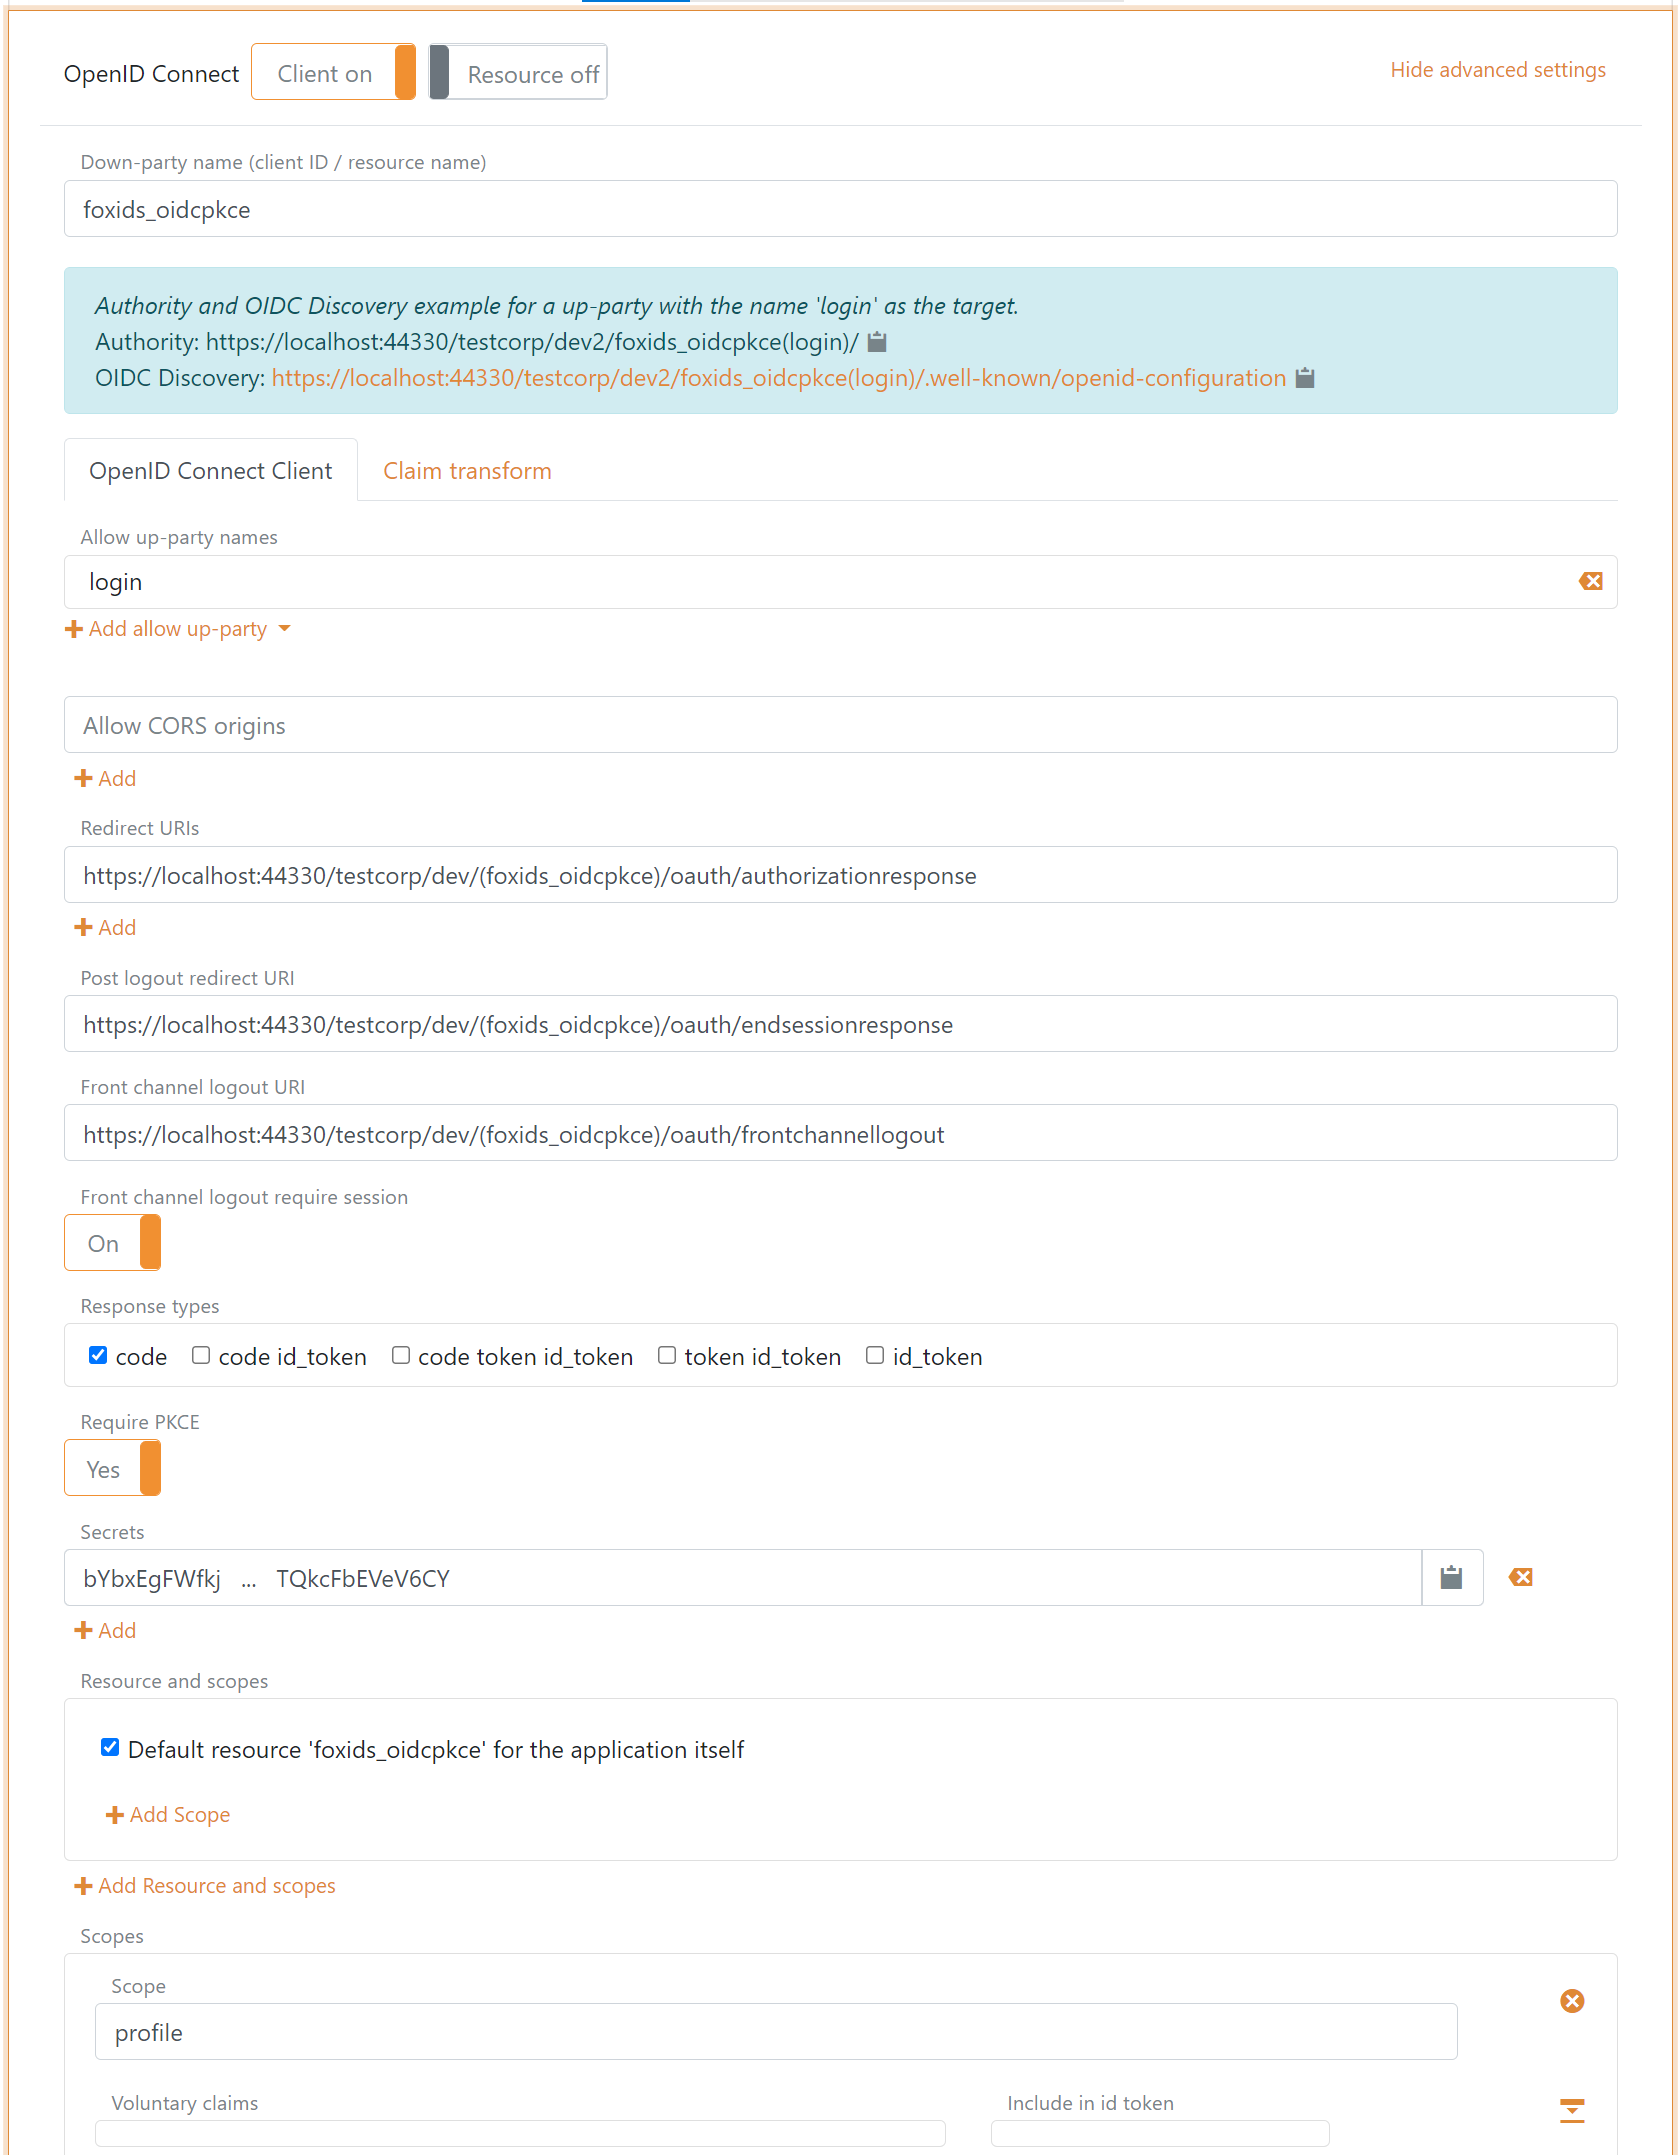
2 - Then go to the parallel FoxIDs environment and create the application registration client
The client is a confidential client using Authorization Code Flow and PKCE.
- Specify client name in application registration name.
- Select allowed authentication methods. E.g.
loginor some other authentication method. - Select show advanced.
- Specify redirect URI read in your authentication method.
- Specify post logout redirect URI read in your authentication method.
- Specify front channel logout URI read in your authentication method.
- Specify a secret (remember the secret to the next step).
- Remove the
offline_access. - Remove / edit the scopes depending on your needs.
- Click create.
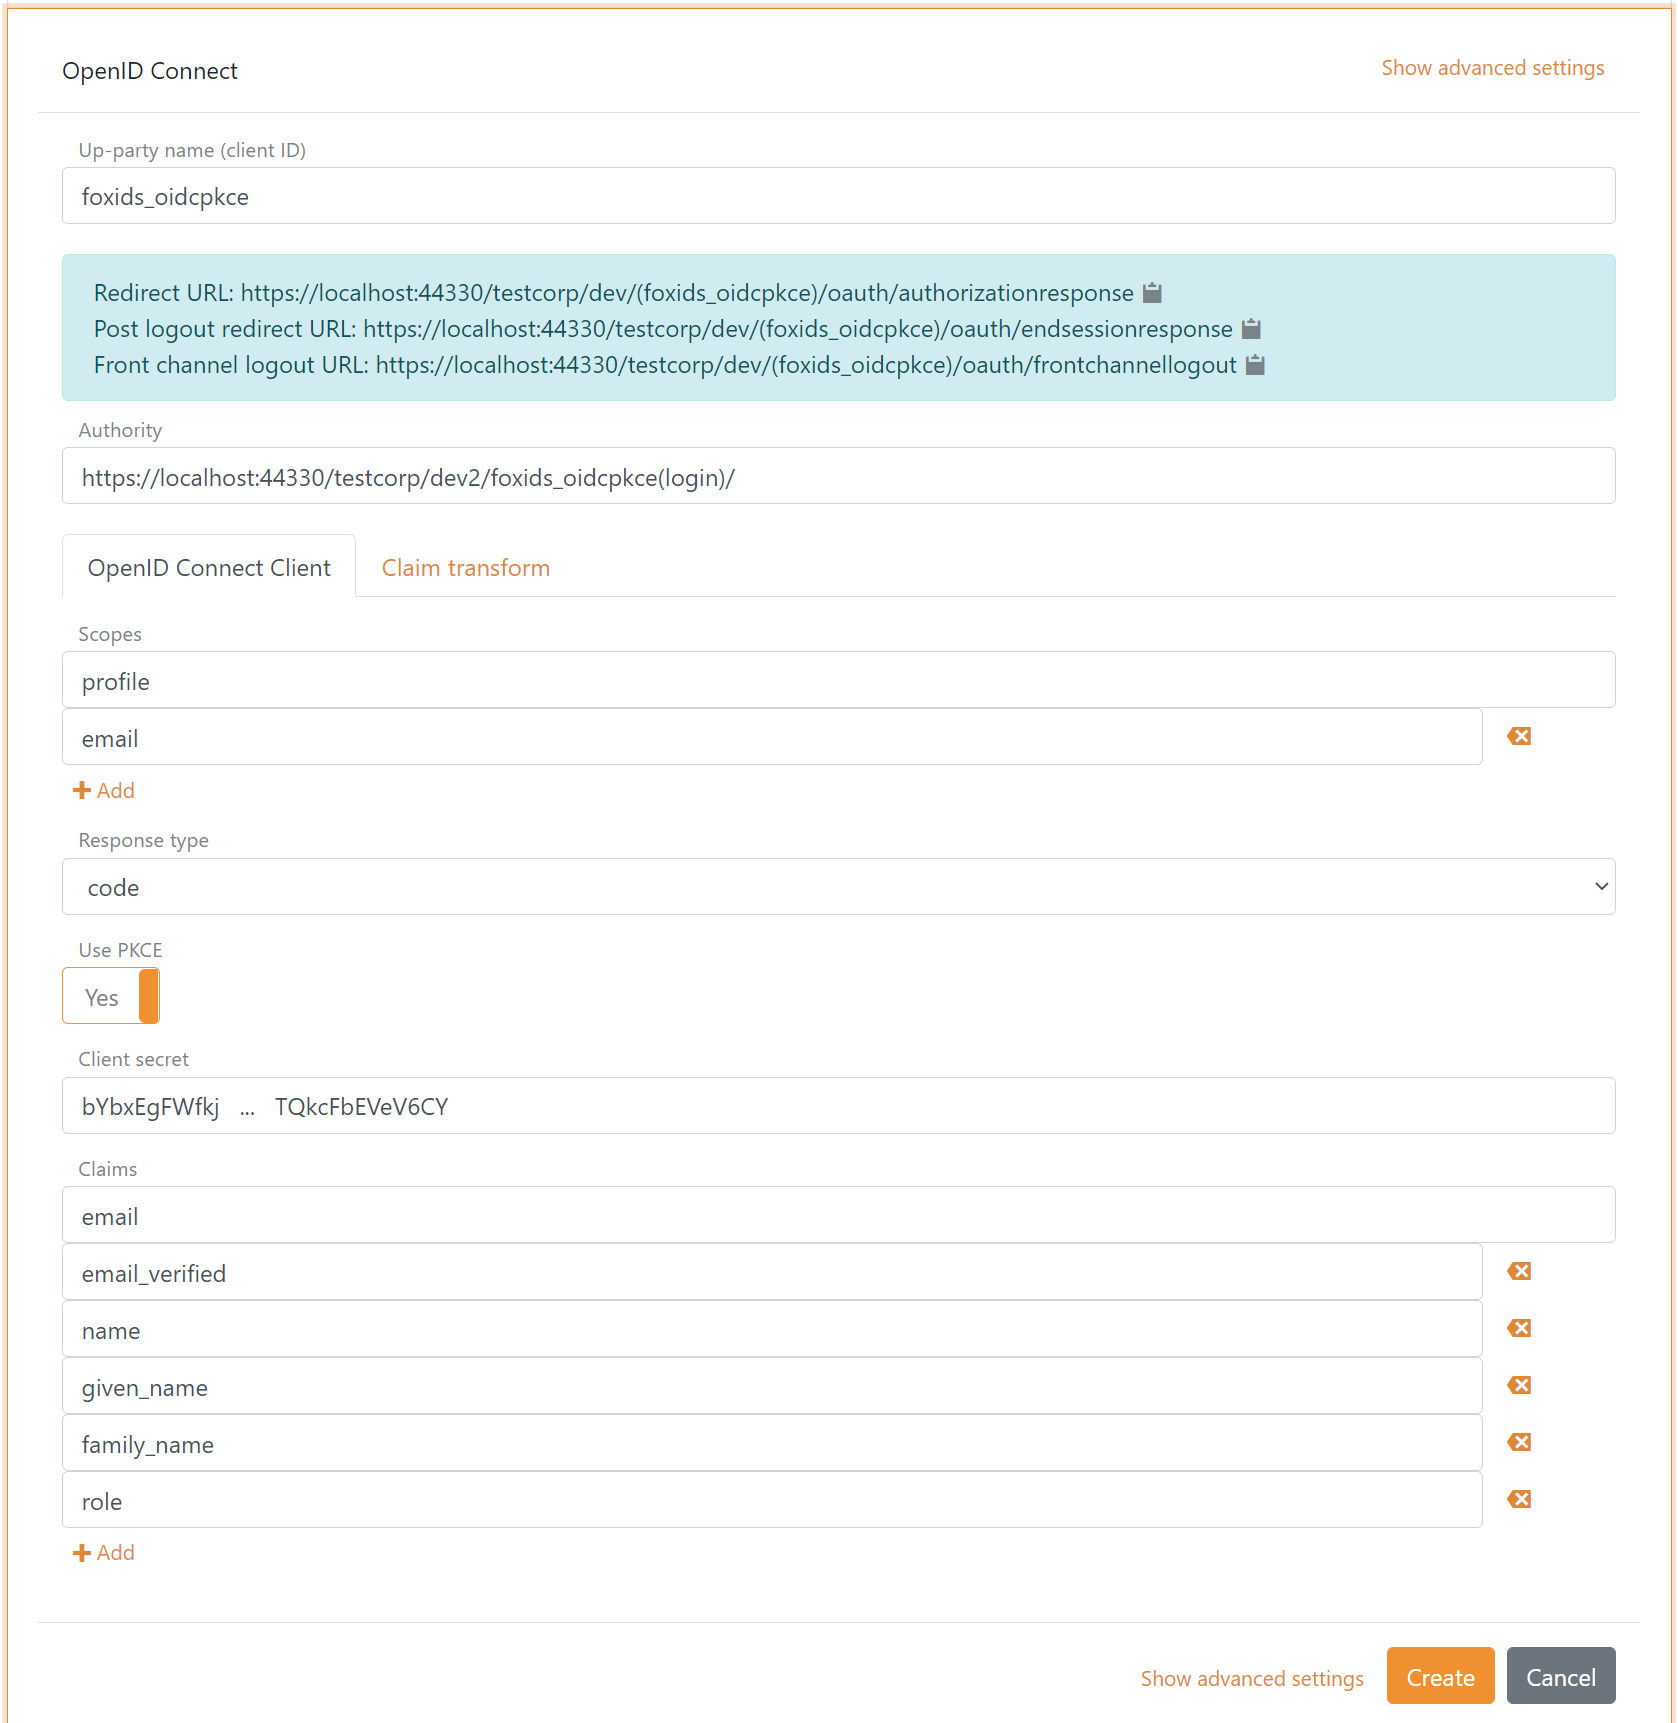
3 - Go back to your FoxIDs authentication method in FoxIDs Control Client
- Add the parallel FoxIDs environment application registration client authority.
Default the parallel environment use the
loginauthentication method to authenticate users with thehttps://localhost:44330/testcorp/dev2/foxids_oidcpkce(login)/authority.
It is possible to select another authentication method in the parallel environment. E.g.azure_adwith thehttps://localhost:44330/testcorp/dev2/foxids_oidcpkce(azure_ad)/authority. - Add the profile and email scopes (possible other or more scopes).
- Add the parallel FoxIDs environment application registration client's client secret.
- Add the claims which will be transferred from the authentication method to the application registrations. E.g., email, email_verified, name, given_name, family_name, role and possible the access_token claim to transfer the parallel FoxIDs environments access token.
- Click create.
That's it, you are done.
Your new authentication method can now be selected as an allowed authentication method in the application registrations in you environment.
The application registrations in you environment can read the claims from your authentication method. It is possible to add the access_token claim to include the parallel FoxIDs environments access token as a claim in the issued access token.