Connect to Amazon Cognito with OpenID Connect
FoxIDs can be connected to Amazon Cognito with OpenID Connect and authenticate users in your Amazon Cognito user pool.
You can add support for SAML 2.0 to your Amazon Cognito. By configuring Amazon Cognito as an OpenID Connect authentication method and a SAML 2.0 application FoxIDs become a bridge between OpenID Connect and SAML 2.0 and automatically convert JWT (OAuth 2.0) claims to SAML 2.0 claims.
Configure Amazon Cognito
This chapter describes how to configure a connection with OpenID Connect Authorization Code flow and read the users claims from the ID token.
1 - Start by creating an OpenID Connect authentication method in FoxIDs Control Client
Navigate to the Authentication tab
Click New authentication
Select OpenID Provider
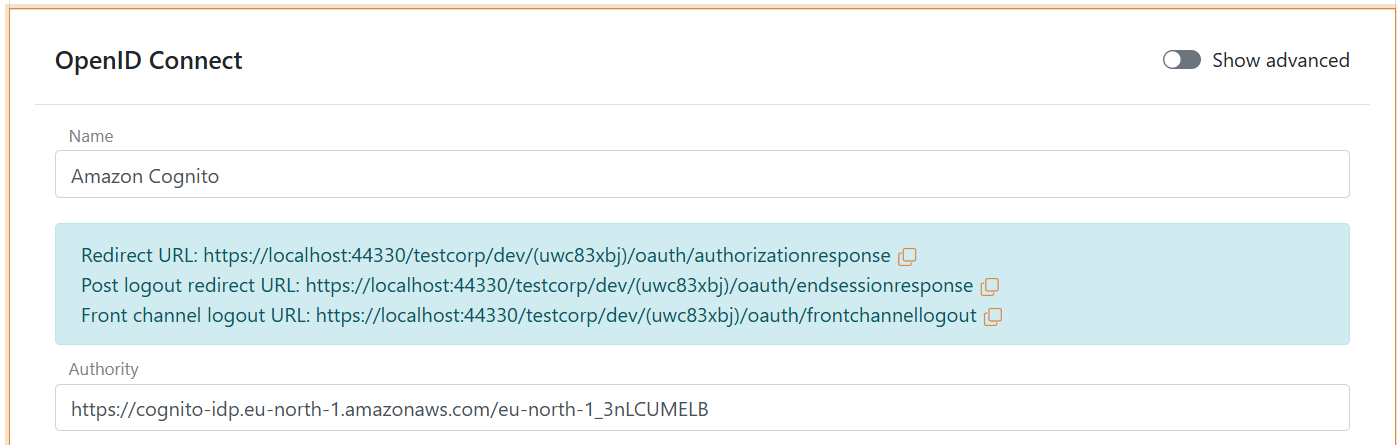
Add the Name e.g. Amazon Cognito
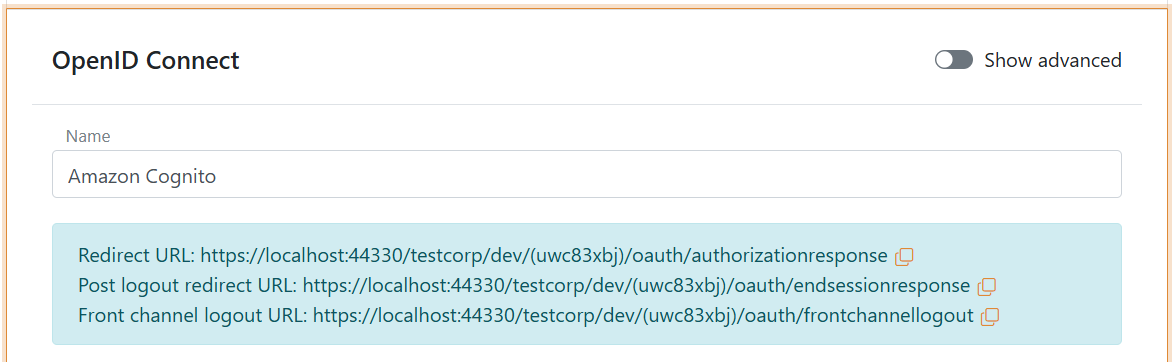
Read the Redirect URL and Post logout redirect URL and save it for later
2 - Then go to the Amazon Cognito AWS portal and create the a new app client
- Navigate to Amazon Cognito
- Select User pools
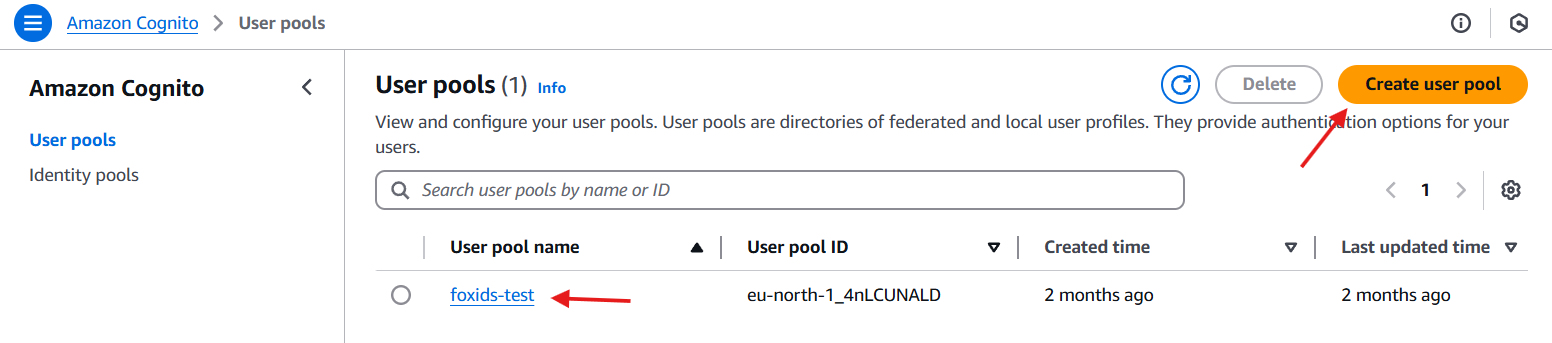
- Select existing user pool or create a new user pool
- Find Applications in the menu and click App clients
- Click Create app client in the top right corner
- Select Traditional web application
- Add the name in Name your application e.g. FoxIDs
- Add the FoxIDs Redirect URL from before in the Return URL field
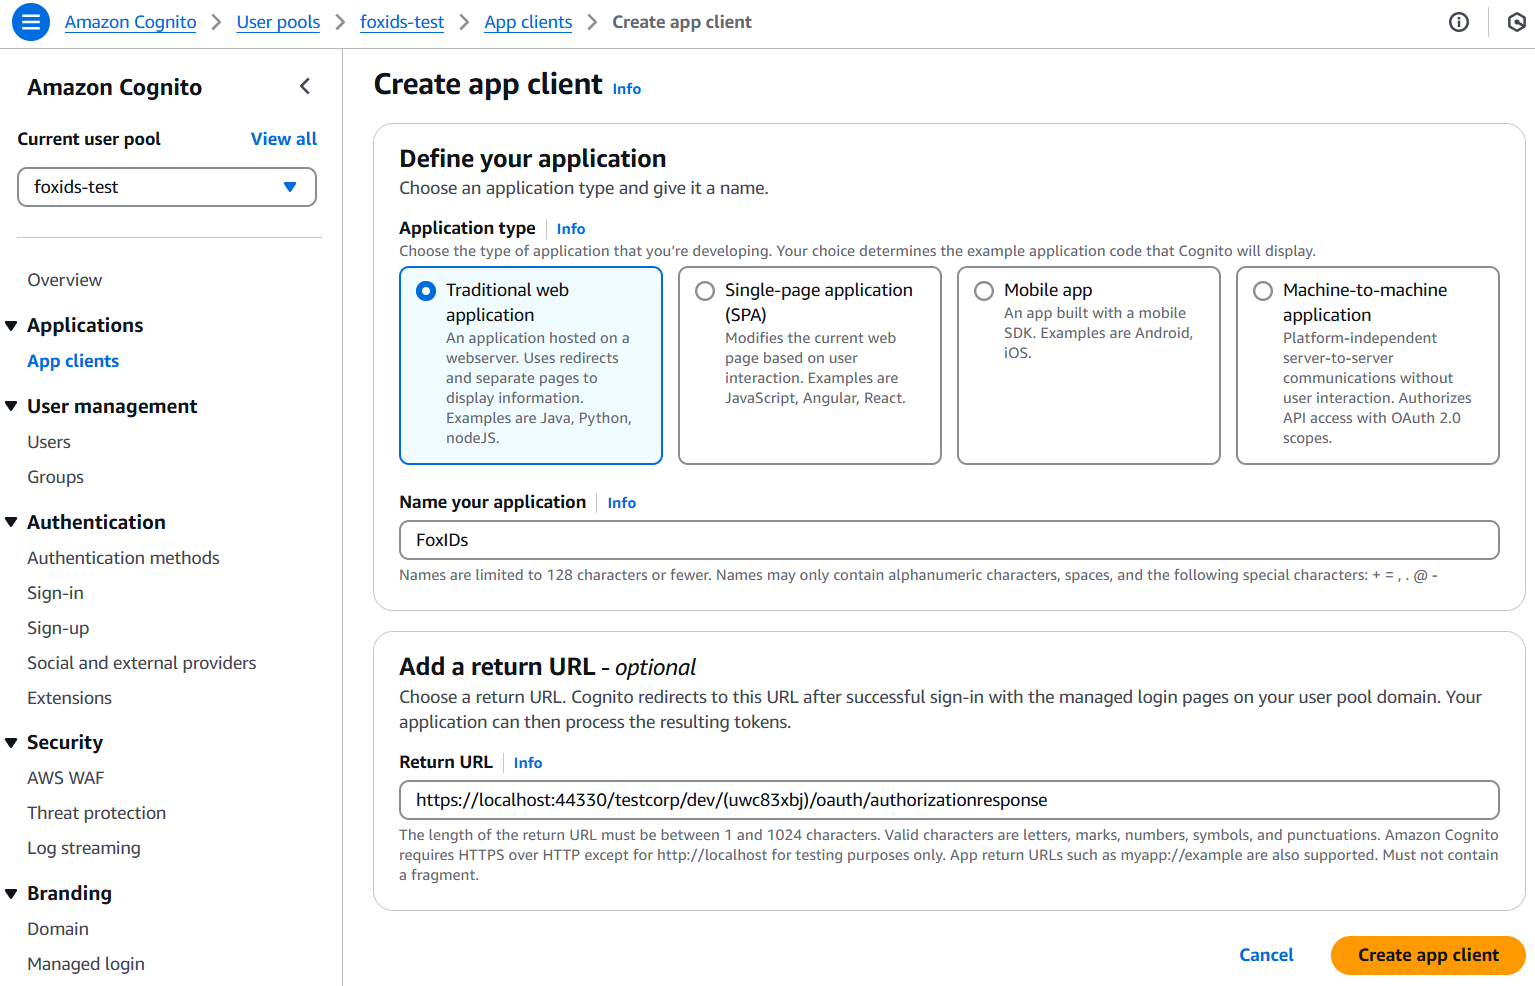
- Click Create app client
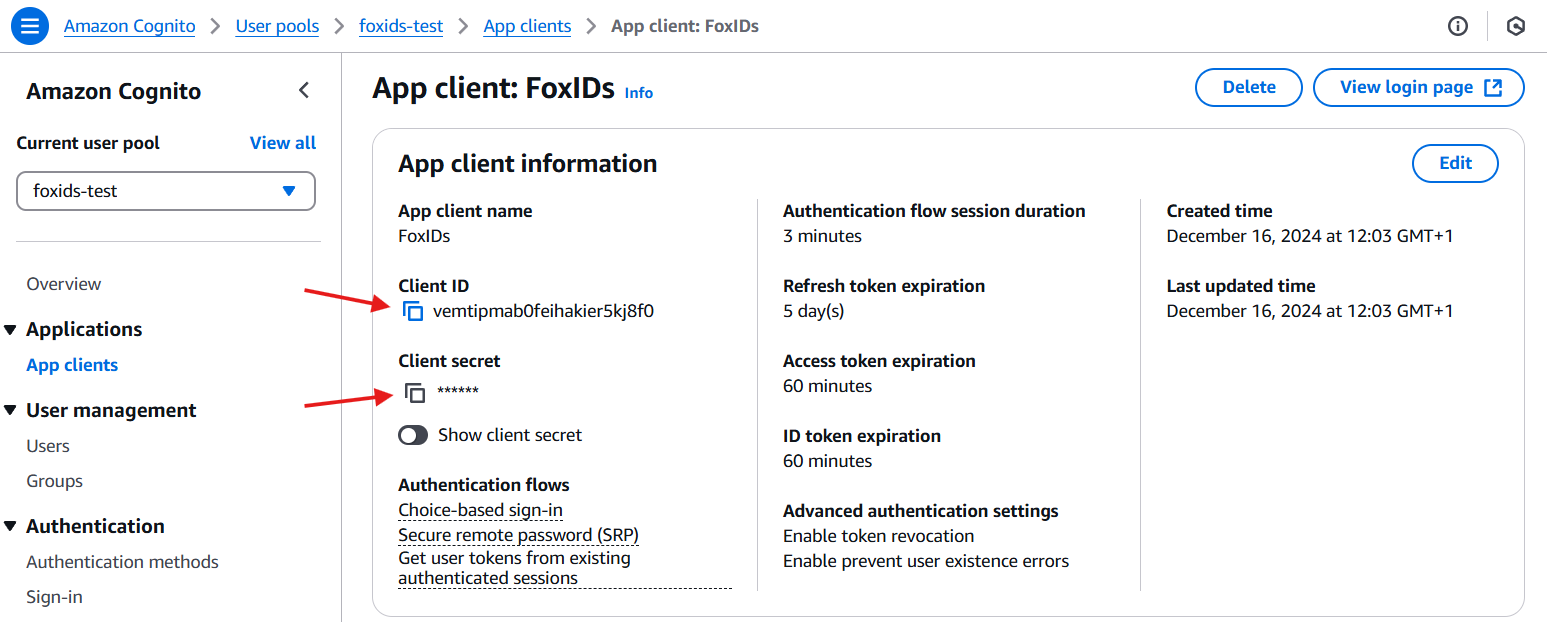
- Read the Client ID and Client secret and save it for later
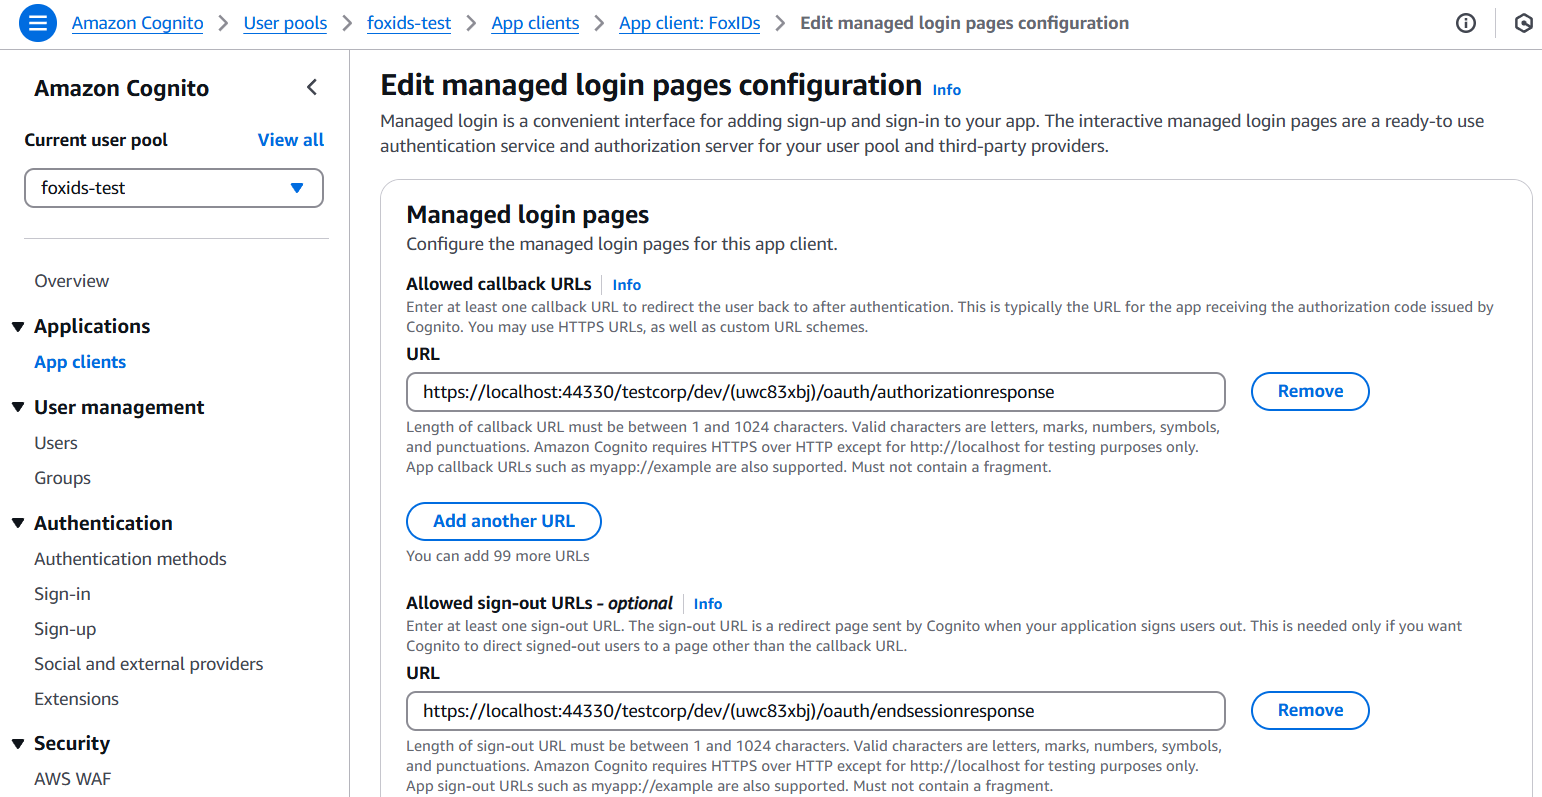
- Click Login pages and click Edit
- Find Allowed sign-out URLs - optional click Add sign-out URL
- Add the Post logout redirect URL from FoxIDs in the URL field
- You can optionnaly configure aditionally scopes like
phoneandprofile - Click Save changes
- Find the View quick setup guide and example code
- Find the authority in the example code (it is also called issuerURL) and save it for later
The authority is in this example ishttps://cognito-idp.eu-north-1.amazonaws.com/eu-north-1_3nLCUMELB
3 - Go back to the FoxIDs authentication method in FoxIDs Control Client
- Add the Authority from Amazon Cognito
- Click Show advanced in the top right corner of this configuration section
- Add the Optional custom SP client ID from Amazon Cognito called Client ID
- Add
emailto the scopes list, you can possible configure the scopesphoneandprofilein Amazon Cognito and FoxIDs - Add the Client secret from Amazon Cognito
- Set the Read claims from the ID token instead of the access token switch to Yes
- As Response mode select query
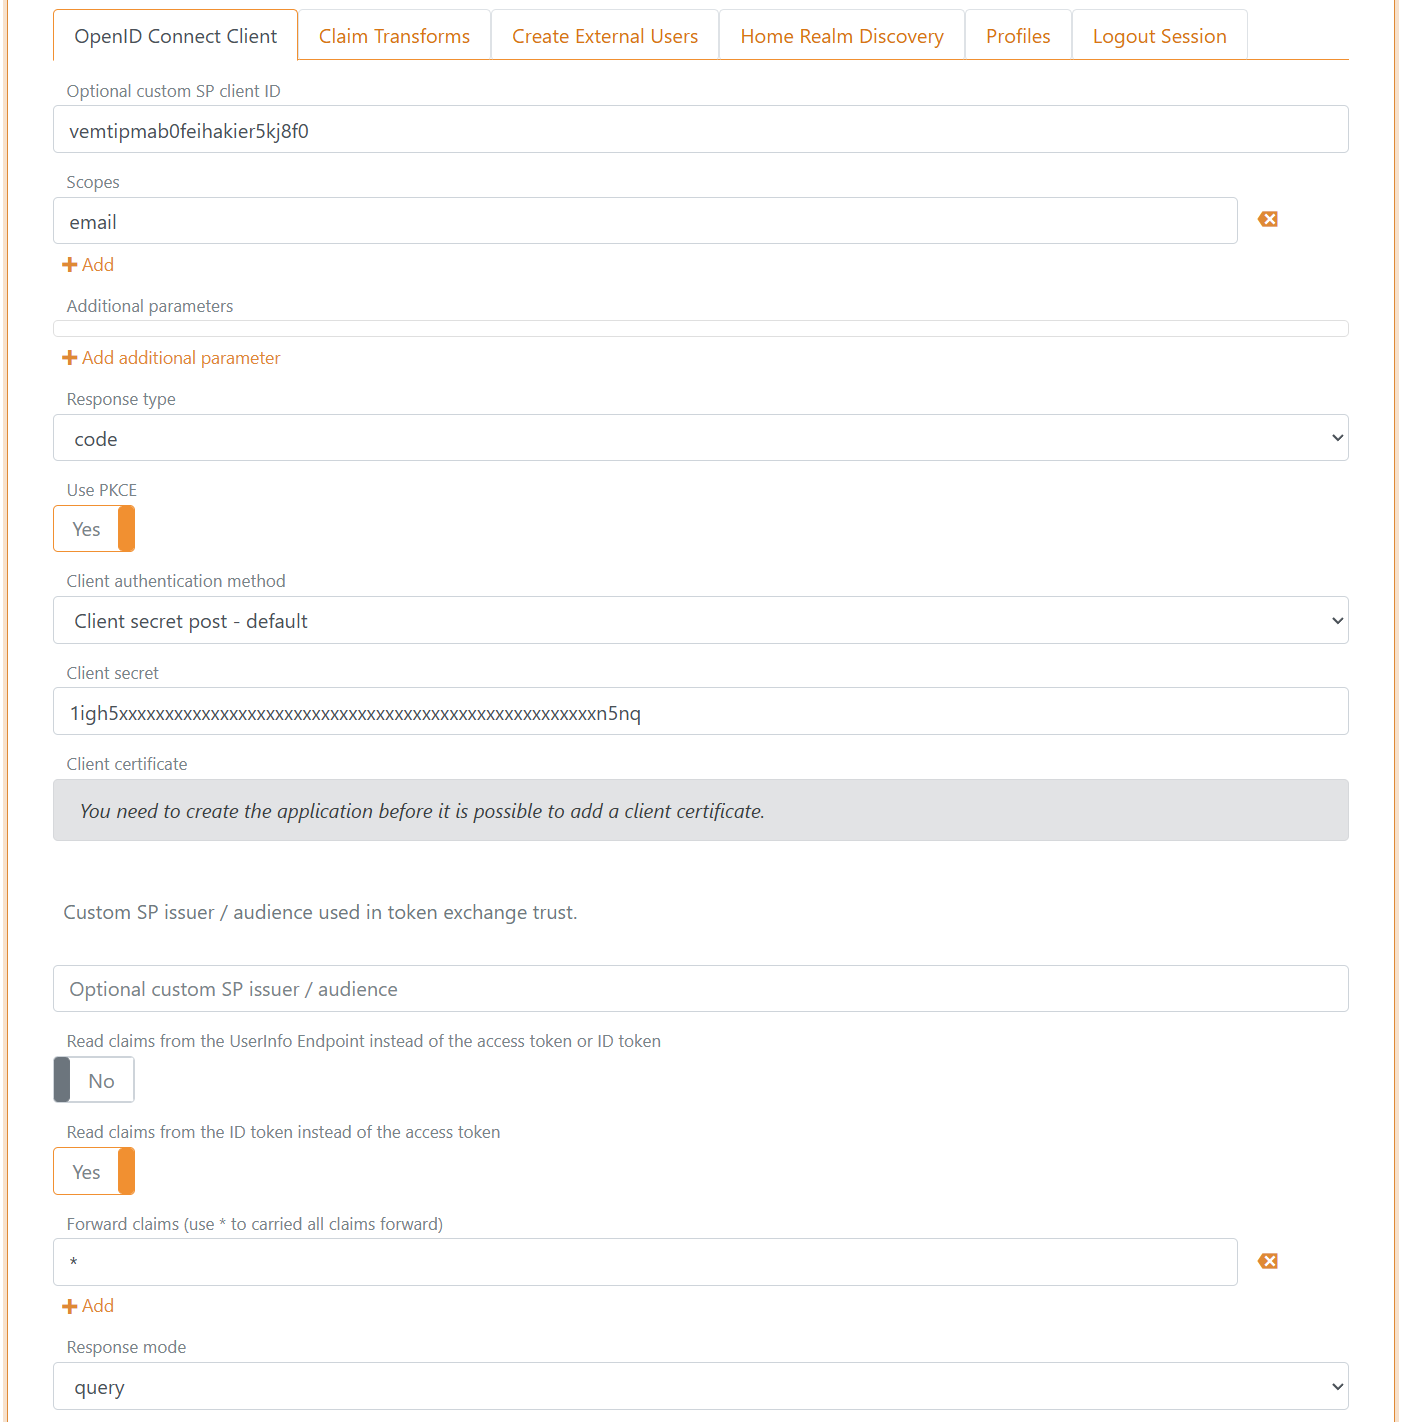
- Click Create
- Click Test authentication to test the Amazon Cognito connection
That's it, you are done.
Your new Amazon Cognito authentication method can be selected as an allowed authentication method in an application registration.