Connect to Tailscale with OpenID Connect
Connect FoxIDs as an external identity provider for Tailscale with OpenID Connect (OIDC) 1.0.
Tailscale guide Set up SSO with a custom OIDC provider. Tailscale requires proof of domain ownership through WebFinger discovery when you use a custom OIDC provider. Configure a WebFinger response that points to the FoxIDs application you create for Tailscale.
Configure FoxIDs
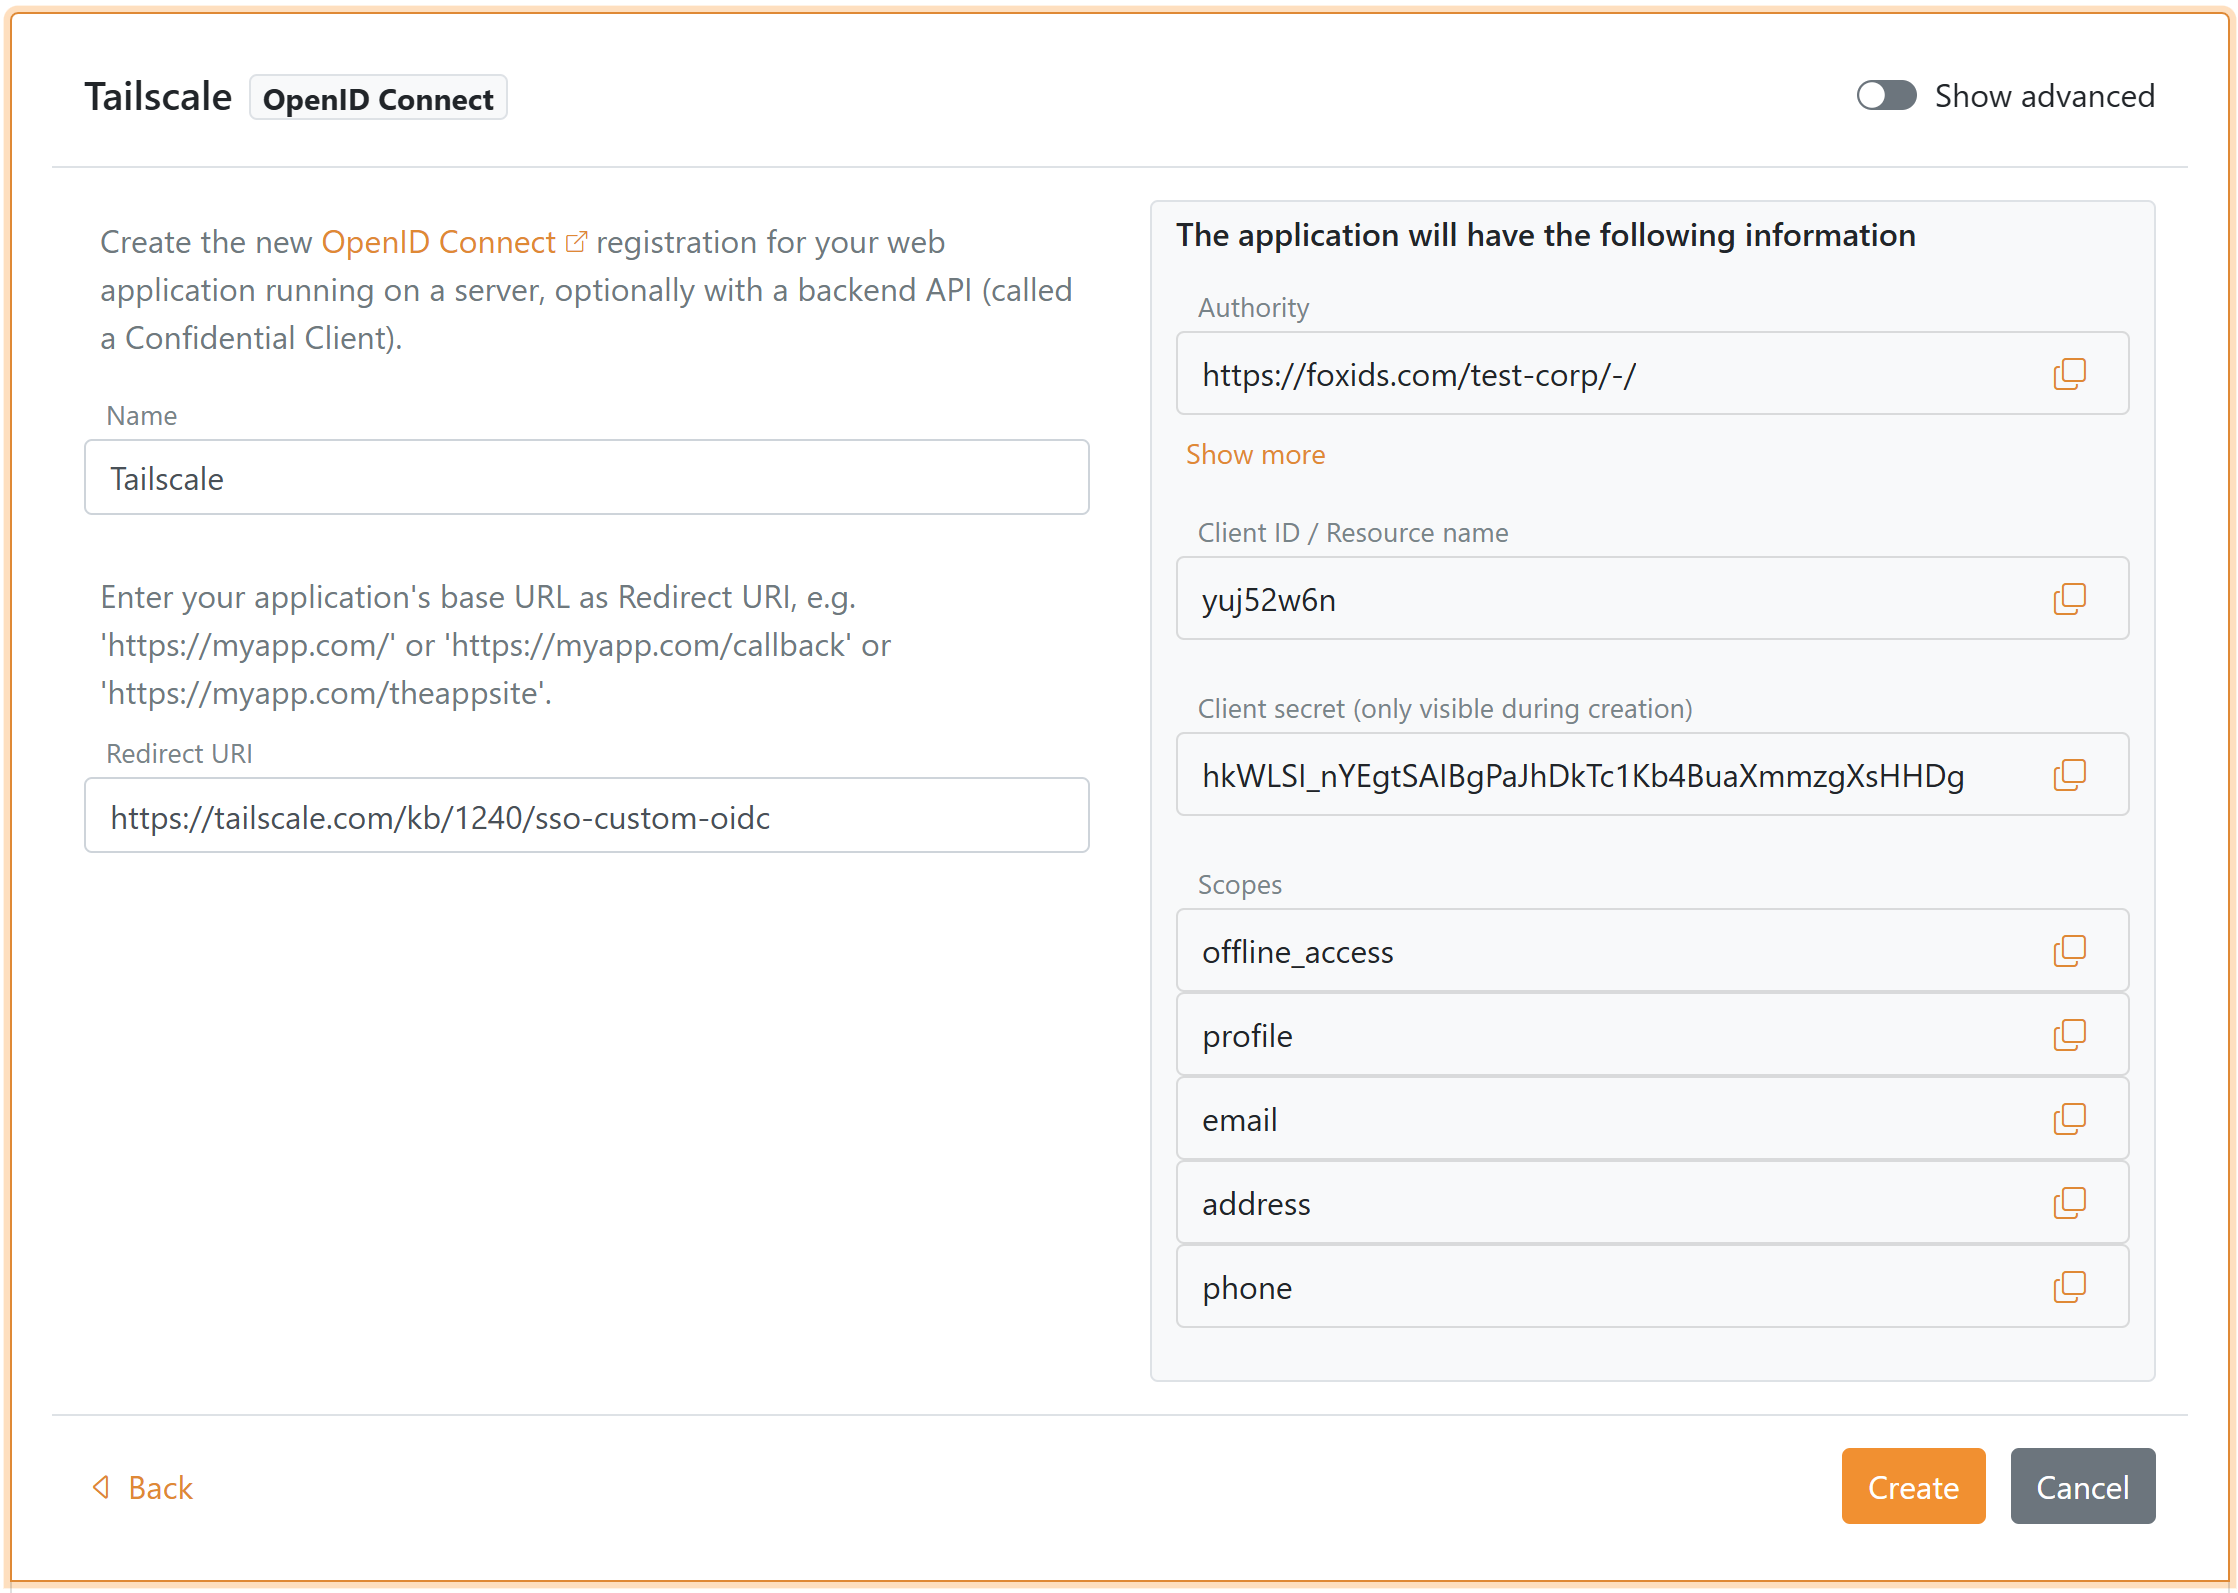
1 - Start creating an OpenID Connect application in FoxIDs Control Client
- Select the Applications tab
- Click New application
- Click Web application (OpenID Connect) to create an OIDC client application
- Enter the Name, e.g.
Tailscale - Set Redirect URI to
https://login.tailscale.com/a/oauth_response - In the panel on the right labeled The application will have the following information
- Copy the Client ID and Client Secret for later use in the Tailscale sign-up
- Copy the Client ID and Client Secret for later use in the Tailscale sign-up
- Click Create
- Click Change application to open the application in edit mode
- Click Show advanced
- Enable Use matching issuer and authority with application specific issuer
- Click Update
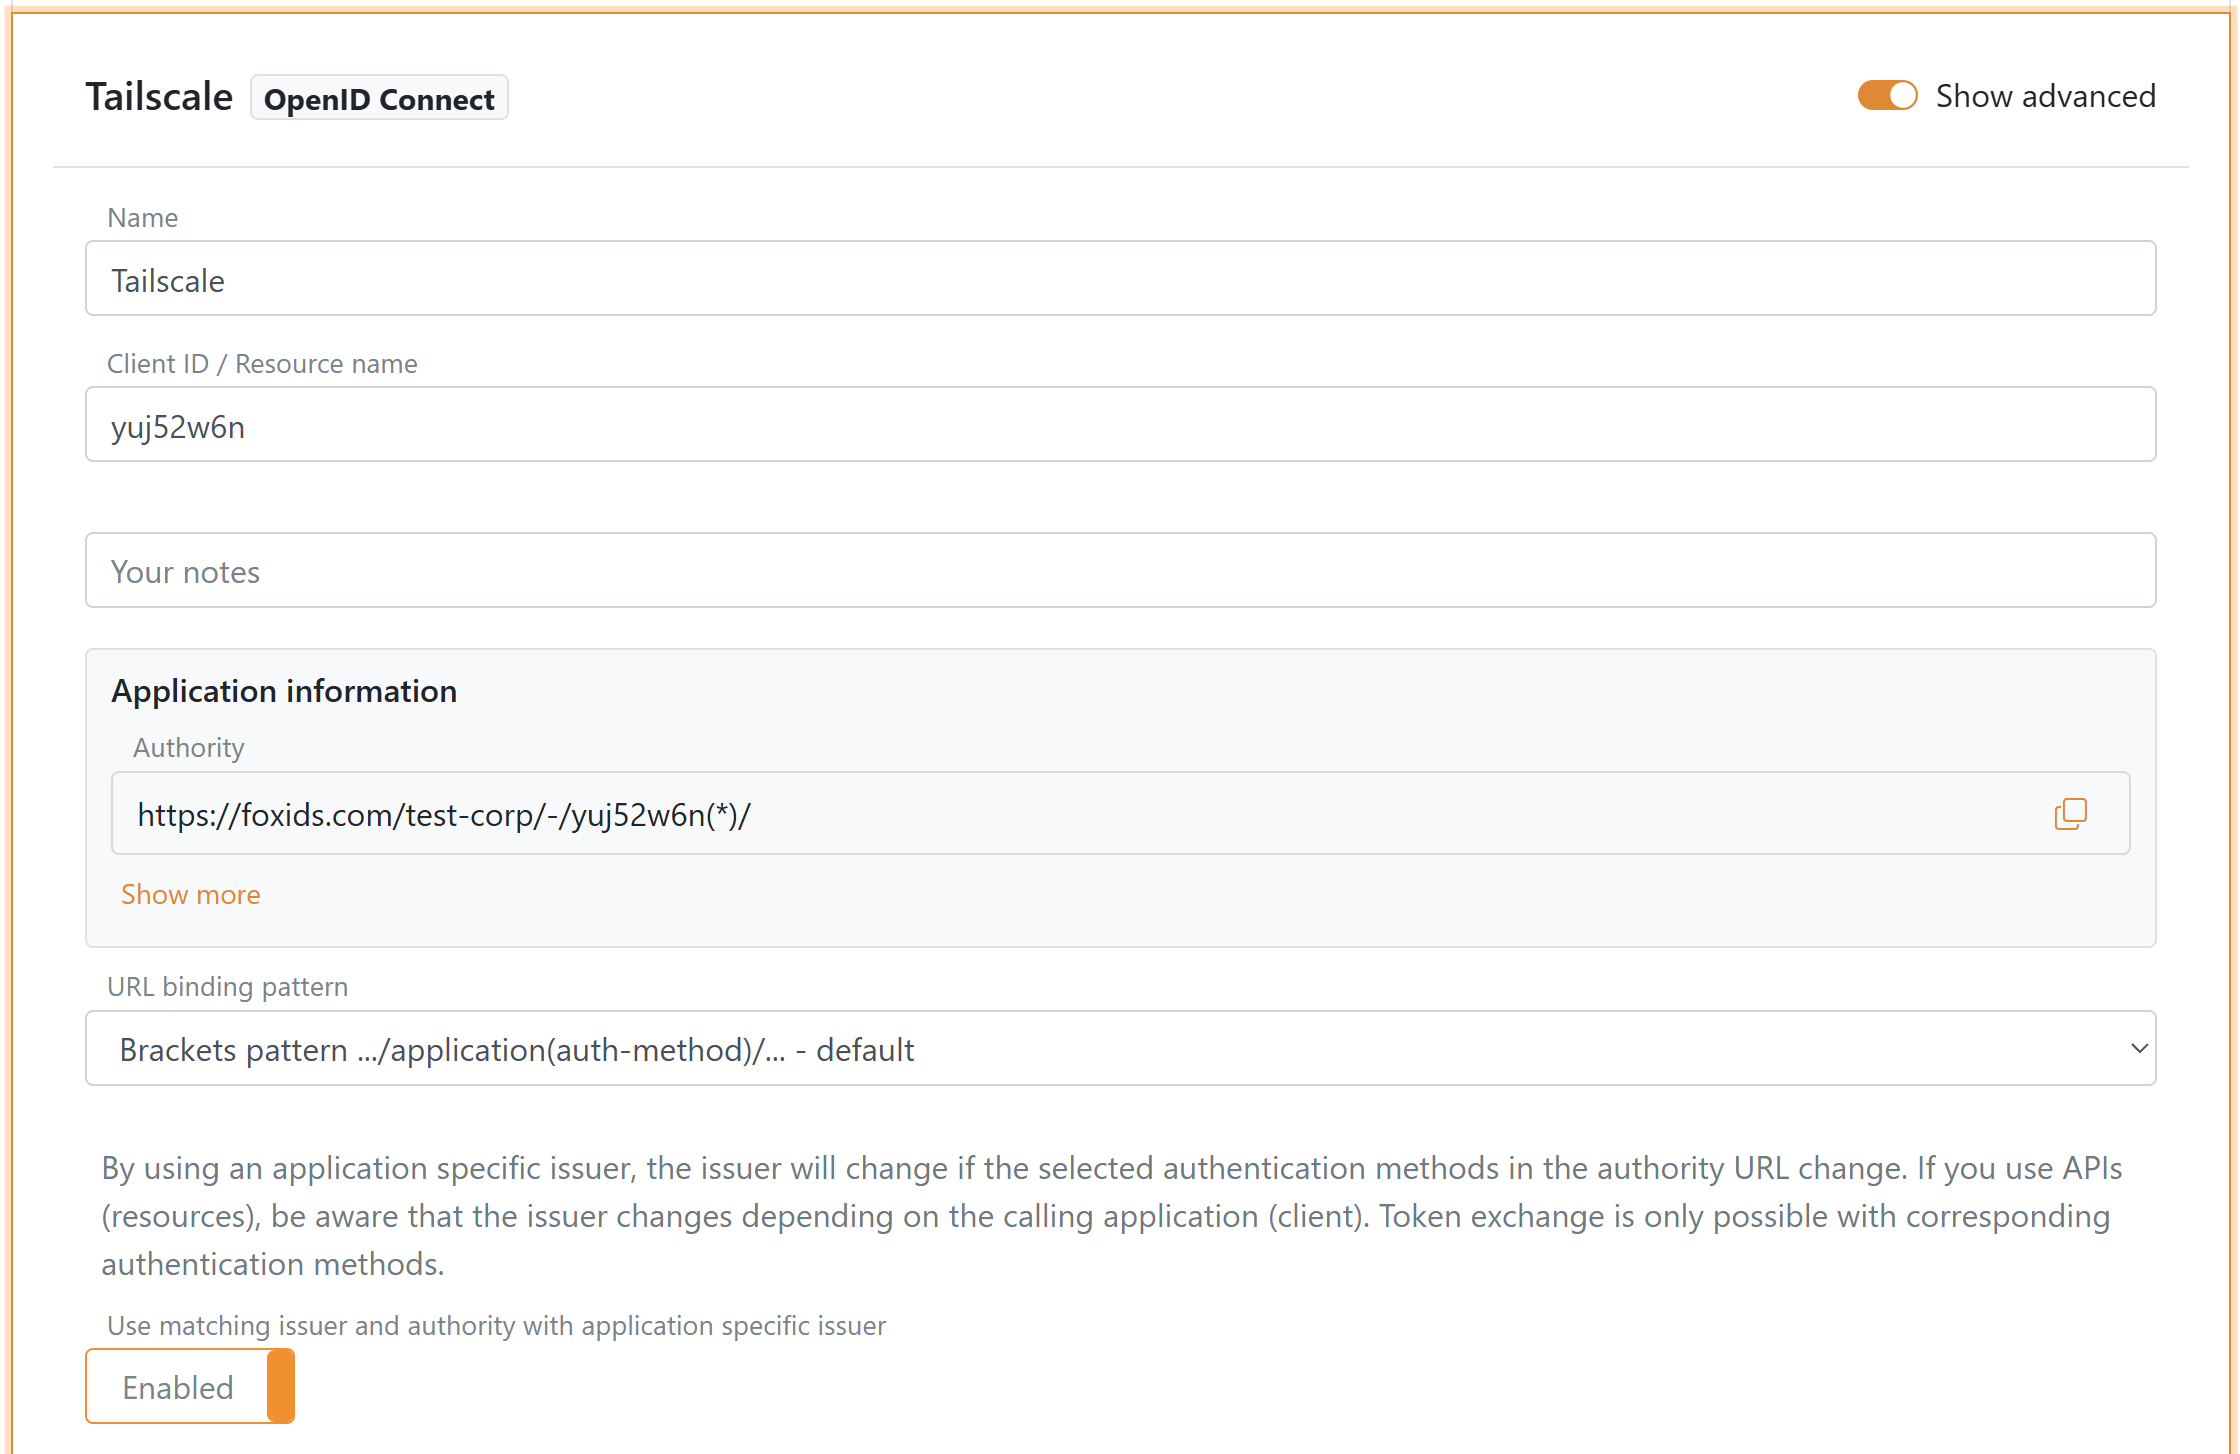
- Go to the top of the application, find the Application information section and click Show more
- Copy the Authority which is the FoxIDs issuer URL for Tailscale
Configure WebFinger for your domain
2 - Then set up a WebFinger endpoint on your domain
To allow Tailscale to discover your FoxIDs issuer, host a WebFinger endpoint at https://<your-domain>/.well-known/webfinger.
The response must point to the FoxIDs issuer URL. Example JSON for the administrator account admin@contoso.com:
{
  "subject": "acct:admin@contoso.com",
  "links": [
    {
      "rel": "http://openid.net/specs/connect/1.0/issuer",
      "href": "https://foxids.com/test-corp/-/yuj52w6n(*)/"
    }
  ]
}
Ensure the domain in the email address matches both:
- The domain where the WebFinger endpoint is hosted, and
- The domain you will use with Tailscale.
The administrator account that configures OIDC for Tailscale becomes the Owner of the tailnet. When additional users from your domain sign in to Tailscale, they can enter their email address and will be redirected to authenticate with FoxIDs.
Configure Tailscale
3 - Start the custom OIDC setup in Tailscale
- Open the Tailscale admin console and go to Sign up with OIDC
- Enter an email address that uses the domain served by your WebFinger endpoint
- Click Get OIDC Issuer - Tailscale will resolve your WebFinger response and display the FoxIDs issuer
- Continue to the credential entry step
4 - Register the FoxIDs client in Tailscale
- Enter the FoxIDs Client ID and Client Secret
- Confirm the configuration to complete registration
- Authenticate through FoxIDs to verify the sign-in flow and create your tailnet
You probably need to create your admin user with the email in the FoxIDs environment to log in (depending on your FoxIDs configuration)