Connect to Microsoft Entra ID with OpenID Connect
FoxIDs can be connected to Microsoft Entra ID with OpenID Connect and thereby authenticating end users in a Microsoft Entra ID tenant.
It is possible to connect both a single tenant and multitenant Microsoft Entra ID App as an authentication method on FoxIDs using OpenID Connect.
A more complex case is to read claims form the access token.
If you configure App roles they are returned in the roles claim.
You can test the Microsoft Entra ID login with the online web app sample (sample docs) by clicking
Log inand thenMicrosoft Entra ID.
Take a look at the Microsoft Entra ID sample configuration in FoxIDs Control: https://control.foxids.com/test-corp
Get read access with the userreader@foxids.comand passwordgEh#V6kSwthen select theProductionenvironment and theAuthenticationtab.
Configure single tenant
This chapter describes how to configure a Microsoft Entra ID single tenant connection with OpenID Connect Authorization Code flow and PKCE, which is the recommended OpenID Connect flow.
1 - Start by creating an OpenID Connect authentication method in FoxIDs Control Client
- Add the name
- Select show advanced
- Select tildes URL binding pattern
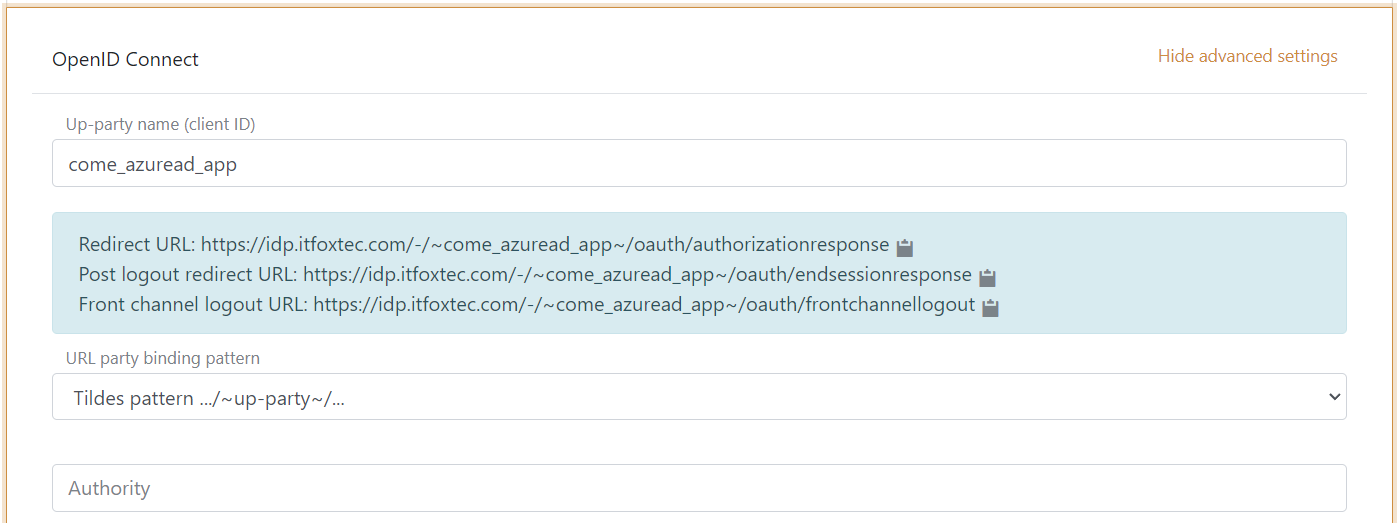
It is now possible to read the Redirect URL and Front channel logout URL.
2 - Then go to Azure Portal and create the Microsoft Entra ID App
- Add the name
- Select single tenant
- (It is a Web application) Add the FoxIDs authentication method
Redirect URL - Click Register
- Copy the Application (client) ID
- Copy the Directory (tenant) ID
- Go to the Authentication tab and add the FoxIDs authentication method
Front channel logout URL, click save - Go to the Certificates & secrets tab and click New client secret and add the secret
- Optionally, use a client certificate instead of a secret
- Copy the client secret value (not the secret ID)
- Go to the Token configuration tab and click Add optional claims. Then select ID (for adding claims to the ID token) and select
email,family_name,given_name,ipaddr,preferred_usernameand click Add twice.
3 - Go back to the FoxIDs authentication method in FoxIDs Control Client
- Add the authority, which is
https://login.microsoftonline.com/{Microsoft Entra ID tenant ID}/v2.0(e.g.,https://login.microsoftonline.com/82B2EBAE-5864-4C9F-8F78-40CB172BC7E1/v2.0) - Add the Microsoft Entra ID, client ID as a custom SP client ID
- Add the
profileandemailscopes (possible other or more scopes) - Add the Microsoft Entra ID, client secret value as the client secret
- Optionally, select show advanced, change the client authentication method to
private key JWTand upload the client certificate
- Optionally, select show advanced, change the client authentication method to
- Select use claims from ID token
- Add the claims which will be transferred from the authentication method to the application registrations. E.g.,
preferred_username,email,name,given_name,family_name,oid,ipaddrand possible theaccess_tokenclaim to transfer the Microsoft Entra ID access token to application registrations. - Select
Noin Front channel logout session required - Click create
That's it, you are done.
It is possible to see the claims returned from the Microsoft Entra ID app in the FoxIDs log by changing the log settings to log claim and optionally to log the entire message and thereafter decode the received JWTs
The new authentication method can now be selected as an allowed authentication method in a application registration.
The application registration can read the claims from the authentication method. It is possible to add the access_token claim to include the Microsoft Entra ID access token as a claim in the issued access token.
Configure multitenant
This chapter describes how to configure a Microsoft Entra ID multitenant connection with OpenID Connect Authorization Code flow and PKCE.
The multitenant configuration differs slightly form the single tenant configuration.
1 - The Microsoft Entra ID Portal
- During the App creation select multitenant
2 - The FoxIDs authentication method in FoxIDs Control Client
- Add the authority
https://login.microsoftonline.com/common/v2.0 - Select edit issuer
- Change the issuer to
https://login.microsoftonline.com/{Microsoft Entra ID tenant ID}/v2.0(e.g.,https://login.microsoftonline.com/82B2EBAE-5864-4C9F-8F78-40CB172BC7E1/v2.0), where you add the Microsoft Entra ID tenant ID.
You can possible add multiple issuers and thereby trust multiple Azure tenants. Or you can use the wildcard*without anything else to accept all issuers, the accepted issuer is added in theauth_method_issuerclaim.
Read claims from access token
If you want to read claims from the access token you need to add one more Microsoft Entra ID App for a resource (API). Where the first Microsoft Entra ID App is for a client.
1 - In Azure Portal
- Create the resource Microsoft Entra ID App
- Expose a scope from the resource app and grant the client app the resource app scope
2 - Then go to FoxIDs Control Client
- Select show advanced
- Select edit issuer
- Add the access token issuer
https://sts.windows.net/{Microsoft Entra ID tenant ID}/(e.g.,https://sts.windows.net/82B2EBAE-5864-4C9F-8F78-40CB172BC7E1/), where you add the Microsoft Entra ID tenant ID - Add the resource app scope as a scope in the FoxIDs authentication method client
- Read claims from the access token by not selecting to use claims from ID token
By during this the access token is issued by the same OP (IdP) and is thereby accepted.
App roles
If you configure App roles on the Microsoft Entra ID App under the App roles tab.
The roles are returned in the roles claim in the ID token for users assigned to the role.
If you are reading claims from access token the roles has to be defined in the Microsoft Entra ID App for a resource (API).
In FoxIDs Control Client
- The roles are returned in a
rolesclaim which can be changed to aroleclaim (without 's') by adding a map claims transformation.
Writerolein new claim, set action to replace claim and writerolesin select claim - Add the
roleclaim to the claims which will be transferred from the authentication method to the application registrations
Remember to also add the
roleclaim in the application registration for it to be issued to the application.