Connect to Google with OpenID Connect
FoxIDs can be connected to Google with OpenID Connect and authenticate users with Google login.
You can test the Google login with the online web app sample (sample docs) by clicking
Log inand then
Take a look at the Google sample configuration in FoxIDs Control: https://control.foxids.com/test-corp
Get read access with the userreader@foxids.comand passwordgEh#V6kSwthen select theProductionenvironment and theAuthenticationtab.
Configure Google
This chapter describes how to configure a connection with OpenID Connect Authorization Code flow + PKCE and read the users claims from the ID token.
1 - Start by creating an OpenID Connect authentication method in FoxIDs Control Client
- Navigate to the Authentication tab
- Click New authentication
- Select OpenID Provider
- Add the Name e.g. Google
- Add the Google authority
https://accounts.google.com/in Authority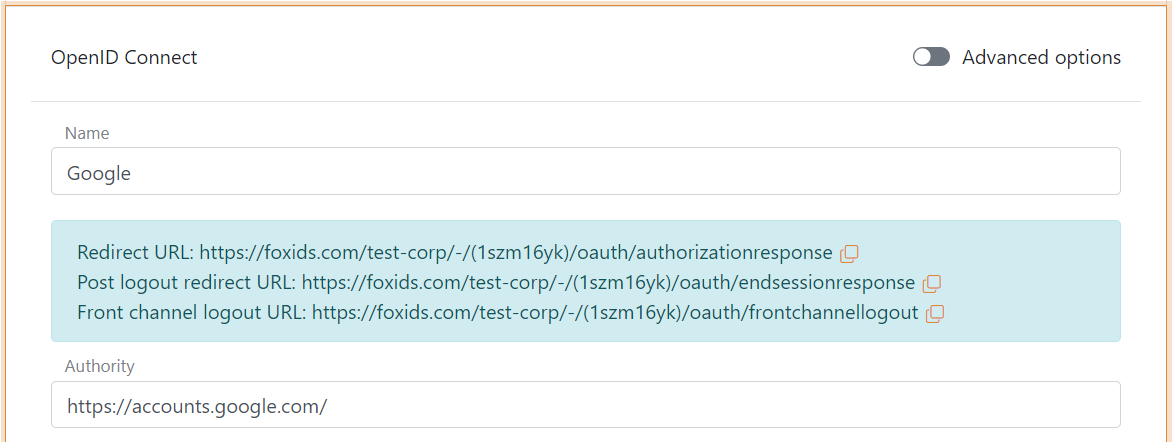
- Read the Redirect URL and save it for later
2 - Then go to the Google API & Services
- A Project must exist first, you may have to create one. Once a project is selected, enter the Dashboard.
- In the left navigation bar, click OAuth consent screen
- In User Type select External
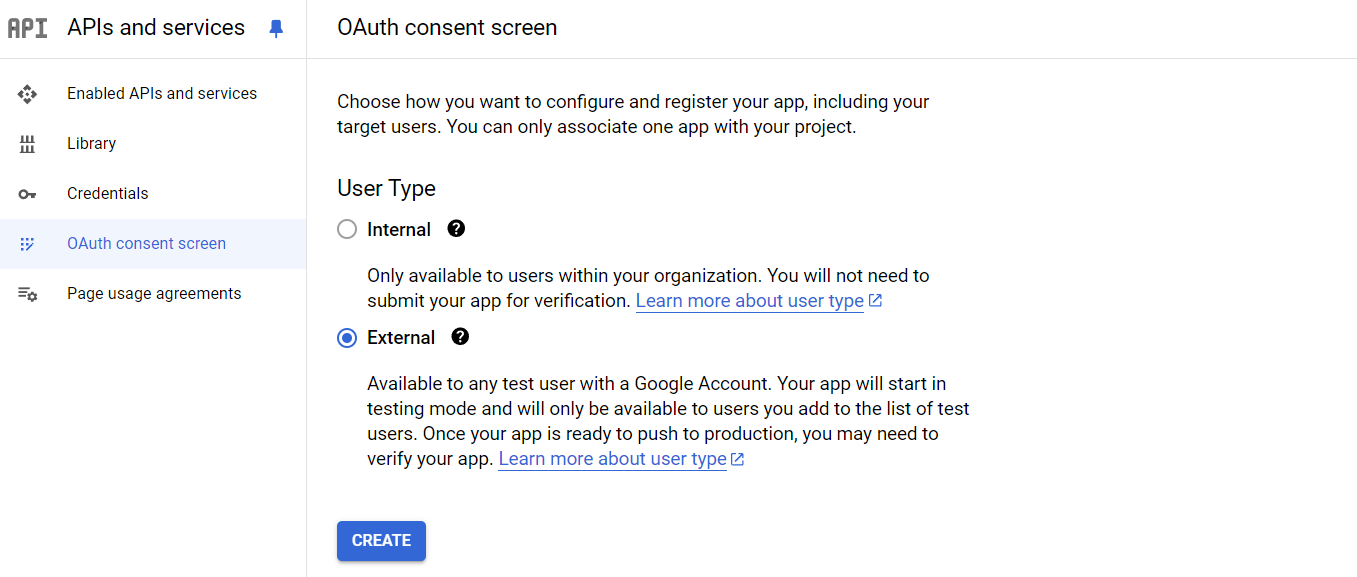
- Click CREATE
- In the App information dialog step, fill in the information (app name, user support email, and developer contact information)
- Click SAVE AND CONTINUE
- In the Scopes step, click ADD OR REMOVE SCOPES
- Select the
email,profileandopenidscopes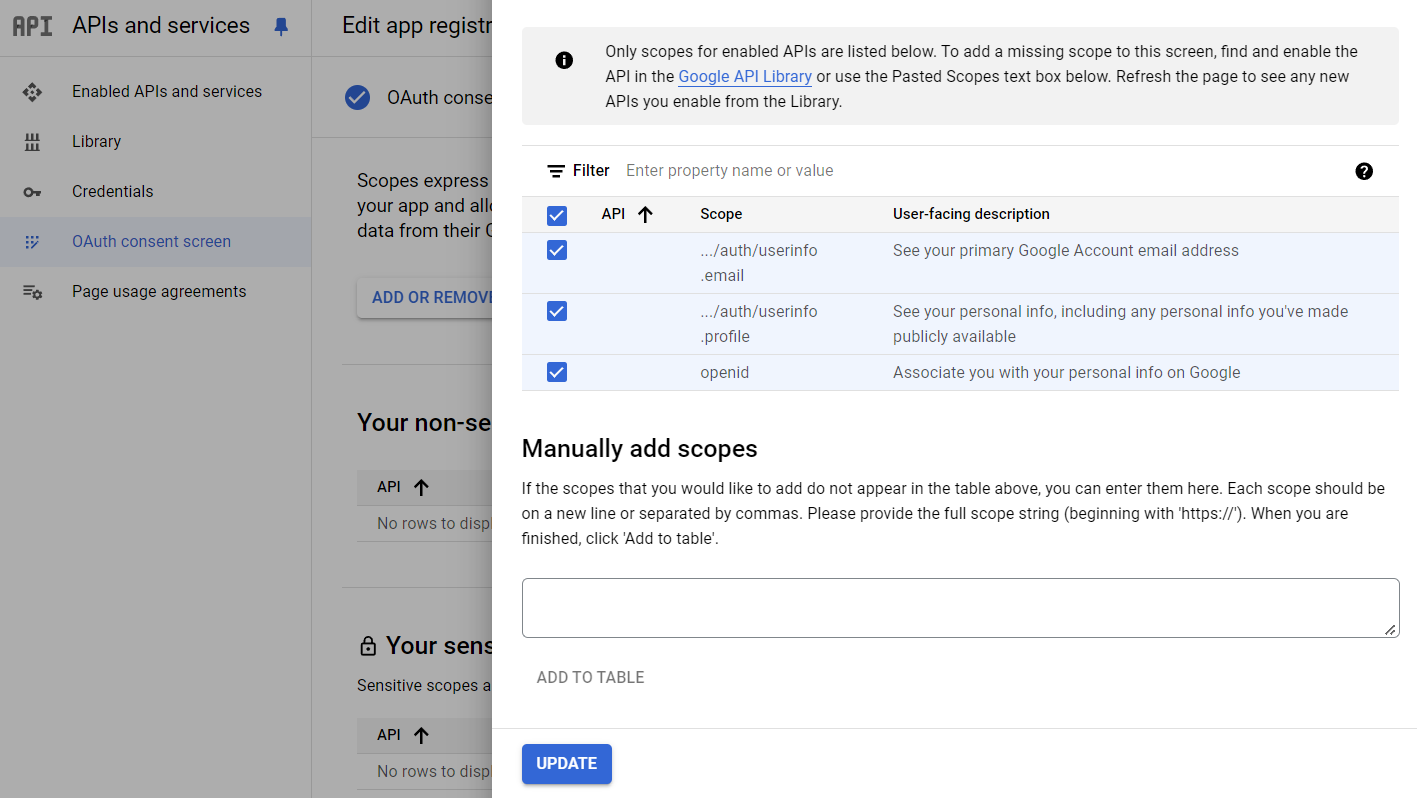
- Click UPDATE
- Click SAVE AND CONTINUE
- Step through the Test users step
- In the OAuth consent screen step, click BACK TO DASHBOARD
- In the left navigation bar, click Credentials
- In the top click CREATE CREDENTIALS and click OAuth client ID
- As Application type select Web application
- Add the Name
- In the Authorized redirect URIs section, click ADD URI and add the FoxIDs Redirect URL from before
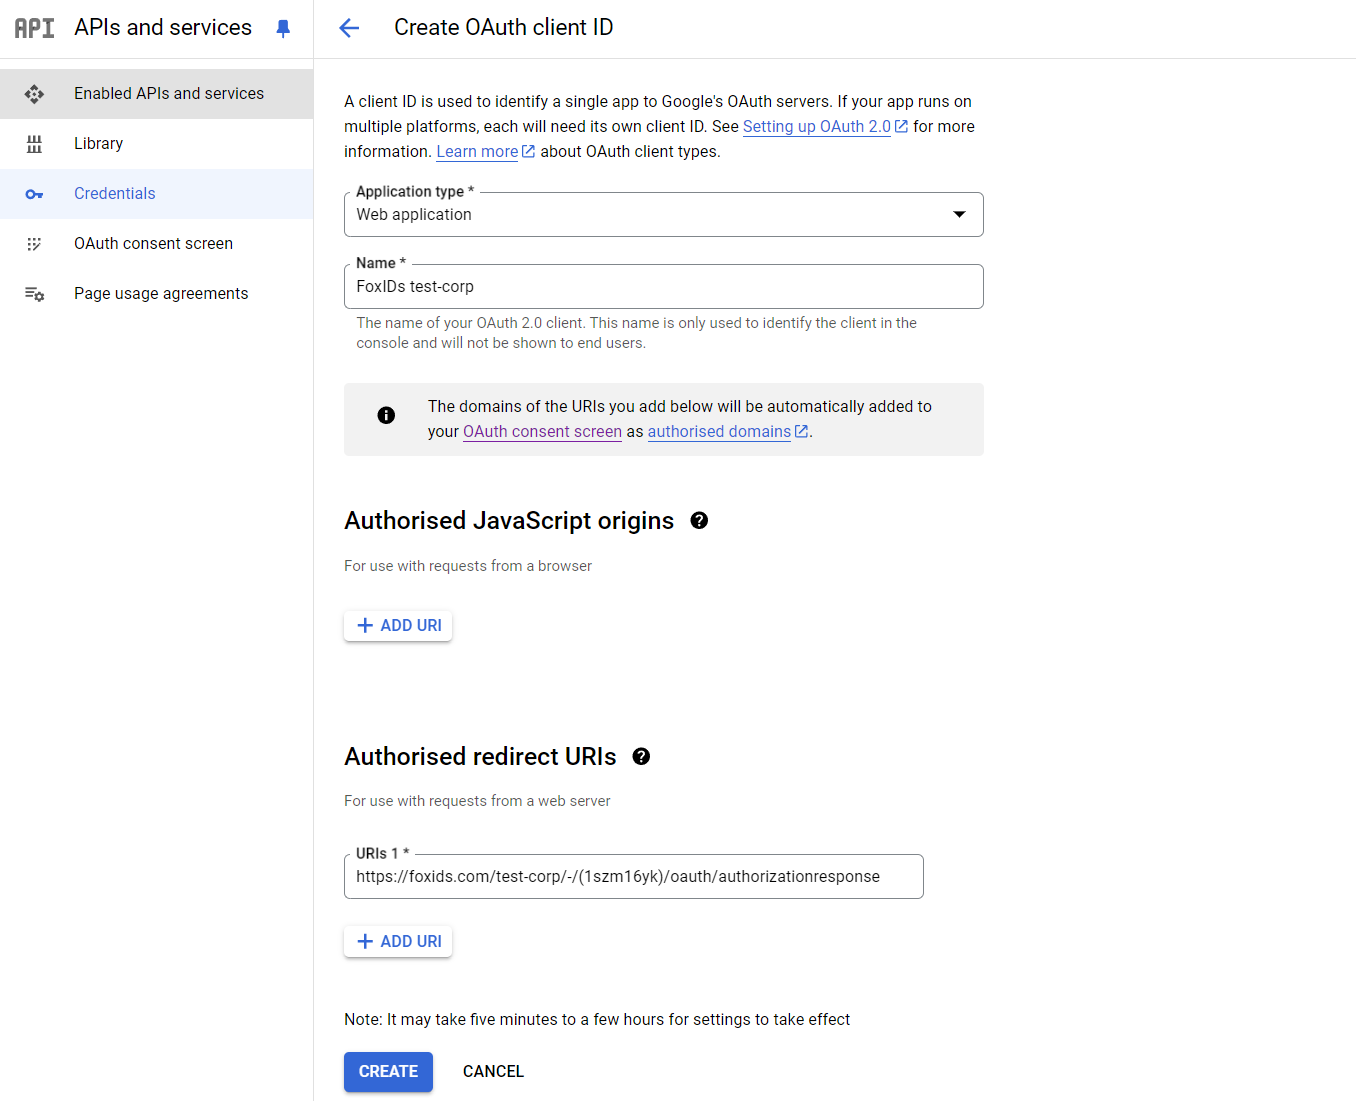
- Click CREATE
- Read the Client ID and Client Secret and save it for later
3 - Go back to the FoxIDs authentication method in FoxIDs Control Client
- Click the Show advanced in the top right corner of this configuration section
- Disable the Single logout switch
- Add the Optional custom SP client ID from Google called Client ID
- Add the two scopes
emailandprofile - Add the Client secret from Google
- Set the Read claims from the ID token instead of the access token switch to Yes
- Disable the Front channel logout switch
- Disable the Front channel logout session required switch
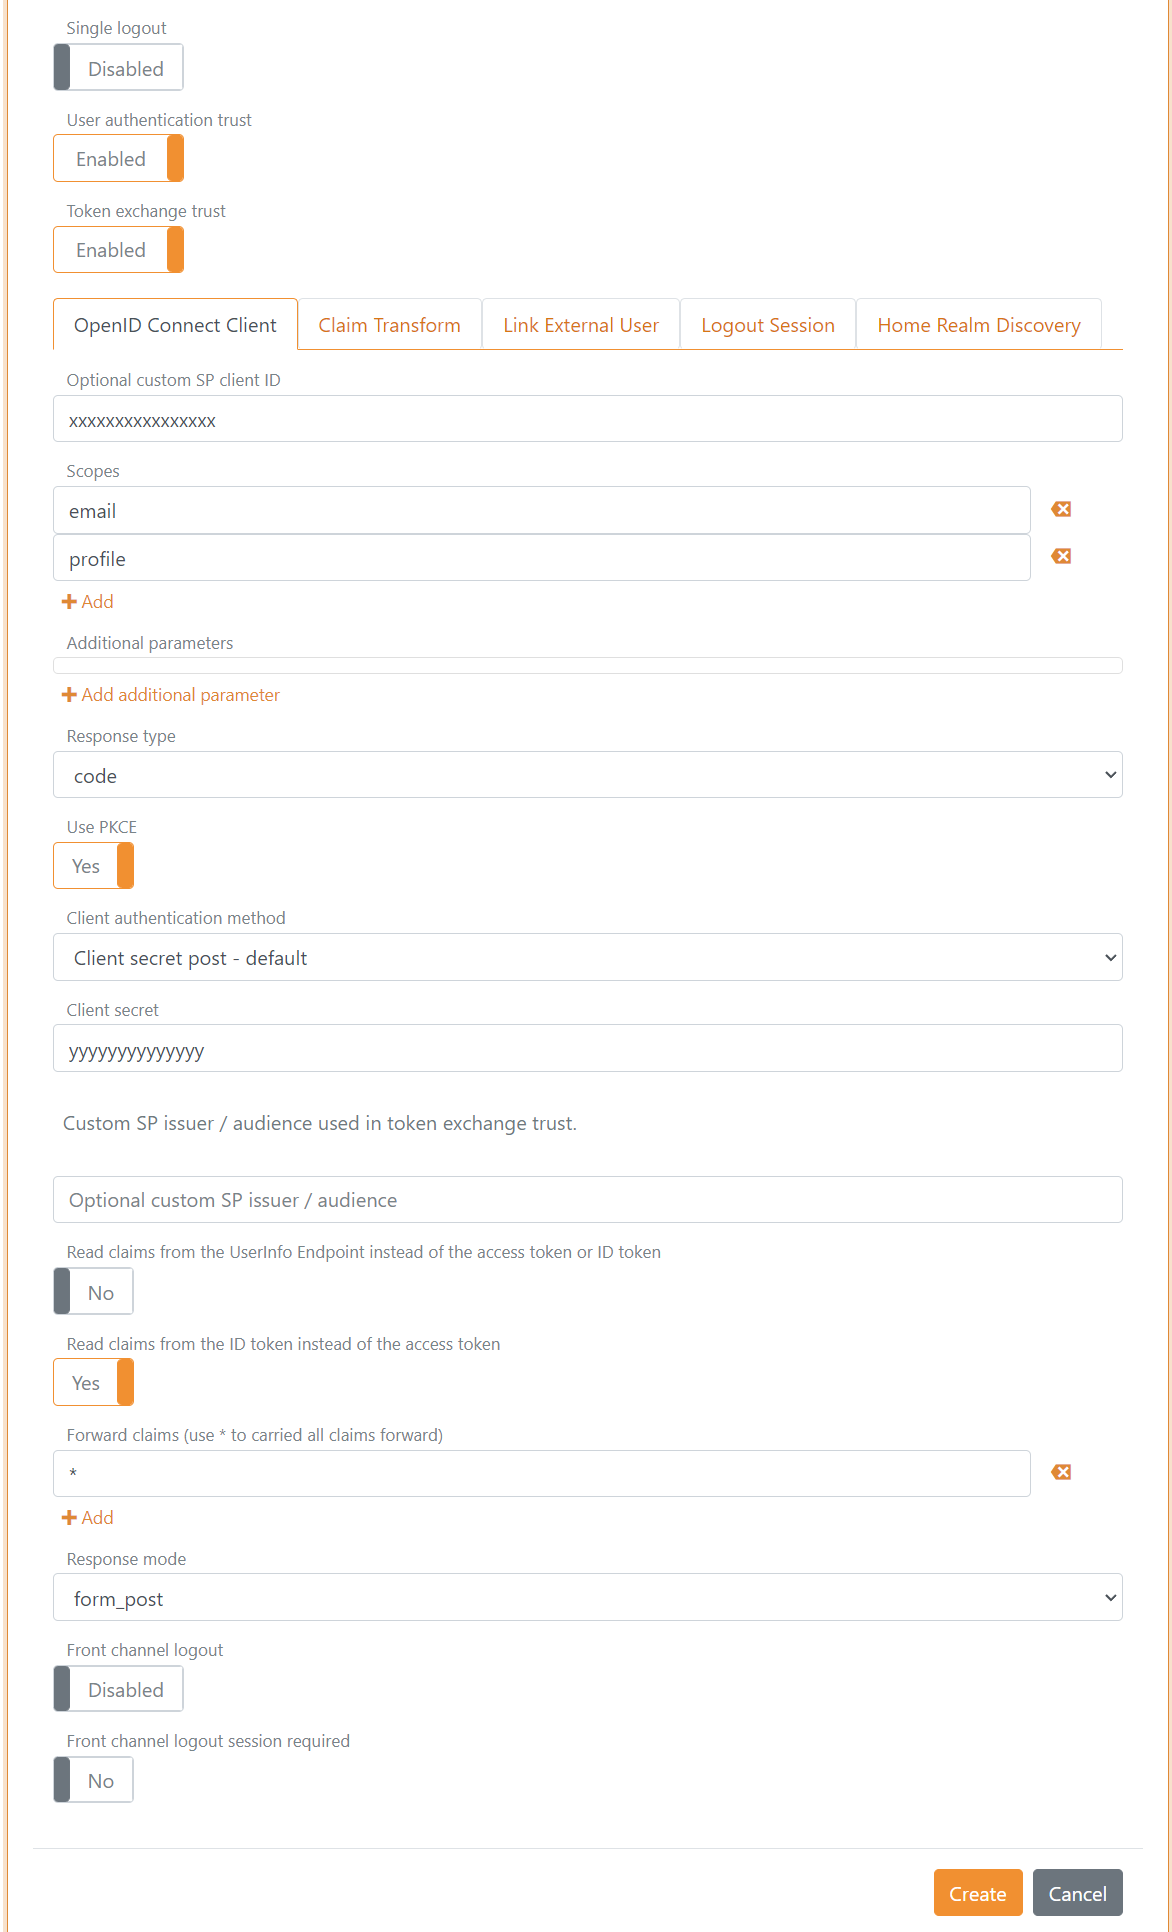
- Click Create
- Click Test authentication to test the Google connection
That's it, you are done.
Your new Google authentication method can be selected as an allowed authentication method in an application registration.