Extended UI
You can extend the login user interface (UI) flow with custom login pages built with dynamic elements. The extended UIs fully support culture and multiple languages.
It is possible to create multiple custom UIs with different dynamic elements.
Each extended UI page can optionally call an API. If an API is called, the returned claims are added to the claims collection; otherwise, the input values are added as the output claim type defined on the dynamic elements.
The dynamic elements consist of fixed fields, a customisable field, and both text and HTML content elements. With this you can easily ask for the user's name, use one or more self-defined fields and show a logo and a link on an extended UI page.
Extended UIs can be added to the following authentication methods in the Extended UI tab; login, external login, OpenID Connect, SAML 2.0 and environment link.
Select extended UI page
You select an extended UI page in the login flow by adding the claim type open_extended_ui with the extended UI page name in the first-level claim transforms.
In a SAML 2.0 authentication method select the extended UI page with the corresponding SAML 2.0 claim http://schemas.foxids.com/ws/identity/claims/openextendedui in the first-level claim transforms.
Subsequently extended UI pages can be selected in the extended UI claim transforms by adding the claim type open_extended_ui (JWT claim only) with the next extended UI page name.
Example
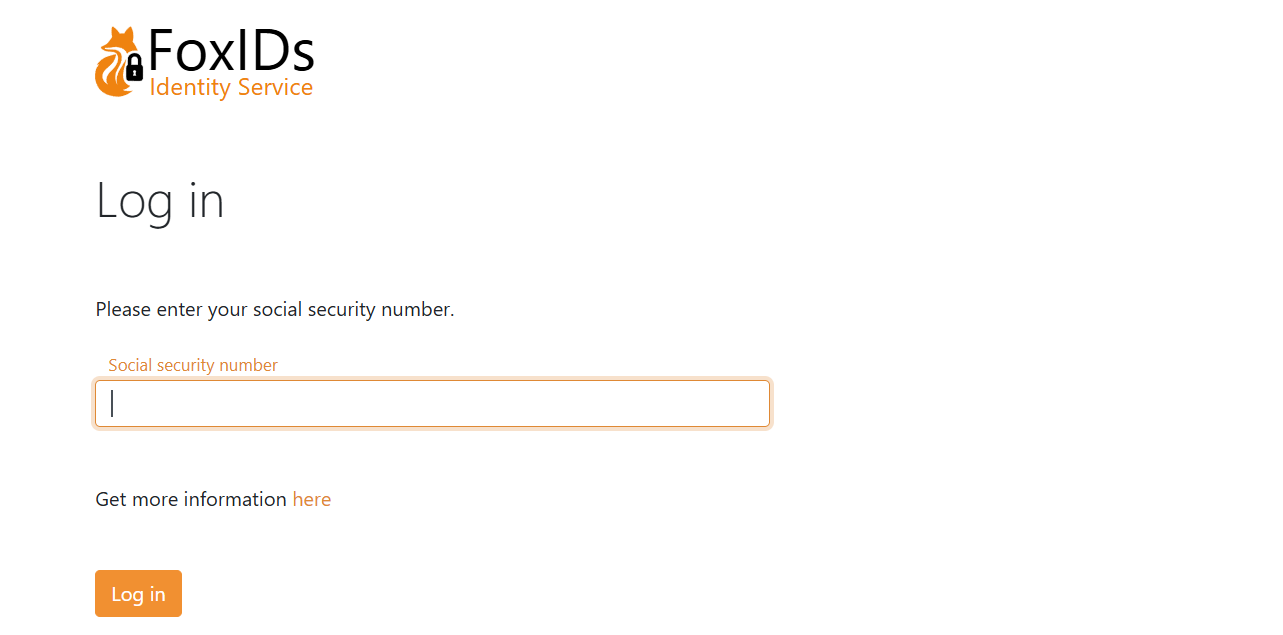
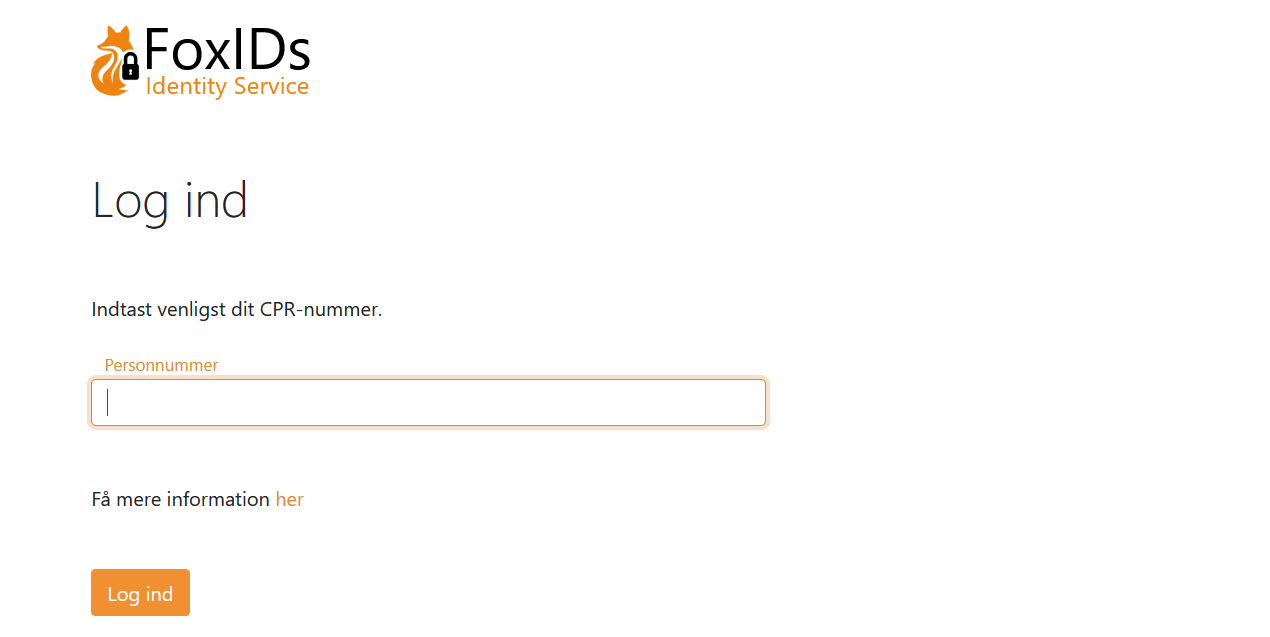
This example page asks the user to enter their social security number (shown in two languages).
The example extended UI adds the input value to the claims collection as the claim type social_security_number. In a real-world scenario, you would probably call an API to validate the social security number.
In English:
In Danish:
The example page is configured in an authentication method in the Extended UI tab with three elements.

The extended UI can be customised with CSS in the login authentication method called Default login, unless you create another login method and use that instead. There's quite a lot of flexibility in how the dialogs can be designed.
Translations
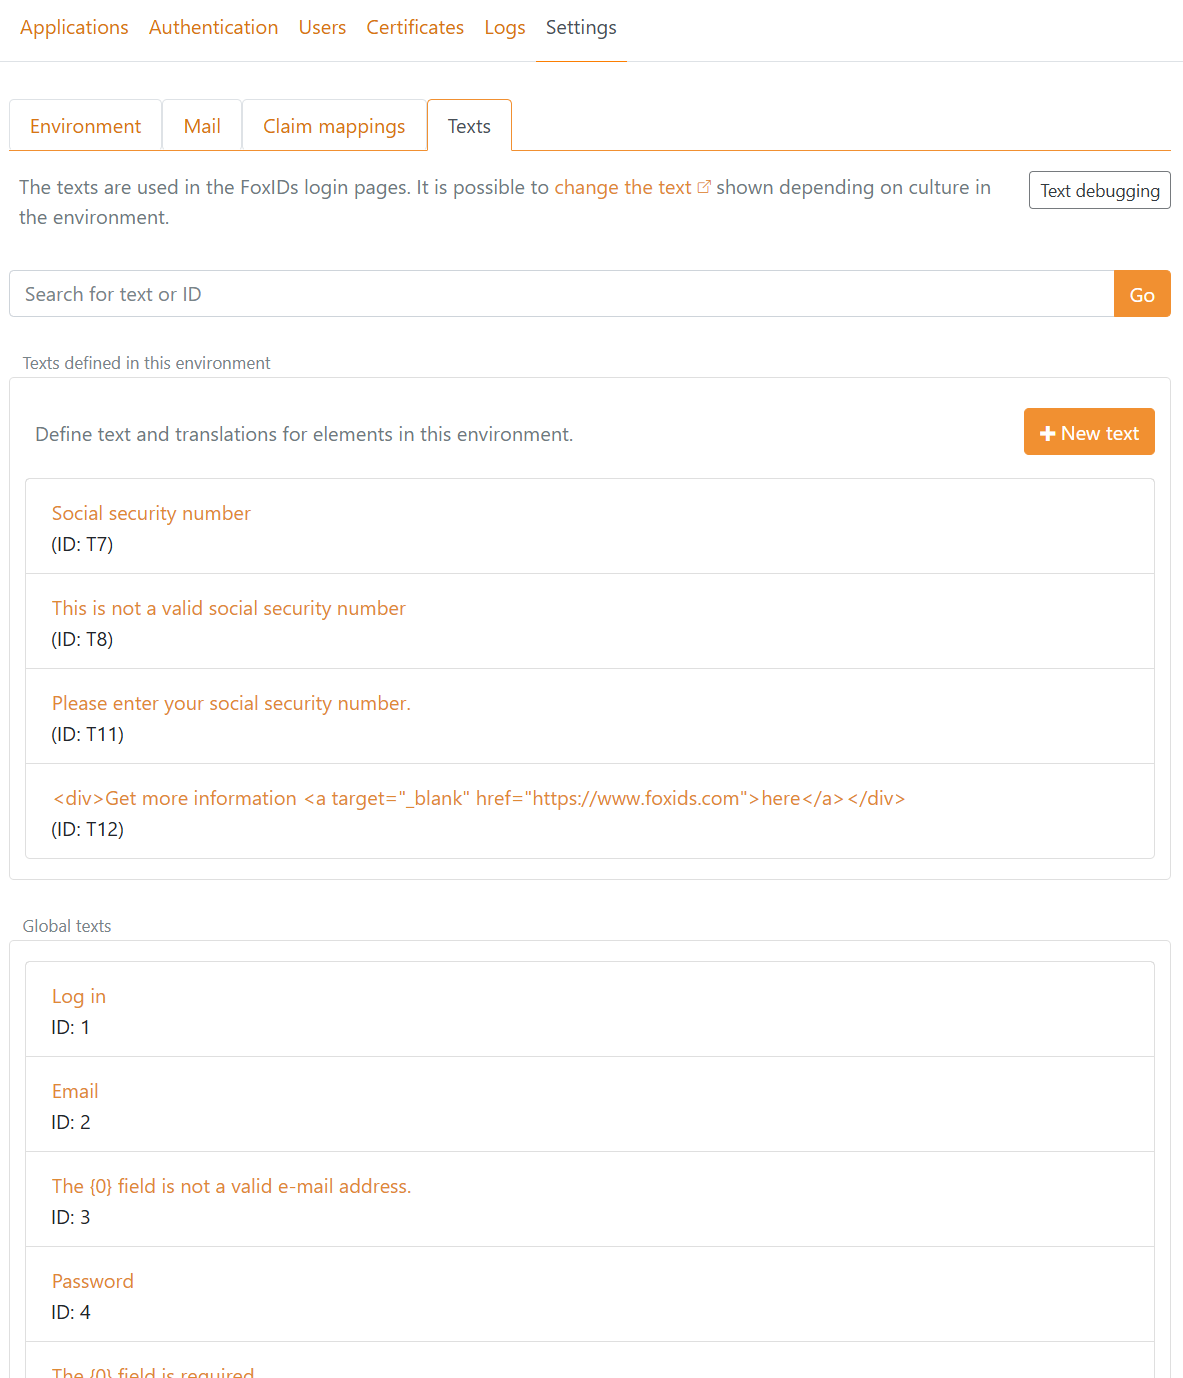
The texts (and error messages) used in dynamic elements are automatically translated if they are defined as global texts with translations. Otherwise, a text element is automatically created in the environments where you can add translations. If you want to support multiple languages, you should create the texts in English and add translations.
You find the texts and translations in the Settings tab and then the Texts tab.
Implement API
Each extended UI page can call an API with the result from the dynamic elements and selected claims. The API can then validate the user input and either on success return claims or an error message to the user.
You need to implement a simple API that FoxIDs calls when the user submits the page.
Please have a look at the sample code.
The API has a base URL, and the functionality is divided into folders. Currently, only the validate folder (functionality) for validating the dynamic elements and selected claims is supported.
Other folders may be added later.
If the base URL for the API is https://somewhere.org/mystore the URL for the validate folder will be https://somewhere.org/mystore/validate.
FoxIDs Cloud calls your API from the IP address
57.128.60.142.
The outgoing IP address can be changed and more can be added over time.
Request
The API call is secured with HTTP Basic authentication, where FoxIDs sends the ID external_extended_ui as the username and the configured secret as the password.
The API is called with HTTP POST and a JSON body.
This is a request JSON body with two dynamic elements and two claims:
{
 "elements": [
        {
            "Name": "ne5uqp5z",
            "Type": "Email",
            "ClaimType": "email",
            "Value": "some@test.org"
        },
        {
            "Name": "ktvywqwc",
            "Type": "Custom",
            "ClaimType": "my_claim",
            "Value": "123456"
        }
    ],
 "claims": [
        {
            "type": "sub",
            "value": "1b1ac05e-5937-4939-a49c-0e84a89662df"
        },
        {
            "type": "email",
            "value": "some_other@test.org"
        }
    ]
}
Response
Success
On success the API should return HTTP code 200 and a list of claims (the list can be empty).
For example, the valid input values as claims:
{
    "claims": [
        {
            "type": "email",
            "value": "some@test.org"
        },
        {
            "type": "my_claim",
            "value": "123456"
        }
    ]
}
Error
The API must return HTTP code 401 (Unauthorized) and an error (required) if the Basic authentication is rejected. Optionally add an error description in ErrorMessage.
{
    "error": "invalid_api_id_secret",
    "ErrorMessage": "Invalid API ID or secret"
}
The API can return HTTP code 400 (401 and 403 are also supported), and an error (required) if the input is rejected. Optionally add an error message to the user in UiErrorMessage and an error description in ErrorMessage.
The UiErrorMessage is translated as a text and should be in English if you want to support multiple languages.
A general validation error:
{
    "error": "invalid",
    "ErrorMessage": "Something is not accepted.",
    "UiErrorMessage": "Please change the thing that is wrong."
}
A validation error connected to a dynamic element by the element name:
{
    "error": "invalid",
    "elements": [
           {
               "Name": "ktvywqwc",
               "ErrorMessage": "The element is not valid because of something.",
               "UiErrorMessage": "Please change the value to the correct value."
           }
       ]
}
If other errors occur, the API should return HTTP code 500 or another appropriate error code.
It is recommended to add a technical error message in ErrorMessage. The error message can then later be found in the FoxIDs logs.
Error messages returned from the API in
ErrorMessageare NOT displayed to the user; they are only logged.
API Sample
The sample ExternalExtendedUiApiSample shows how to implement the API in ASP.NET Core.
You can use this Postman collection to call and test your API with Postman.
Configure
Configure an extended UI page in an authentication method to call your API in FoxIDs Control Client.
Navigate the Authentication tab and select the authentication method, then select the Extended UI tab. Find the extended UI page and configure the API.
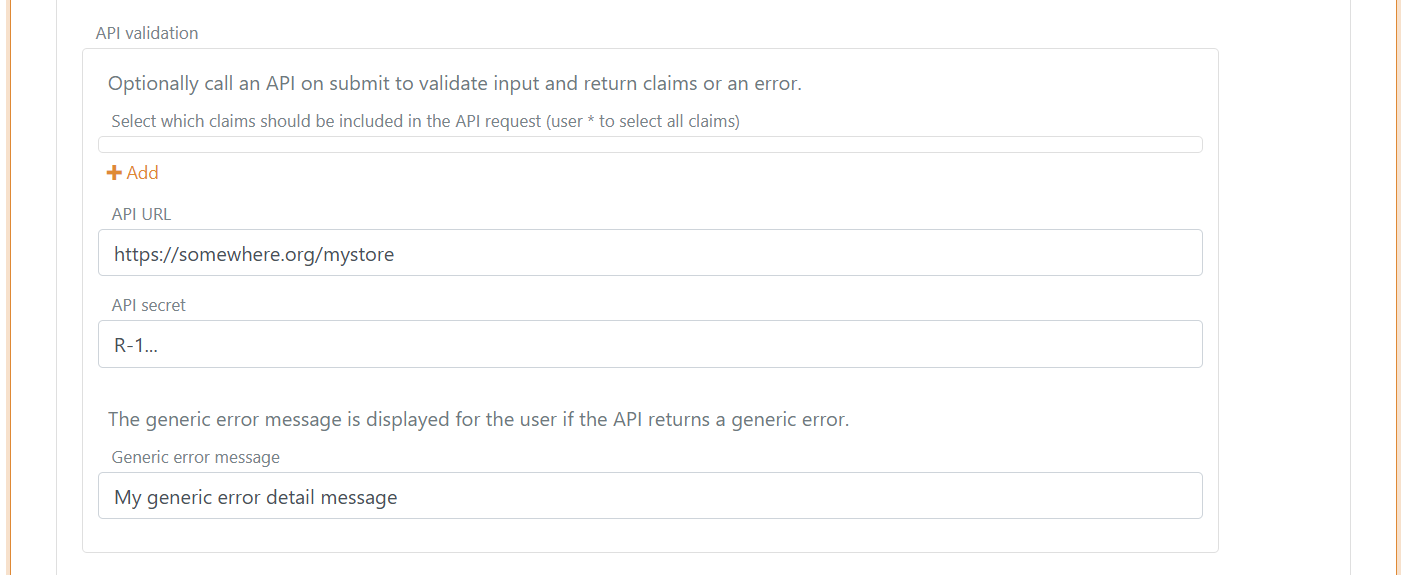
- Optionally select claims that should be sent to the API.
- Add the base API URL without the
validatefolder in API URL - Add the API secret
- Add a generic error message which is displayed for the user if the API returns an error without a
UiErrorMessage